Art With Jenny K.

Holiday

Pour Painting Pumpkins

Pour paint pumpkins

Description

Students love to pour paint. Adults love to pour paint. In fact, I have yet to meet anyone who doesn’t like to pour paint. If you are new to pour painting, keep reading this post (I’ll explain everything). Over the years, I’ve led groups of children (and adults) to pour paint on canvas and holiday ornaments (primarily). In this post, we are going to change that up a bit and pour paint on pumpkins.  I’ll explain everything you need to know about our pour-painting pumpkins.

Any links that go to Amazon are affiliate links (full disclosure, HERE).

This project has extra credit! Check it out!

This project is part of a collection!

Supplies

To do this project with your students, you’ll want to be prepared before the kids arrive. Students get really excited when they see they are pour painting, so the more prep I can do ahead of time, the more I mitigate problems.

To prepare, I like to “set the table” for projects like this. By that, I mean I have everything out and ready to go. I start with a shoebox top, then put a small pumpkin in the box (raised slightly on a plastic cup), and then set the paints and cups out on the table. When students arrive to their spots, they have everything they need!

Preparation

Make it a center!

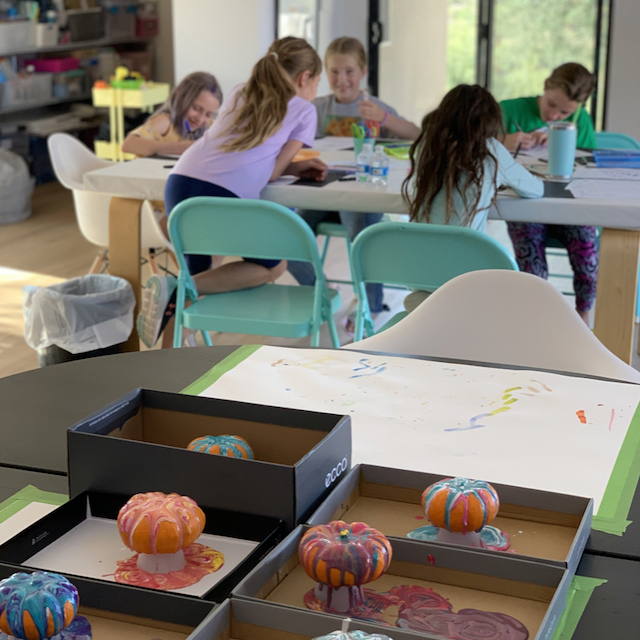
Messy projects like this can be very intimidating to do in a classroom setting (even at home sometimes). The best way I have found to manage “messy” fun is to use centers/stations.  Doing this allows you to have students cycle through the center in small groups. This makes it easier to distribute the supplies and also to help monitor the kids. You can work with the students at the center and have the rest of the kids do more independent activities (see my extra credit project at the end of this post).

Pour paint pumpkins - prep

New to Pour Painting?

If you are new to “pour painting,” you might want to read my more comprehensive blog post here about pour painting holiday ornaments. In this post, I explain that you can make your own paints or you can purchase them already formulated for easy pouring (both great options).  When it comes to pour painting, that’s really one of the only decisions you have to make – do you make your own paints or buy them already made? Then you’ll want to think about what you are going to pour the paint on. In this post, my students poured paint on pumpkins.

Instructions

Recently, I had someone give me a bunch of baby pumpkins. I thought my students would enjoy doing pour painting on the pumpkins because they love to pour painting, but also because the little ridges in the pumpkins create the perfect place for the paint to pool and then drip over the sides. The kids absolutely loved this project and I loved it because it was so easy!

  1. Start by layering the colors of paint in a small cup.

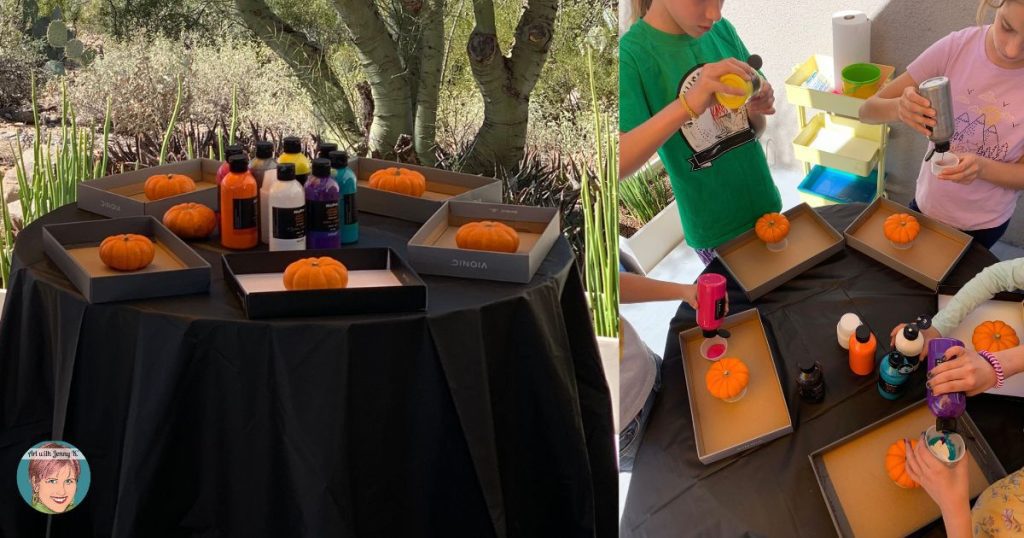
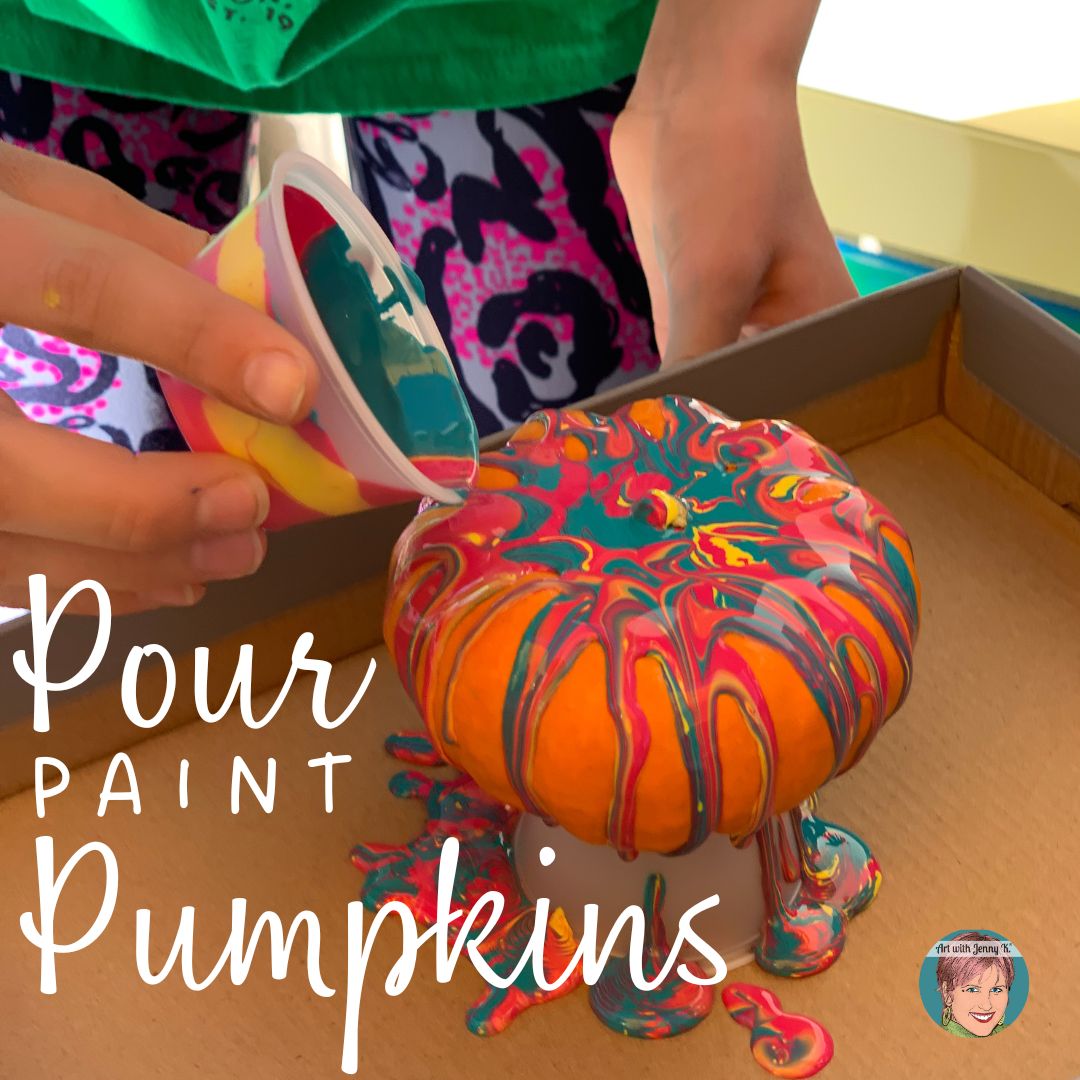
    To begin this fun (and easy) pour-paint pumpkins project, you’ll want to layer your pour paint into a small disposable plastic cup. The amount of paint you need will depend on your pumpkins. We were using small pumpkins, so filling a small plastic cup was plenty of paint.

    To start, select three colors that go well together. To do this, kids can apply their knowledge of color schemes, pick their favorite colors, or use whatever they are provided with (or that you have on hand). I like to provide white when I can because it will mix with the colors and lighten them – providing more variety in colors.

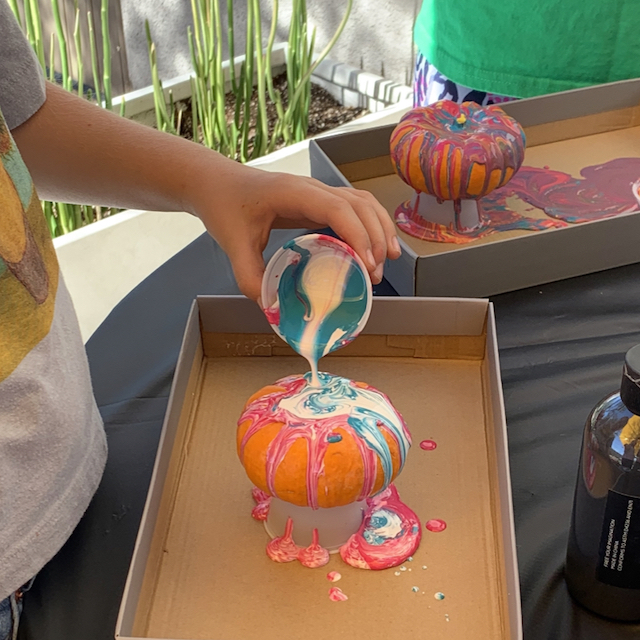
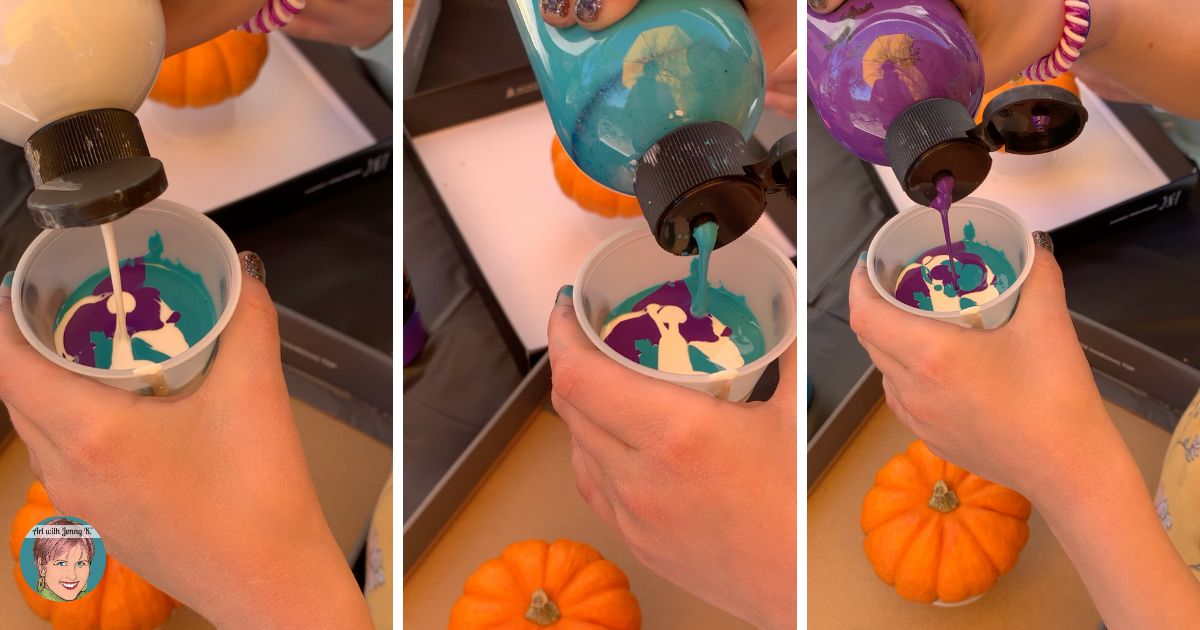
    Have students layer their colors, one after the other, until their cup is about 3/4 full. The first color you put into your cup will be the last color that comes out. Don’t overthink this; just layer, layer, layer. However, don’t mix or stir the paints in the cup. You want all the mixing to happen on the pour, so be sure you don’t mix the paints at this step – just keep layering.

  2. Then, pour the paint onto a pumpkin!

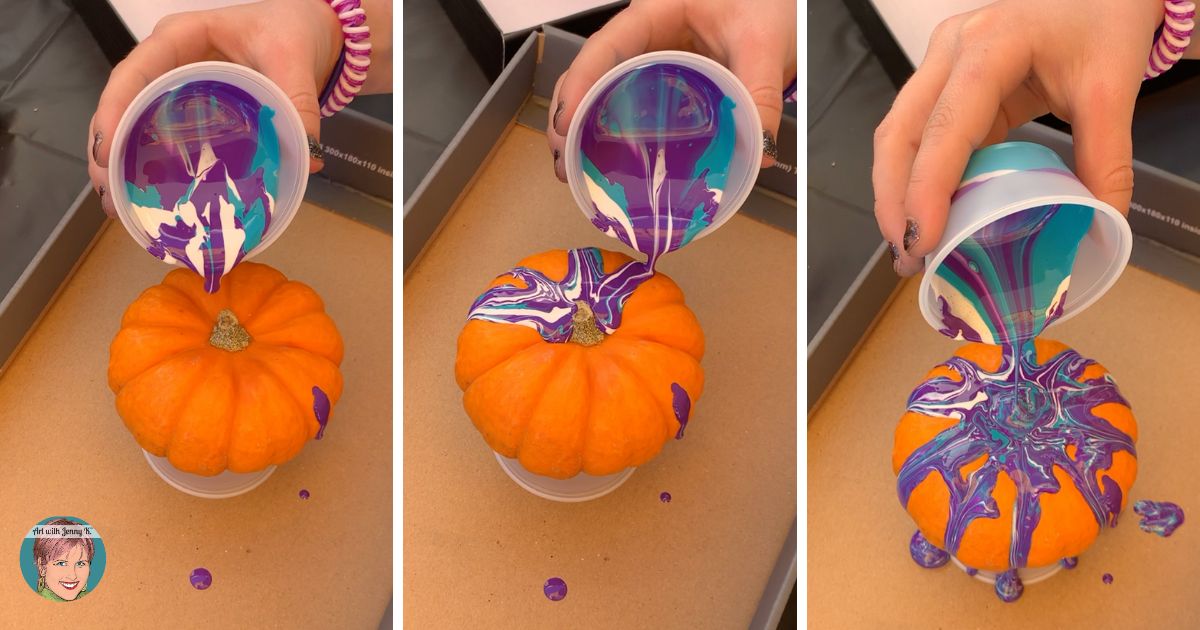
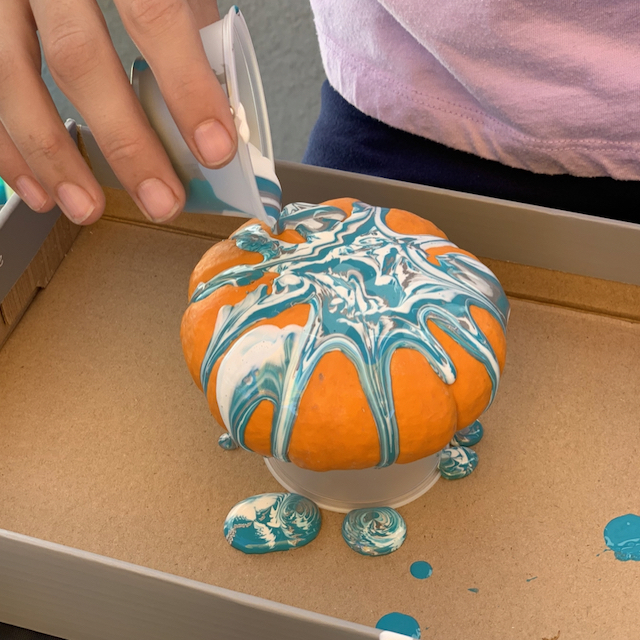
    I’ve done this lesson a lot, both with adults and children. When it comes time to pour the paint, both adults and children will often hesitate, take a deep breath, and sometimes worry a little bit about “how” to pour the paint. This is an opportunity to encourage your students to let go of the results and just let it “flow.” Not being able to control the outcome is part of what makes this a really fun process project. Gravity does all the work for this step, so there really isn’t much to do – just let go and enjoy!

    However, I do tell my students to go slow. This is because pour painting is fun, and I want them to enjoy it for as long as possible and not rush through it. Also, if they go slow, they can watch as the paints flow into one another and drip onto their pumpkin.

    I also like to encourage my students to go one at a time in small groups so they can watch each other pour. Watching others pour paint is *almost* as satisfying as pouring it yourself.

  3. After pouring the paint, let the pumpkins dry (try not to touch!).

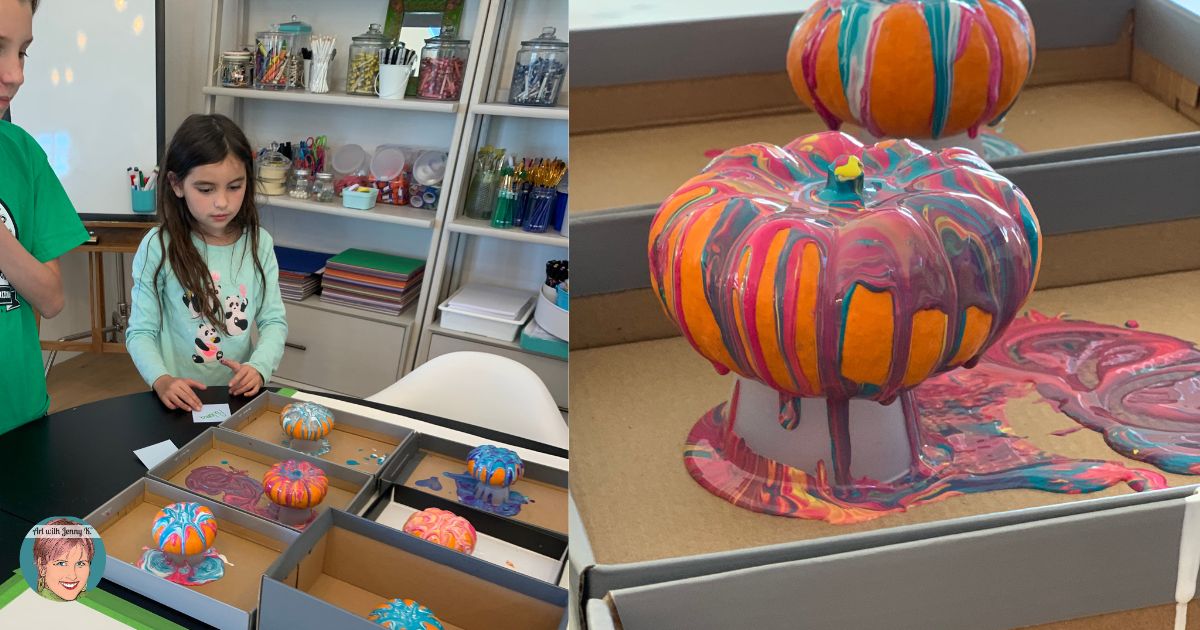
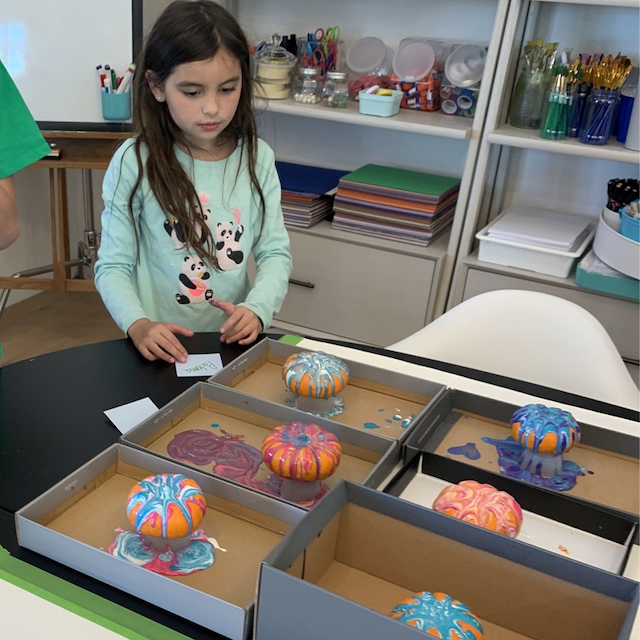
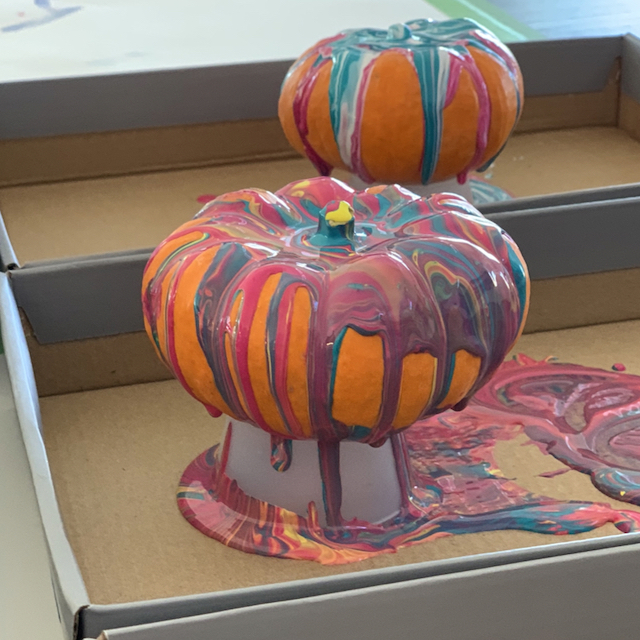
    After your students have poured their paints, they’ll enjoy having some time to look at their pumpkin and watch as it continues to drip and the colors continue to change. The weight of the paint will continue to push the paint over the pumpkin.

    I like to give kids time to go around and look at their peer’s pumpkins and see the color choices they used. Remind students not to touch (even though it’s so tempting) their pumpkins or those of their classmates.

  4. Don't watch paint dry.

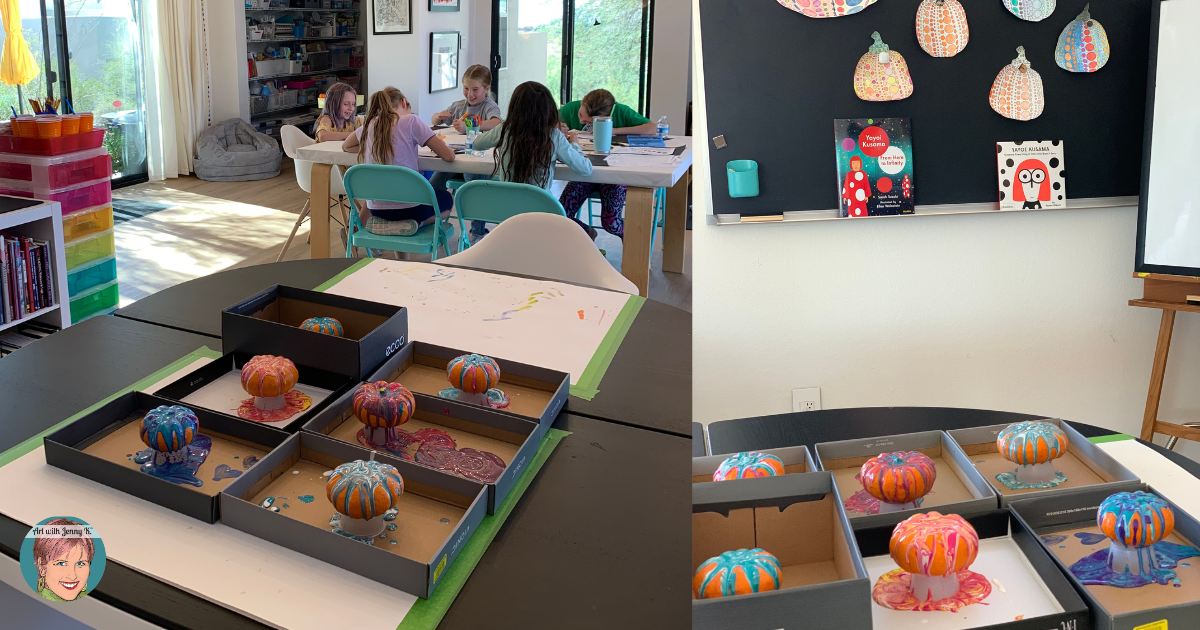
    While students let their pumpkins dry, they can work on other pumpkin-themed activities or lessons like my Yayoi Kusama Infinity pumpkins. My Yayoi pumpkin lesson would also be great if you decided to do this pour painting project as a center. You can get your entire class going on my lesson and then pull out small groups to work on their pour painting pumpkins. When they are done, they can go back to where they were in the lesson while another group comes and pours paint. You’ll find my lesson on TPT here and explain more in the extra credit section below.

Share with me!

I hope you enjoyed this project my students and I did. If you decide to make pour paint pumpkins with your students at school or children at home, I’d love to see what you make. Please feel free to tag me on social media (@artwithjennyk) to show me what you’ve done. If you decide to try my extra credit below, be sure to come back and submit photos for extra credit ;).

Thank you for reading and for making art with your students!

Jenny K.

P.S. If you liked this project, you might also like my Pollock pumpkin project.

Pin It!

Extra Credit!

Yayoi Kusama infinity pumpkins

Yayoi Kusama-inspired Infinity Pumpkins. Your student will color and/or paint small, medium, and large Kusama-inspired polka dot pumpkins for this project. This project is so cool. My students loved it, and I know yours will too!

Yayoi Kusama is famous for many things—polka dots and pumpkins are the two things for which she is most famous. This unique project will combine both of those things with your students’ creativity to create an “infinity” pumpkin bulletin board display—one like no other!

The steps of this project are as easy as color, cut, and assemble. The final pumpkins can create a stunning bulletin board display.

Grade Level Recommendation:

Having so many options in one resource makes this an excellent project for grades PreK-8th grade. You can easily differentiate for your students as well. I have only marked this resource grades 2nd-8th. However, this resource could be used with PreK, Kindergarten, and 1st grade if Design #2 is used.

Purchase Extra Credit Add-on

$6.49
Submit Your Extra Credit for a Chance to Be Featured!

Share & Save!

Out of the box ideas to your inbox!

Sign up today to receive Art with Jenny K’s eBook, The Benefits of Directed Drawing for Kids, and gain access to the AWJK Subscriber Library of freebies!

More Tested & Approved Projects

Integrate art into your classroom!

Sign up for my newsletter and get out of the box ideas to your inbox!

Fill out and submit this form for a chance to be featured on ArtWithJennyK.com!

Grade
Grade
Category
Category