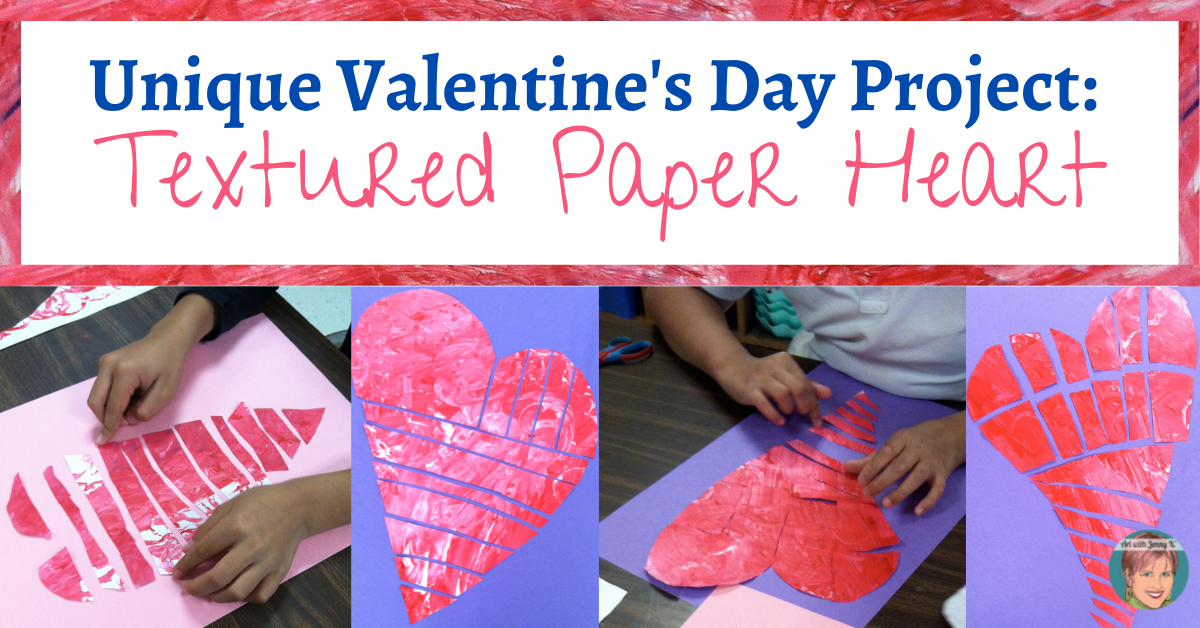
Are you looking for a unique Valentine’s Day project to do with your students? If you are an educator, you most likely answered yes to that question. Did you also immediately say to yourself, “But I’m not an art teacher”?
If so, don’t go anywhere.
It’s my job to make infusing art into your classroom easy for you and fun for kids!
This Valentine’s Day project will be fun for your children to create. Also, I should note that if you don’t want to paint, you can skip section 1 and go to section 2 (modify accordingly) and use construction paper in different colors.
I’ve done this textured paper heart project with my students (many times). I know it well. If you are an art teacher, this will be a breeze for you, and you might only need a little nudge with the idea. If you are a classroom teacher and want to know “all the things,” then let’s get started!
This lesson takes 2 sessions to start and complete. The first session is for creating Eric Carle-style textured paper. The second session is for creating the textured “puzzle” hearts with the paper that was created in session one. It is important that the paper has at least one night to dry before you work with it for session number two.
-
-
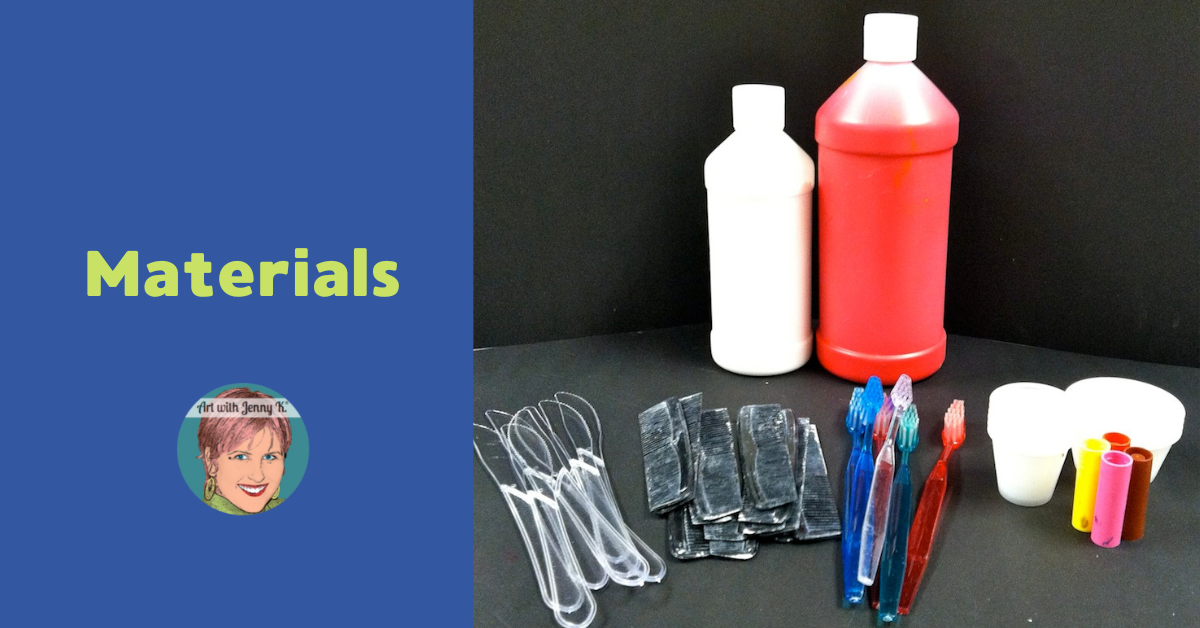
- Red and white acrylic paint or tempera paint (acrylic works best because it has more flexibility)
- Large sheets of paper to paint on
- 12” x 18” pieces of paper (for the final product)
- Scissors
- Glue Sticks
- Toothbrushes*
- Combs*
- Plastic forks or knives*
- Marker tops and/or small cups (anything that is round)
-
* You don’t have to use these exact tools. Be creative and use what you have on hand. The most important thing is to provide a variety of different kinds of textures for your children to play with and explore. In the past, I’ve even used plastic easter egg “halves” to create circles. Don’t buy anything—use what you have!
Valentine’s Day Project Part 1:
Make the Textured Paper
Please feel free to use this video to show your students how to create the textured paper, or watch it yourself to get a better idea of what the process looks like. I purposely left this video generic so that if you wanted to use it for other things (not just Valentine’s Day), you could. At the end, I say, “Make something FUN with the paper,” instead of telling them to make the puzzle hearts.
Making textured paper with students is versatile and can be used many times during a school year. Use this technique to make greens for St. Patrick’s Day or to make secondary colors by mixing primary colors and then make Eric Carle-style animals… whatever you want to do with it!
Start by getting Set Up and ready for Your Students!
Cover your tables with white paper. If you have big rolls of paper, just cut off pieces that are the length of your tables. I use big butcher paper for this. You could also use a light color paper if you don’t have white.
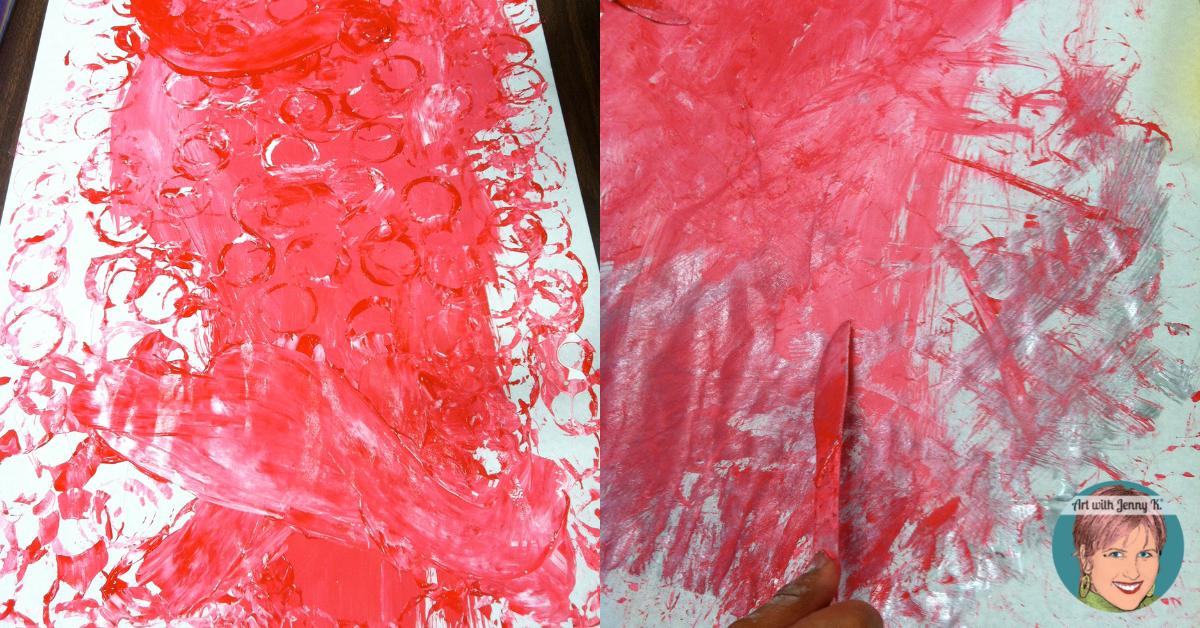
At each table, put a different “texture tool.” For example, put the toothbrushes at one table, put the combs at another table, put the plastic knives at a third table, and at the fourth table, put the marker tops/cups or whatever you are using to create circles.
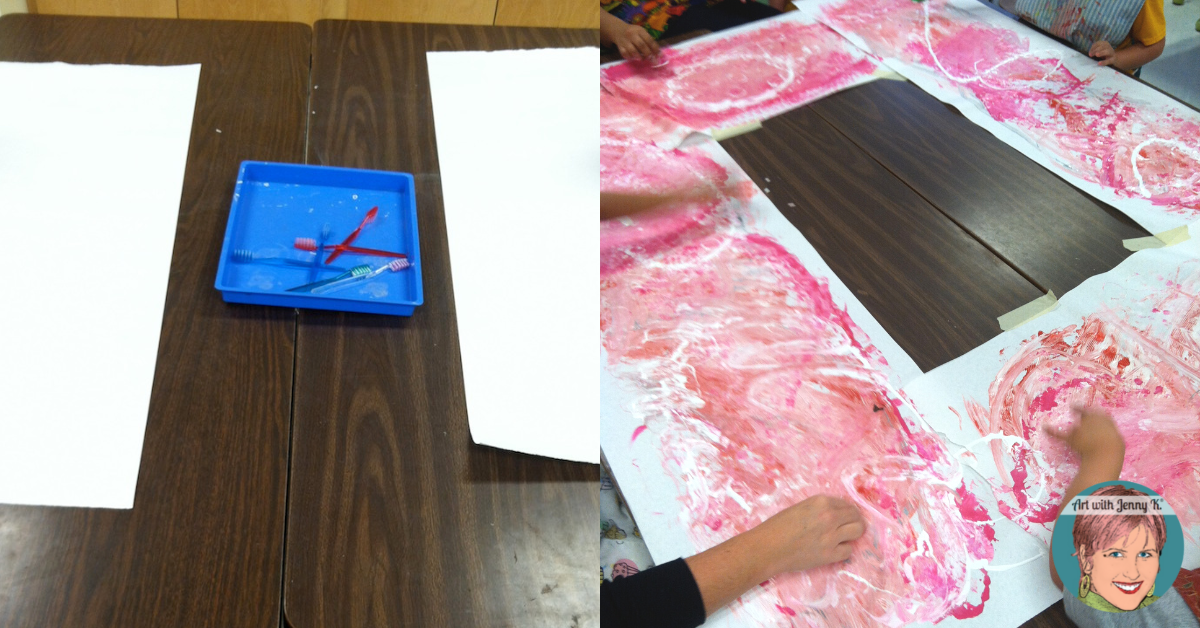
Option: Tape the paper down to the table. I don’t always do this step. That’s why I say it’s optional. However, in the past, I have taped the large paper to the table to reinforce it and keep it from falling off the table. This is especially helpful for younger children or those with special needs who might need extra support. Taping down the paper helps to keep it from slipping off and the paint ruining the children’s clothing. You may decide that for the group that you are working with, you need to tape down the paper as well.
If you can, do this step before your students arrive (covering the table with paper and setting out the supplies).
Part 1 Instructions: Textured Paper Valentine’s Day Activity
Once your students arrive, have them stand near their seats and explain that they are going to be painting with unique tools like a toothbrush, Easter egg cup, etc.
Then wait for them to cheer with excitement (you and I both know they will ;)).
Once they are calm…
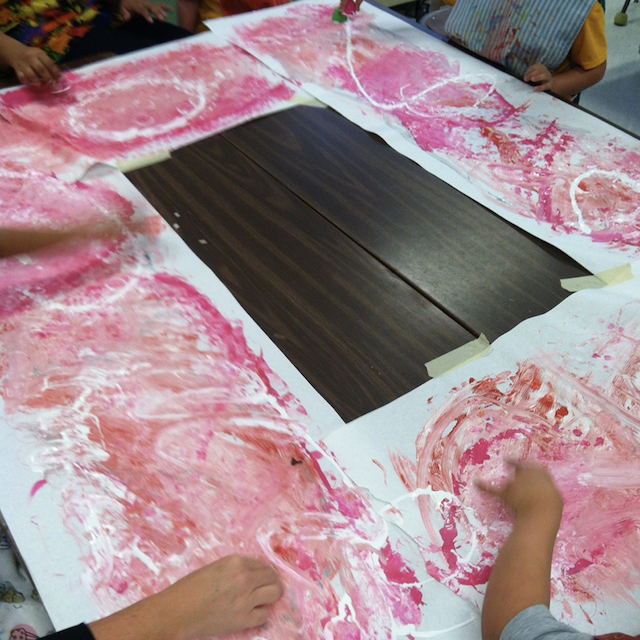
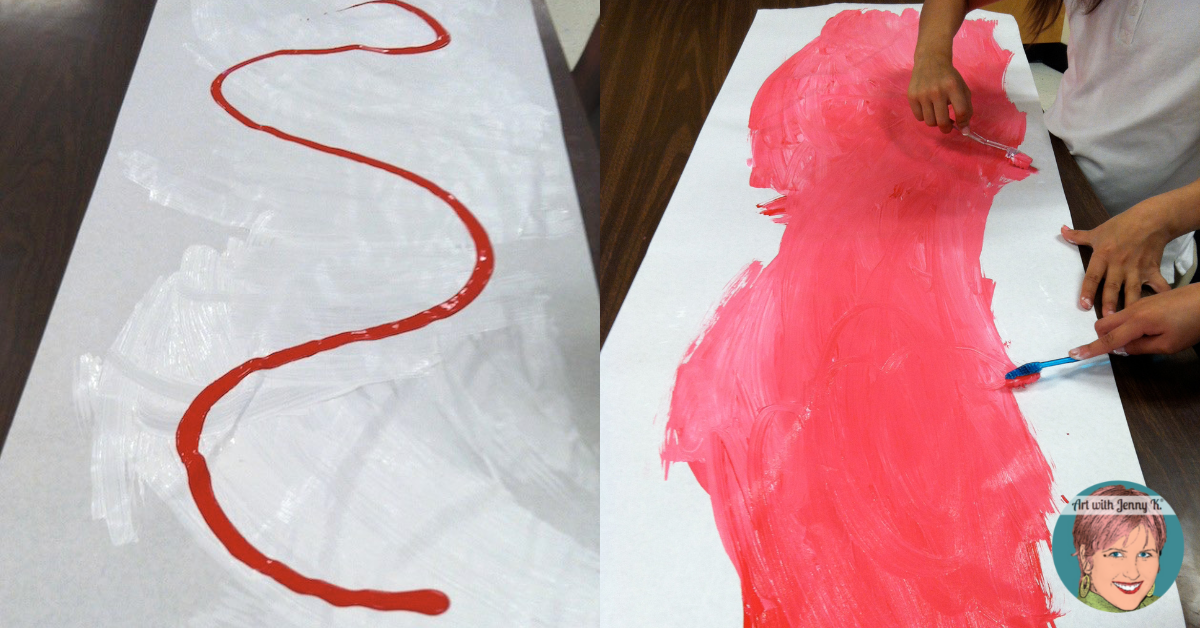
Go around and cover the papers with white paint. Have students spread the paint around the paper with whatever tool they have.
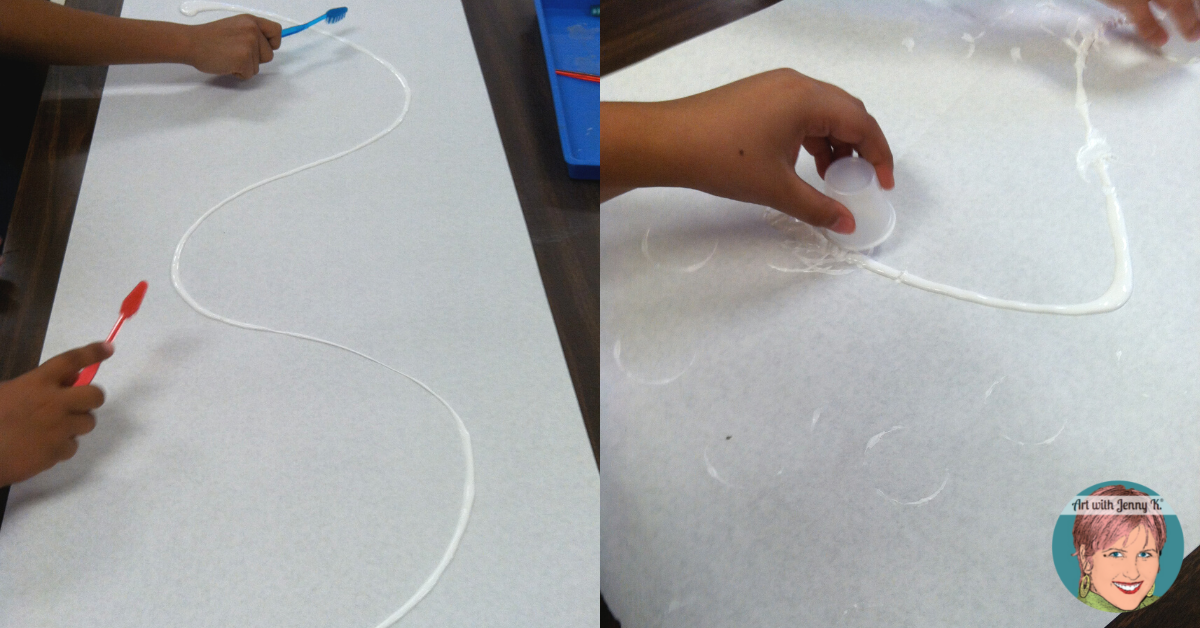
Have students put their texture tools onto the tray at their table when they are done spreading. Then, move the trays (easier to move than the kiddos ) to other tables so the students get a new texture tool. With the next tool, go around and put red paint on the paper. I squirt it all over the paper straight from the bottle.
When students start smearing the red into the white, they will discover that it makes PINK. Don’t tell them it’s going to happen because they love shouting out, “It’s Pink!”
Repeat this process for the next two texture tools. Have students put the tools in the middle tray and then change the tools to a new table. On the third round of paint/new texture tool, add more white to the mixture to give it some light variations.
On the fourth round, you could add some fun silver, purple, or even pink paint that you already have made. Have fun with it, and use what you have.
The kids will have a blast!
TIP: Encourage students to work on the empty parts of the paper and not just in one spot.
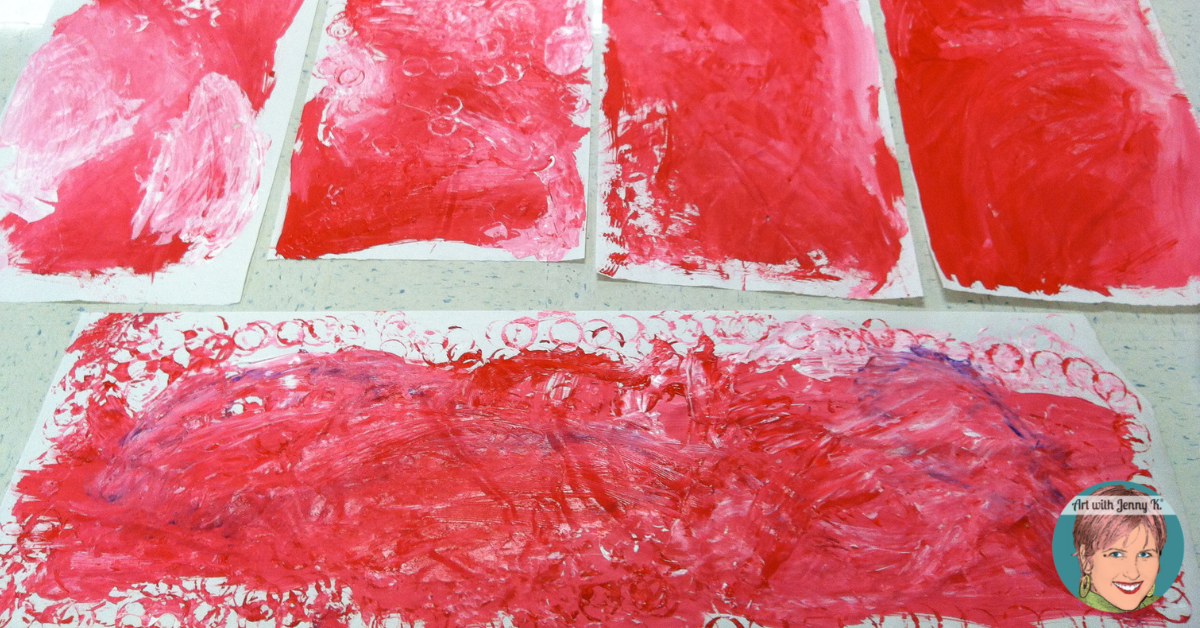
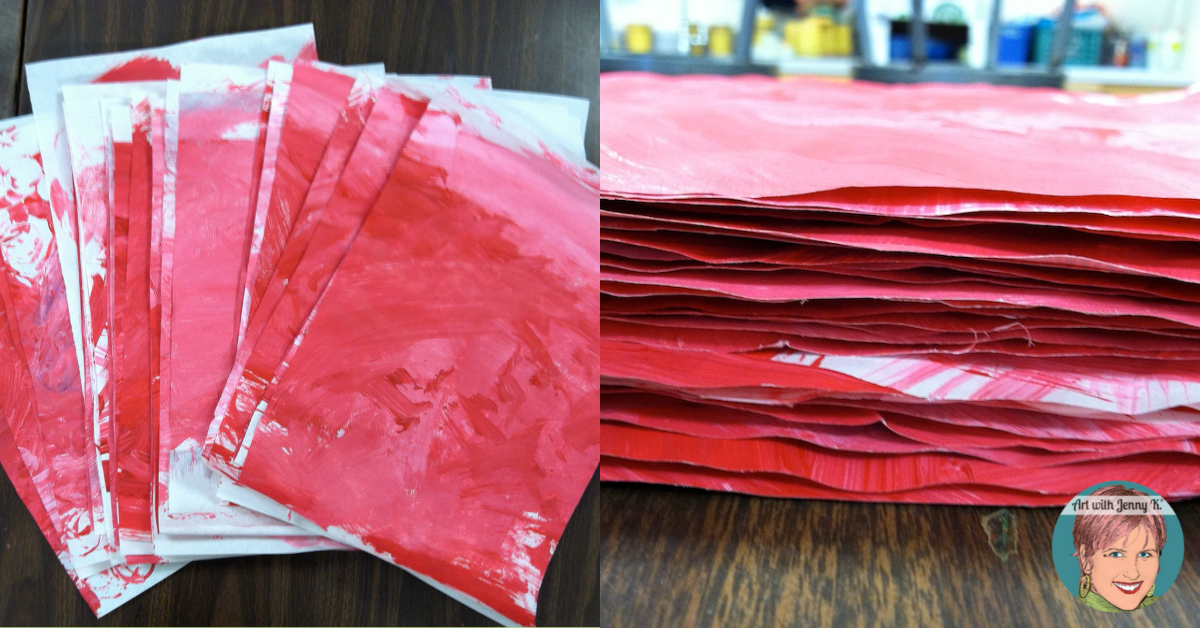
When the paper is covered in color, and the kids are finished, lay the paper someplace safe overnight so it can dry.
Valentine’s Day Project Part 2: Create the “Puzzle” Hearts
Preparation
In the morning, after your textured paper has dried overnight, stack up all the paper and cut it into smaller pieces so that they are about the size of your final paper size. Don’t measure or do anything precise for this step. Just cut the larger paper into manageable sizes for the kids to use.
Part 1 Instructions: Puzzle Heart Valentine’s Day Activity
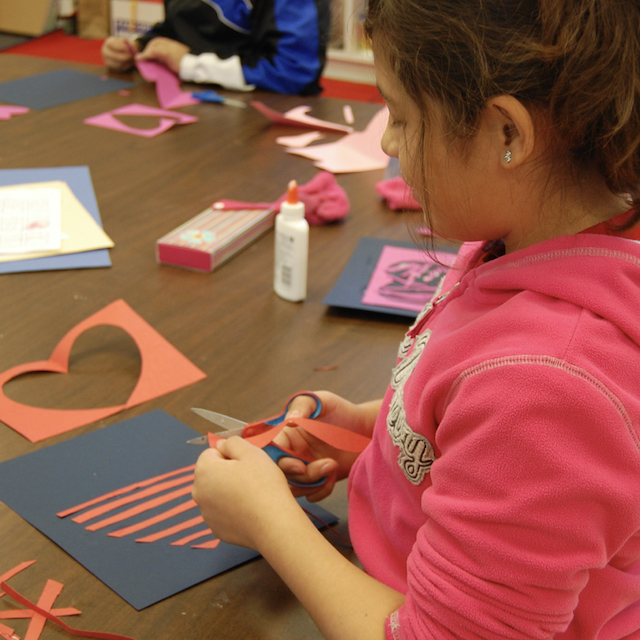
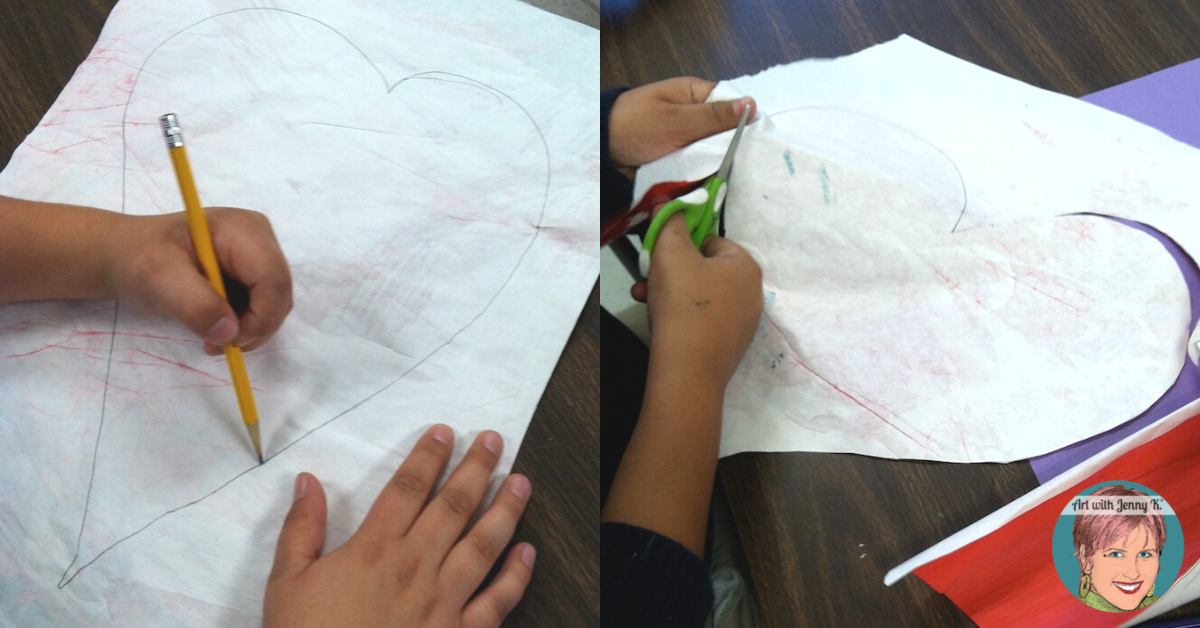
DRAW: On the back of the finished textured paper, have your students draw a large heart. Have them “sketch” lightly. Encourage them to draw big. If a student “messes up” and wants to draw another heart, have them do so right on top of their first try. Ask them not to erase (it wastes time and erasers).
CUT: Once they have a heart shape they like, have your students cut out the heart around the outside perimeter.
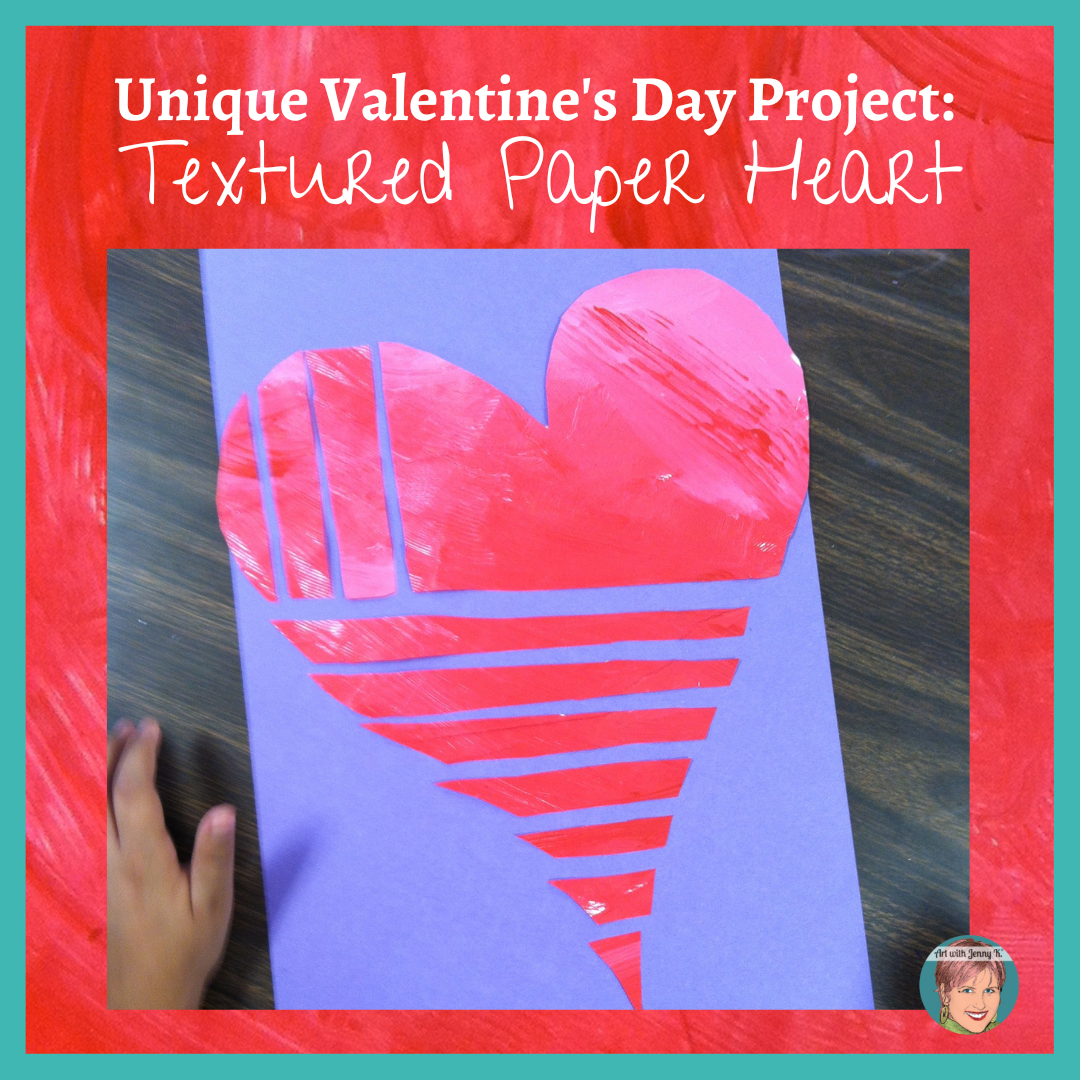
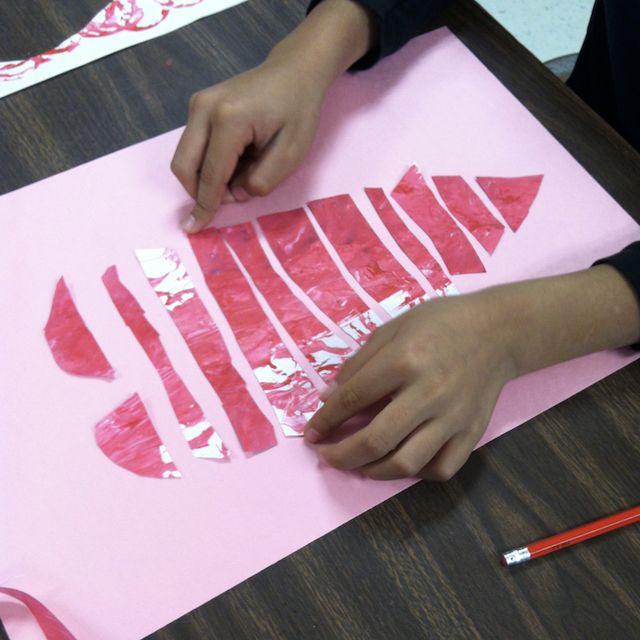
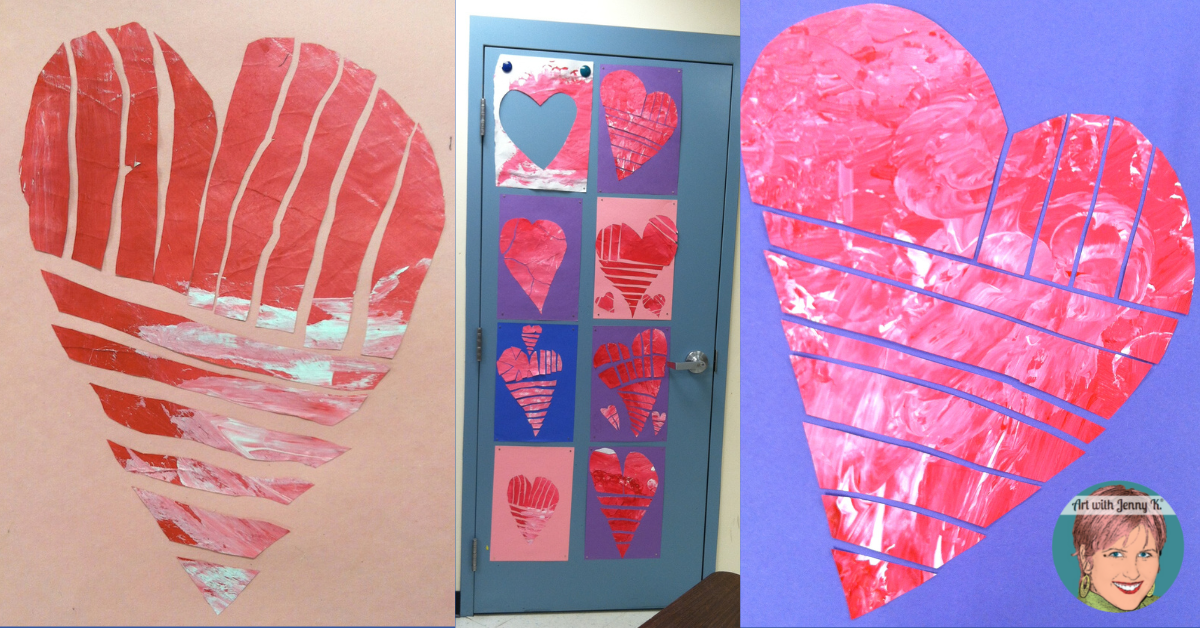
SLICE: This is where this project turns into a unique Valentine’s Day project. Have your students “slice” the heart design into strips that run horizontally or vertically (diagonally if you are working with older students).
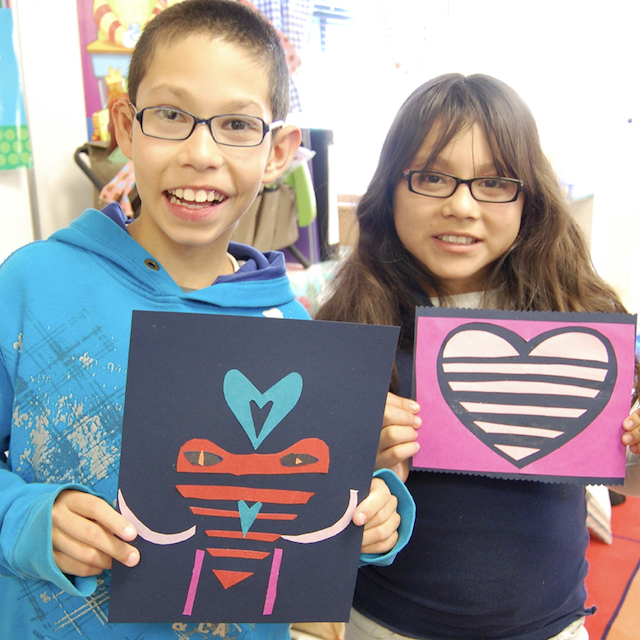
ASSEMBLE: Lay all the pieces down on a 12” x 18” piece of paper with space between each strip of textured paper. Let students come up with their own designs. All pieces should be cut out and reassembled before they are glued to ensure everything fits on the paper.

Tip: When your students are ready to glue their pieces to the page, remind them to leave space between the individual pieces.
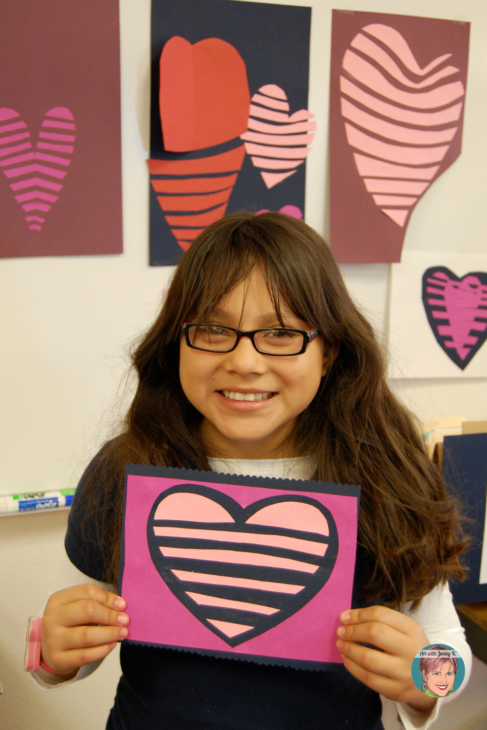
GLUE: Once your students have shown you their final design, you can give them glue to secure it to the final paper. Once all the projects are complete, you can create a gorgeous display on your bulletin board for Valentine’s Day!
Variations?
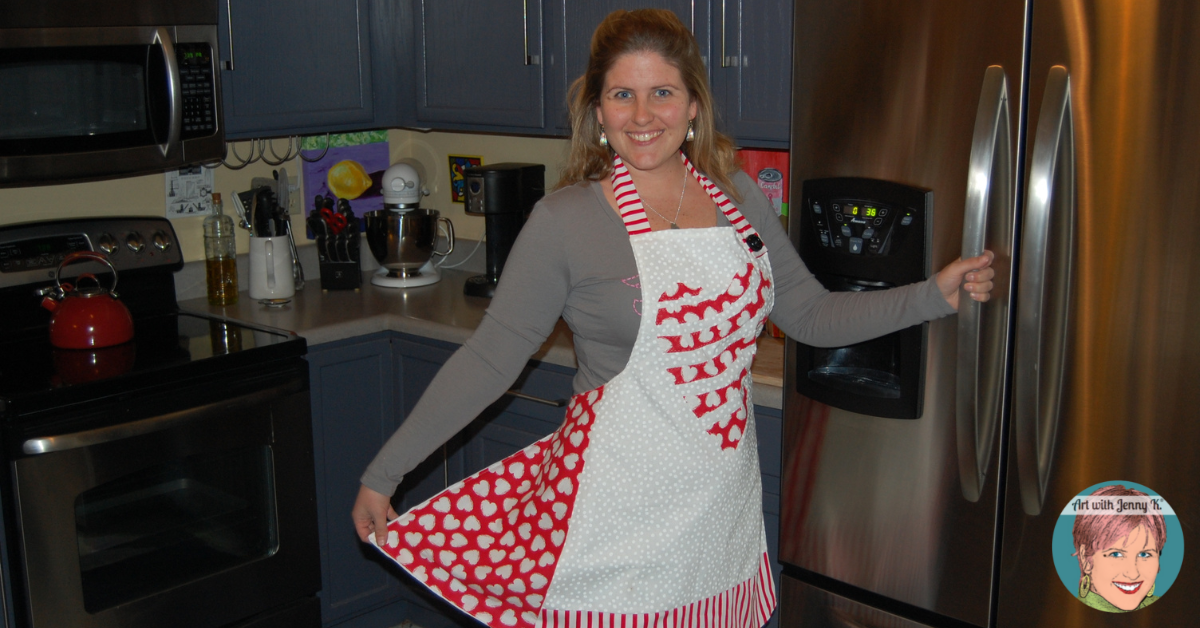
When I get an idea, I typically play with it as much as possible. This Valentine’s Day project is a great example of how I do that. What started as Valentine’s Day cards for my family and friends turned into creating an apron, resulting in a lesson for my students (which was then shared with other educators on TPT for many years and is now available here).
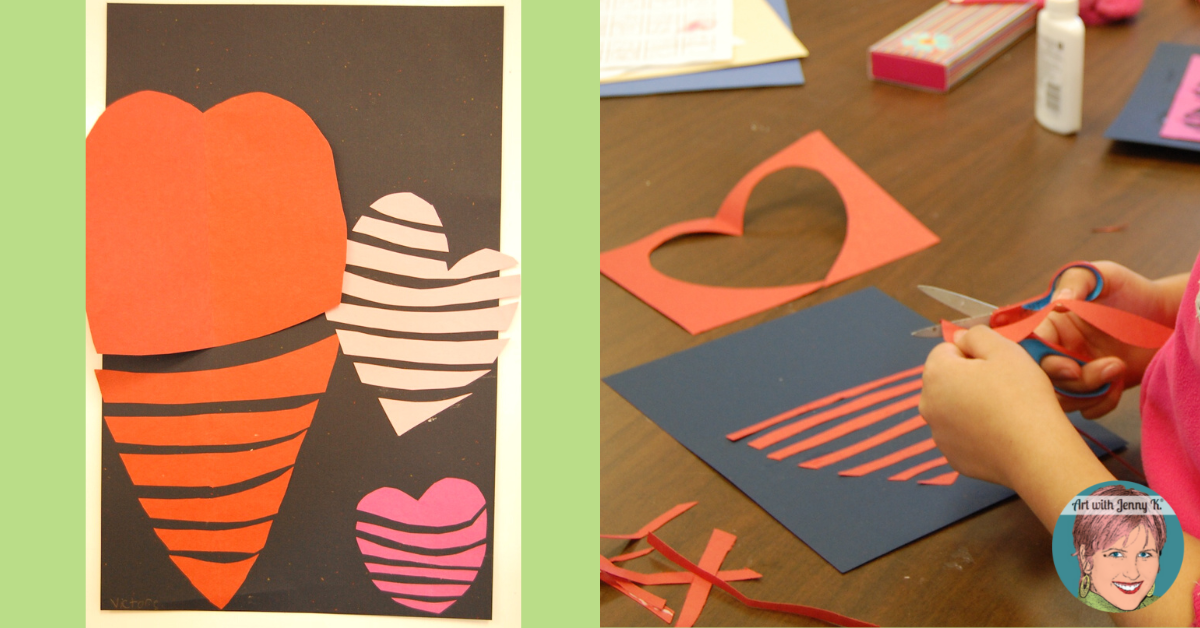
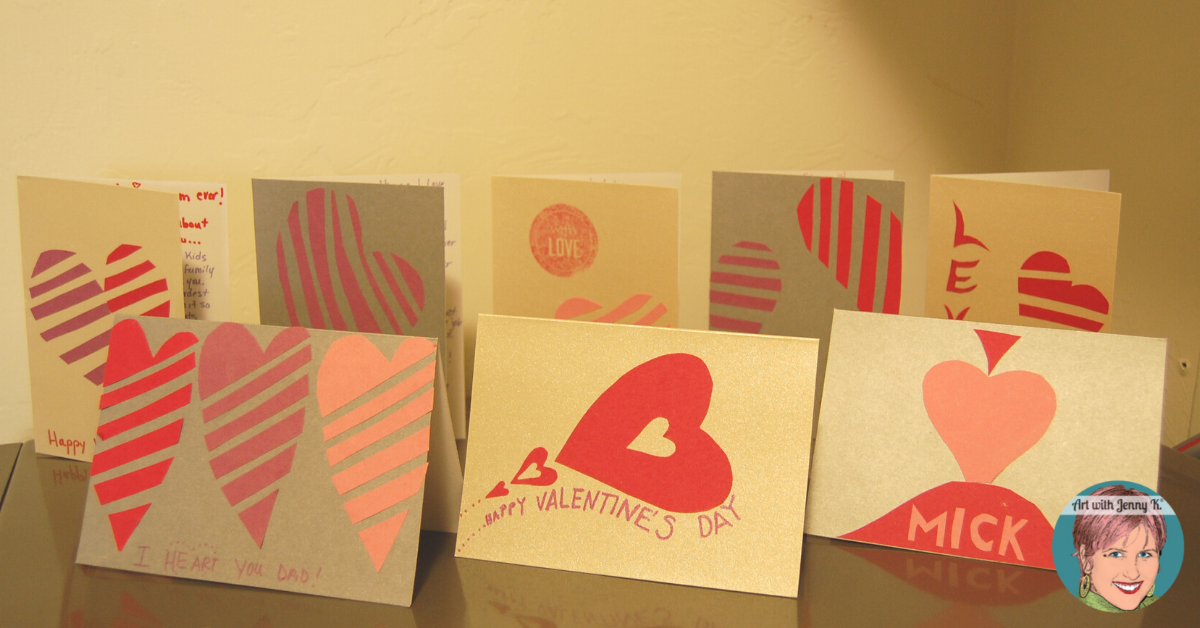
Short on time? Don’t have time to make the textured paper? No worries. Use construction paper. I’ve done that too. Here are some examples…
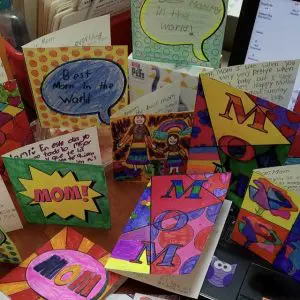
Extra time? Have lots of extra time on your hands? Don’t answer that if you do, because if so, I’m sorely jealous. However, once upon a time, I, too, had extra time on my hands. That’s when I created this lesson, and I made Valentine’s Day cards for my friends and family.
I even made an apron with this design…
I hope you are able to modify this lesson and use it with your students—no doubt sparking creativity for them! You never know where an idea will lead.
More Valentine’s Day Project Ideas?
I have many blog post posts with Valentine’s Day project ideas (listed near the bottom of this post), and I have a lot of Valentine’s Day resources on TPT. You can see all that I have HERE. I wanted to showcase my Kindness 3D Agamograph Collaboration Poster and art integration resources.
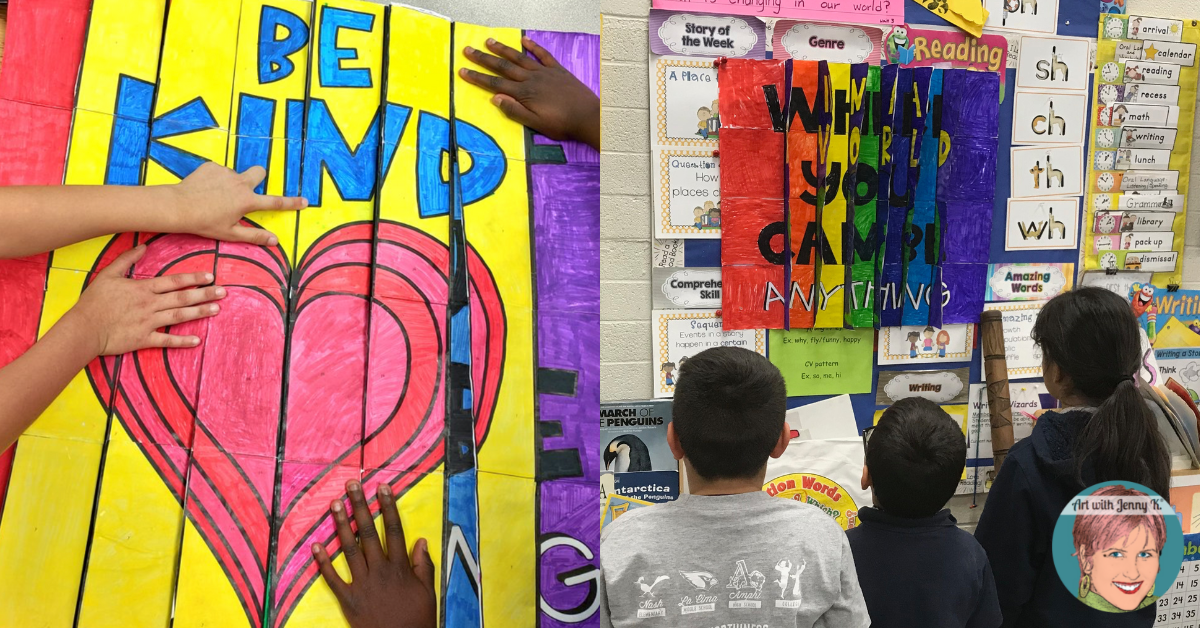
Kindness 3D Agamograph Collaboration Poster
This is a great team-building activity for your class. When complete, this poster says: “IN A WORLD WHERE YOU CAN BE ANYTHING BE KIND.” This is one of my little magic tricks where it looks hard and complicated, but it’s as easy as color, cutting, and assembling. That’s the really big impact this lesson makes. Instead of telling you about this lesson, I thought I’d share some reviews and photos from teachers instead.
You can see this resource (and all the details about it) on TPT HERE.
My kindness 3D agamograph is on TPT HERE. I have many 3-way agamographs (most of them life cycle themed). However, I also have small, individual (2-way) agamographs for Valentine’s Day HERE.
I would love to see your students’ work if you decide to create this Valentine’s Day project with them. Feel free to tag me (@artwithjennyk or #artwithjennyk) on social media so I can see what they make! You’ll find me on Twitter, Facebook, and Instagram!
Thank you for reading and making art with your students (and letting me help!)
Jenny K.