
What’s for dinner? Just kidding—that question is too hard to answer. If you are anything like me, you don’t mind making dinner, but trying to decide what is for dinner is maddening (day after day). Well, I can’t solve the dinner dilemma. However, when it comes to making crafts with kids, it often feels the same way, and I can help you there! When it comes to making Valentine’s Day crafts with your kids, if you have thought to yourself, “Someone, please just tell me what to make, and I’ll make it,” then this post is for you!
As an educator and/or parent, it’s easy to get bogged down trying to find a fun and easy Valentine’s Day craft to do with your children at home or students at school—that’s where I come in.
I’ve created a “menu” of Valentine’s Day craft ideas you can use with your children. In this post—er, I mean, menu, you’ll find a brief introduction to each craft so you can decide what is right for you and your students.
My projects have all been tested and approved by me and my students—they work!
To pick something from the menu, simply scroll through the eight ideas (um, yes, short menus, please!) and see what stands out.
Sadly, I can’t help with dinner, but I can help with crafts!
These Valentine’s Day crafts are for classroom teachers who are looking to infuse some art into their lessons, parents who want some ideas (and the steps to pull off the craft), and art teachers who are looking to get messy.
Primarily, these projects are for grades 2 to 6, but you can easily modify and change them to fit your needs. I have included easy, time-saving printables from my TPT store—some are free, some cost (thank you for supporting me in this way). I have also included various “from scratch” projects (even clay). The projects range from easy to more advanced—there is something for everyone!
If you are looking for the “easy button” (who isn’t?) I have marked each project as easy, medium, or advanced so you’ll know what level each project is.
Each of these crafts is an opportunity for children to explore their creativity in a different way. You will find the following projects and ideas included…
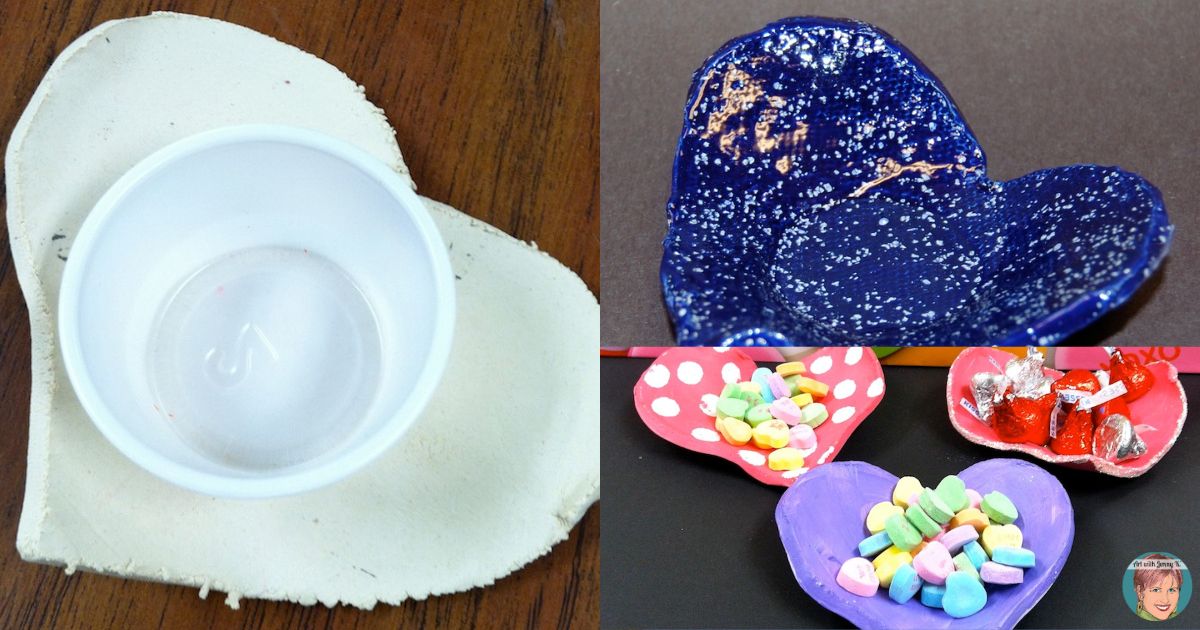
You can find my full post that details the supplies and steps, plus some of my classroom management tips, HERE.
This clay project works great with either air-dry or kiln-fire clay. This project takes two sessions to complete (each about 45 min to one hour). In the first session, students will trace a flat heart with clay and then shape it into a bowl around a small plastic cup. In the second session, students can paint and decorate their dishes. The end result is a beautiful candy dish that makes a perfect Valentine’s Day gift.
Fair warning: if you send the kids home with a dish full of candy, it might get eaten before it gets home 😉 Kids to their parents, “What candy?! My teacher just had us make candy dishes—you have to put in your own candy!” 🤣
Difficulty Level: Medium (air-dry clay) Advanced (kiln-dry clay).
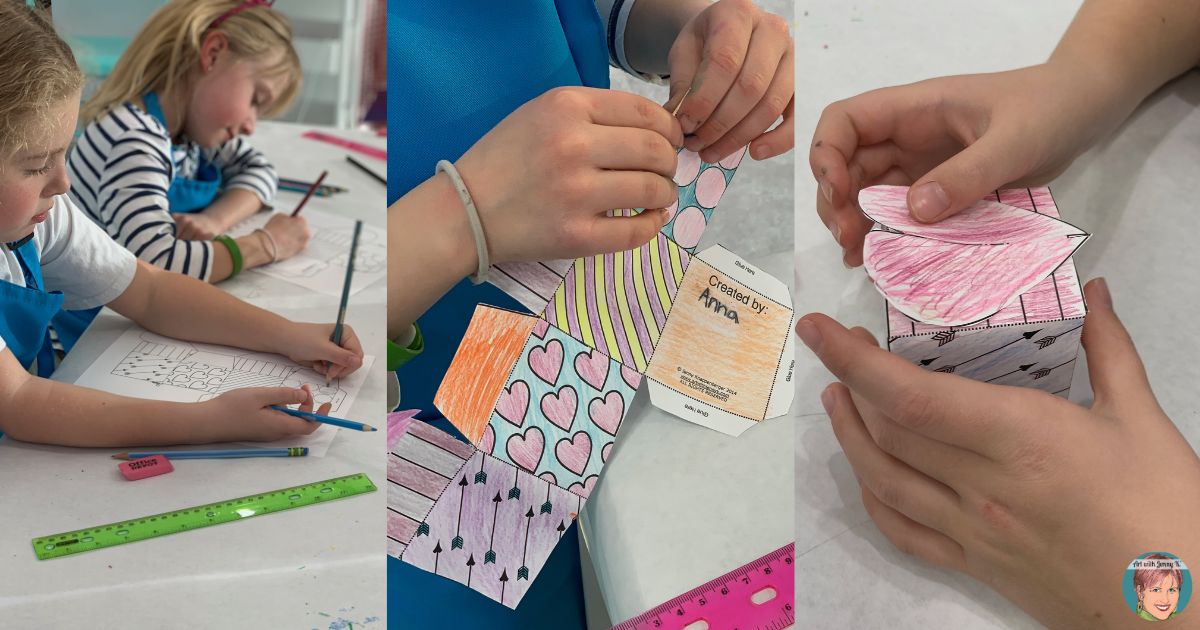
The full resource with step-by-step instructions and templates is available on TPT HERE.
These colorful and fun Pop Art message boxes will add some pizzazz to your Valentine’s Day celebrations. Students will color the template, cut around the outline, and then fold their boxes to assemble them.
The process of creating these 3D boxes allows children the time to talk to one another and be social while they work, and they love being able to give gifts to each other (with a piece of candy or a note inside). This Valentine’s Day craft can also tie in nicely with units or lessons involving cubes. I’ve designed this activity to be easy for you (the teacher or caregiver). There’s even a full-color example so students can see what it will look like in the end, and so you don’t have to take the time to color one before the kids.
Difficulty Level: Easy—simply print and go!
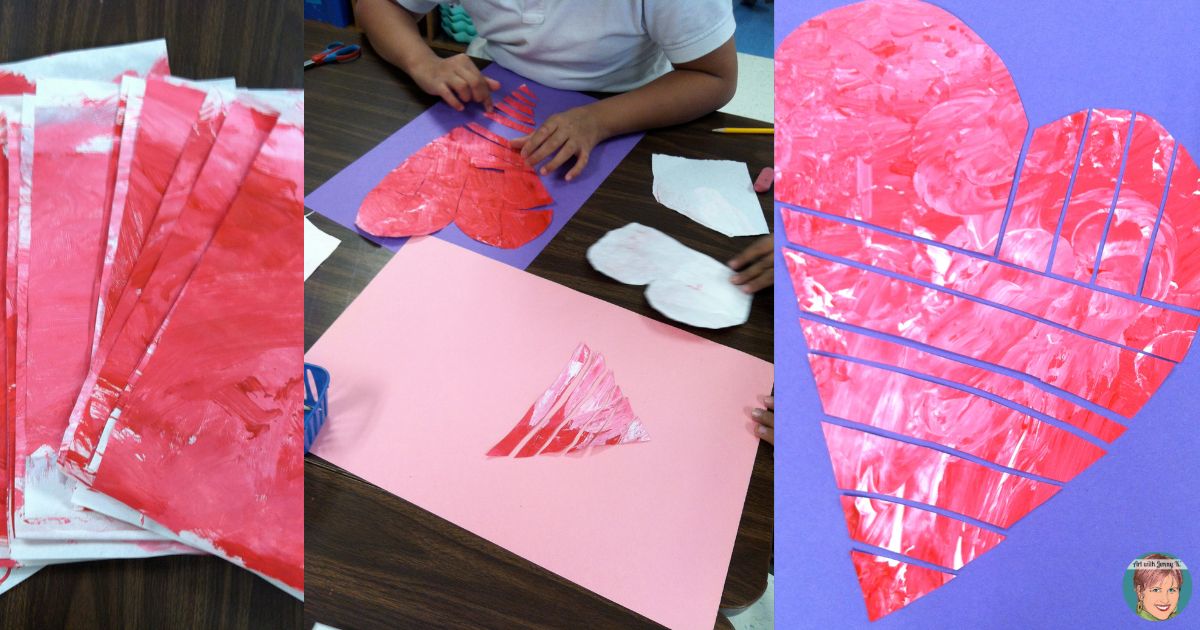
You can find my post that fully breaks down all the instructions for both parts HERE.
I’ve done this textured paper heart project with my students (many times). I know it well. If you are an art teacher, this will be a breeze for you, and you might only need a little nudge with the idea. If you are a classroom teacher and want to know “all the things,” then I’ve got you covered there too.
This is another activity that takes two sessions to complete, though you could make the puzzle hearts with construction paper if you don’t have time to do the textured paper. However, making the textured paper is SO. MUCH. FUN. It’s a great time for children to explore the materials and play with paint. In part two, children will cut their hearts into puzzle pieces and assemble them spaced out on their final page. The results are all unique and absolutely stunning.
Difficulty Level: Medium (I mean—paint 🤷♀️).
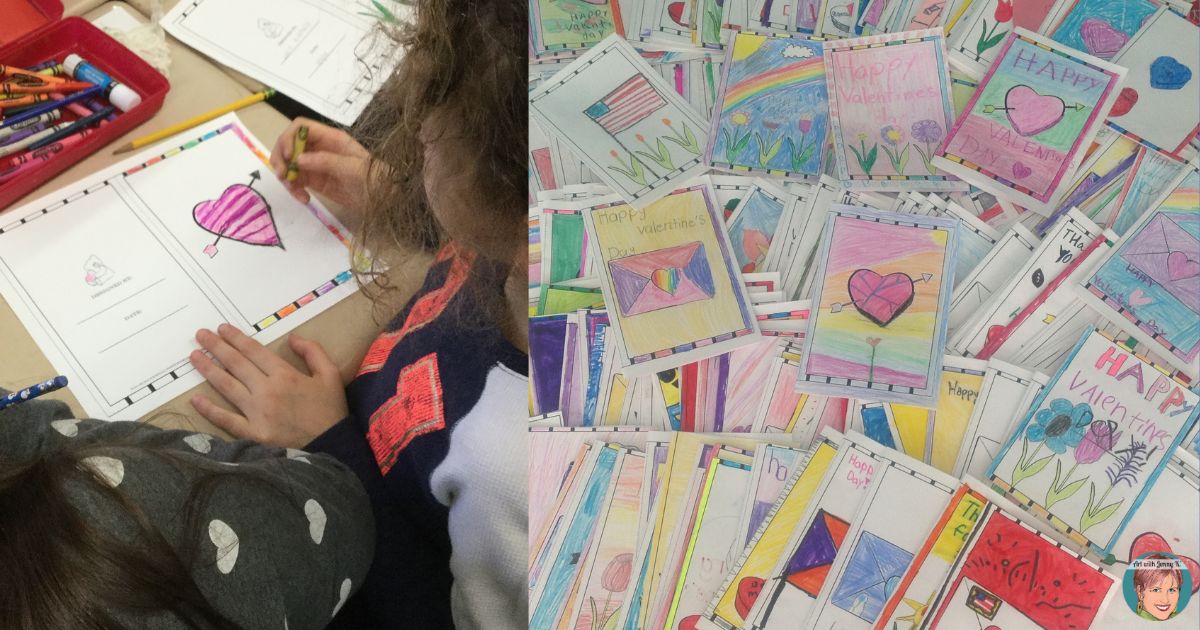
The full resource with 12 starter ideas is available on TPT HERE.
Students love to be creative, and they love to give cards to people they care about—especially around Valentine’s Day. Each card template has a “starter” design that includes a partial image for students to include in their final design. It is great for both students who are eager to draw and students who need a little help getting started.
The “starter” picture will then become the front of a greeting card. Children can then write a nice message inside and give the card to someone special! This activity will allow your students to show their individuality and creativity while making their Valentine’s Day cards in a very easy way.
Difficulty Level: Easy—print and go!
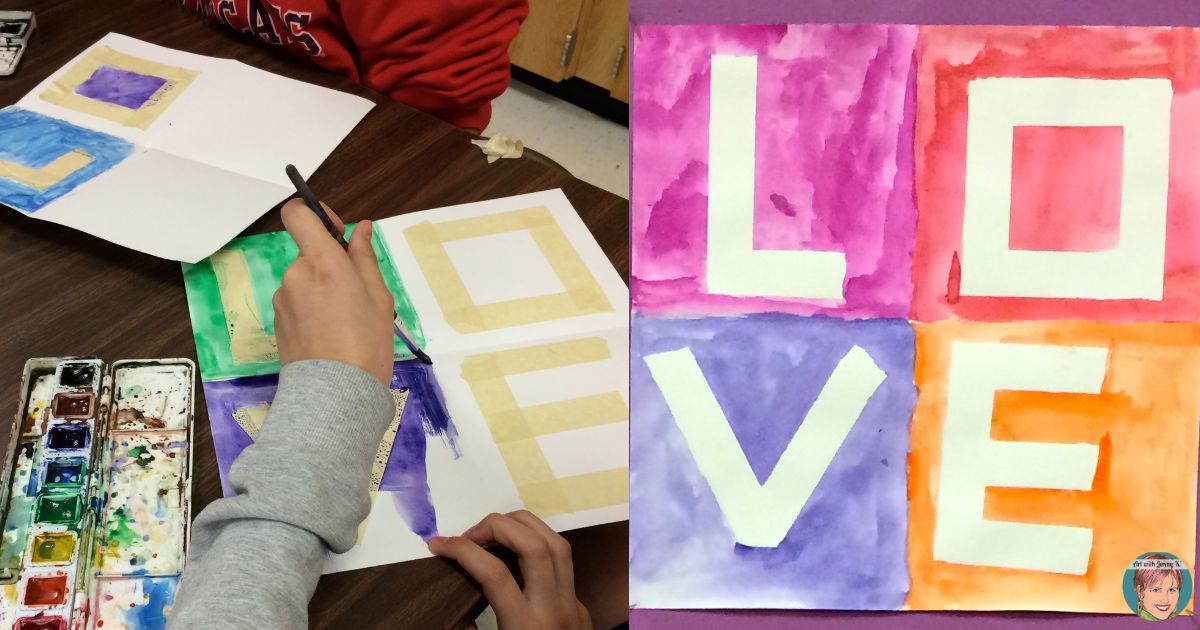
You can find my full post with instructions and suggestions for talking about symbols HERE.
It might be a little cheesy to say your students will LOVE making these paintings. But it’s for Valentine’s Day, so I hope you can forgive me for being cheesy. I always like to start this lesson by showing my students an example of Robert Indiana’s LOVE sculpture since our art is inspired by his iconic design. Then, we talk about the symbolism of what the image could mean.
The project itself is pretty straightforward and easy. Students will fold their paper in quarters to divide it and then use tape to mask off the letters. Getting the tape just right is tricky enough to be a great practice of fine motor skills (something I find kids need more and more of these days).
Then, students will paint over the tape, which they can remove to reveal the final painting—Voilà!
Difficulty Level: Medium (watercolor paint). If paint doesn’t scare you, then I’d say this is an easy project.
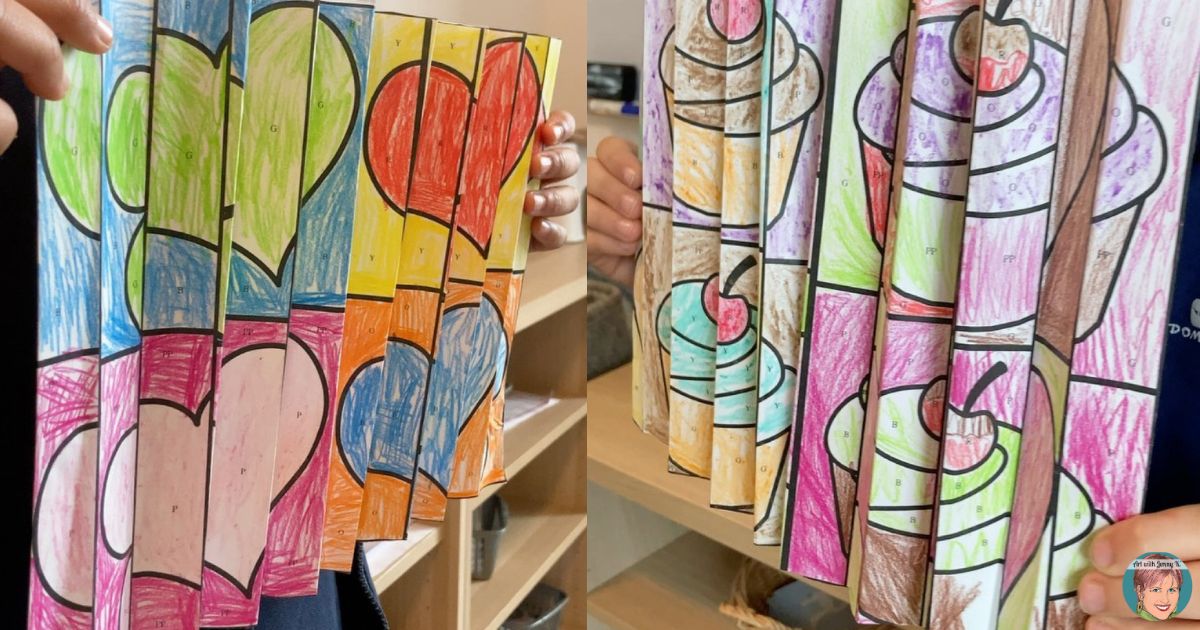
The full resource, including video instructions and writing prompts, is available on TPT HERE.
Agama what?? An agamograph is a picture that morphs from one image into another when you look at it from a different angle. It’s hard to say but easy to do!
Making agamographs is a project often done by art teachers; however, I’ve taken out most of the “prep and mess” so that classroom teachers and parents can find this useful and fun, as well as art teachers. My agamographs start with the images already “spliced” together, with each space assigned a color. Students color them in and then fold them. Once completed, students can walk from one side of the image to the other and watch it change!
There is a lot of “wow factor” in this activity—the students love the surprise. And best of all, they did it themselves.
Difficulty Level: Easy—print and go! Okay, I lie—it is easy but requires students to follow instructions and to accordion fold (so it’s between easy and medium). For those reasons, I recommend this for grades 3+, and if kids don’t get a lot of exercise with their fine motor skills, they’ll need adults to be patient with them.
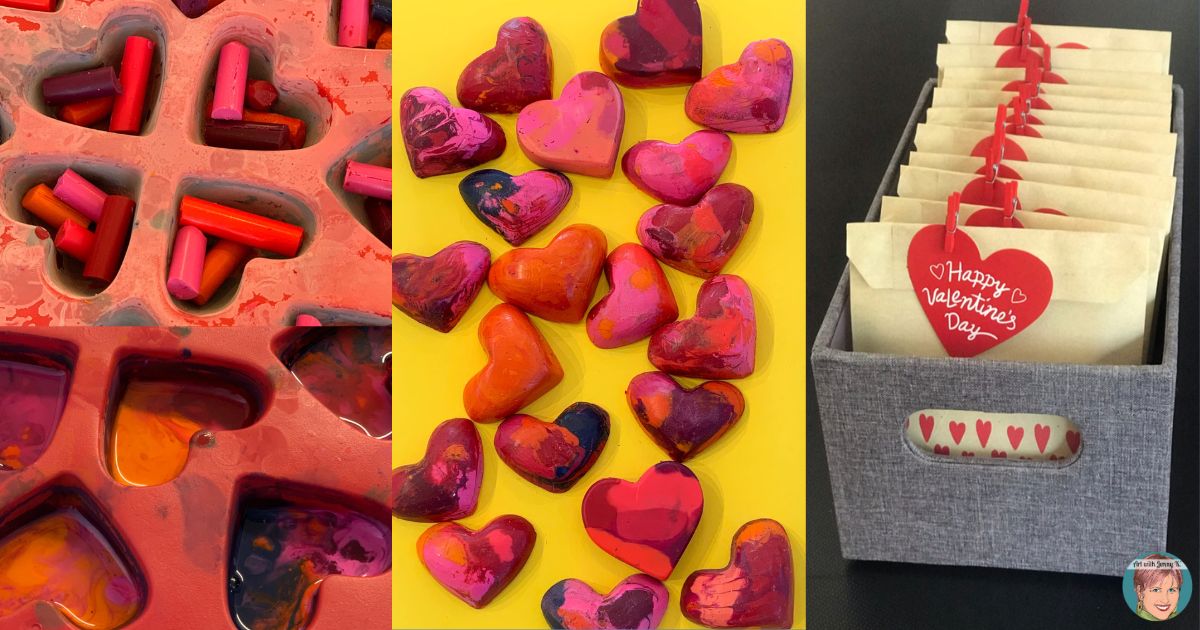
You can find my post all about how I make these crayons into Valentines HERE.
This is DIY at its best. My daughter and I love creating recycled crayons, so, of course, we made some in the shape of hearts for Valentine’s Day. We did this by melting down old crayons and remolding them into new shapes. Then we wrapped them in festive bags and signed all the Valentines to share with her classmates for Valentine’s Day. The best part about this DIY Valentine’s idea is that it’s inexpensive way to give small gifts to classmates.
Difficulty Level: Advanced. An adult needs to be present to do this project with kids at all times (hot wax).
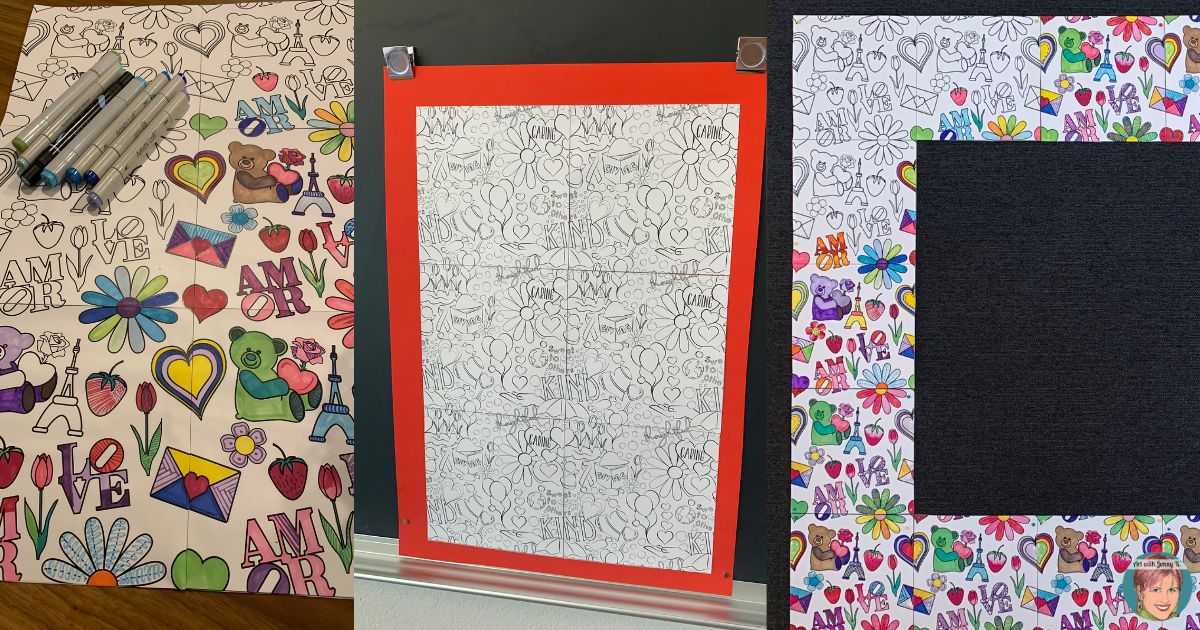
The full resource with all the display options explained is available for FREE on TPT HERE.
I designed my infinity pages to connect to one another on all sides. Each pages connects on the top, bottom, and sides—infinitely—it’s so cool. The theme of this set of infinity coloring pages is kindness. This activity is a great way to celebrate Valentine’s Day or could be used whenever you want to talk about kindness. You can decide how many pages you want to use to create something unique for your class. I’ve given you a lot of options so you can customize what you want to make. There are also two design options for differentiation: one design has larger and less complex shapes, while the other has more intricate details.
Difficulty Level: Easy (and free)! Print and go.
I hope you were able to find something on this “menu” to satisfy your hunger for creativity.
If you decide to try any of my projects and share pictures online, please tag me using @artwithjennyk on your favorite social media platforms so I can see the final results! Or if you have a stellar way to solve the dinner dilemma, I’m all ears 🤣
Thanks for reading,
Jenny K.
Sign up today to receive Art with Jenny K’s eBook, The Benefits of Directed Drawing for Kids, and gain access to the AWJK Subscriber Library of freebies!

Art-infused activities
for every classroom!
Integrate art into your classroom!
Sign up for my newsletter and get out of the box ideas to your inbox!