
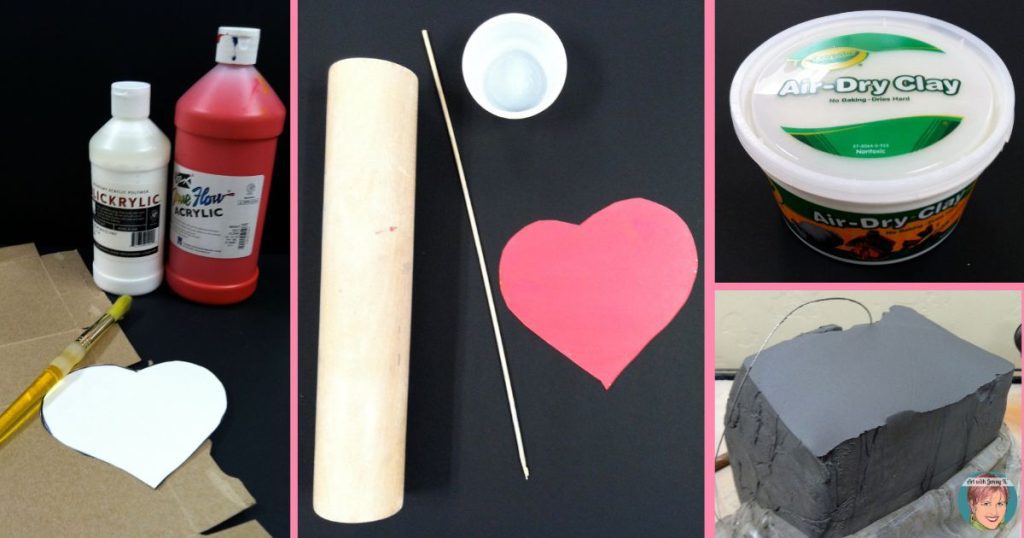
To make these clay heart dishes, you’ll want first to gather the supplies you need. Keep in mind that the steps of this project are the same for air-dry clay and kiln-fired clay. However, there are some differences and things to mention if you are using kiln-fired clay. You’ll find those tips in the pink boxes below.
Step one you can do before kids come, or you can have them help you with this step—whatever works best for you! I’ve done it both ways 🙂
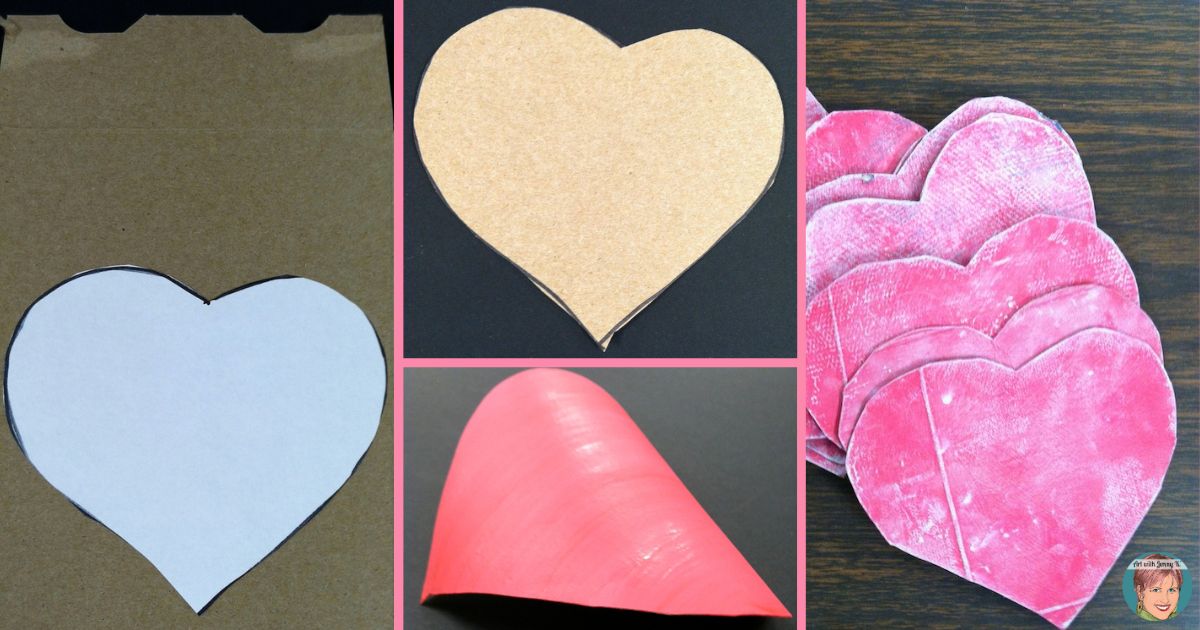
You’ll use the heart templates for tracing and cutting out the clay hearts. The heart template can be printed on plain paper. However, pain paper tends to stick to wet clay, so it works best to make a cardboard template.
Painting the cardboard keeps it from sticking to the cust like paper would.
To create these templates, I cut out the paper template and traced it onto cardboard (I use old cereal boxes). Once I’ve cut out my cardboard template, I then paint both sides with acrylic paint.
Why both sides? After painting the first side, the template will start to curl up. This is why it is necessary to paint both sides. As soon as you paint the back, the heart will lie flat again.
Making a set of templates one year makes it easy to use year after year.
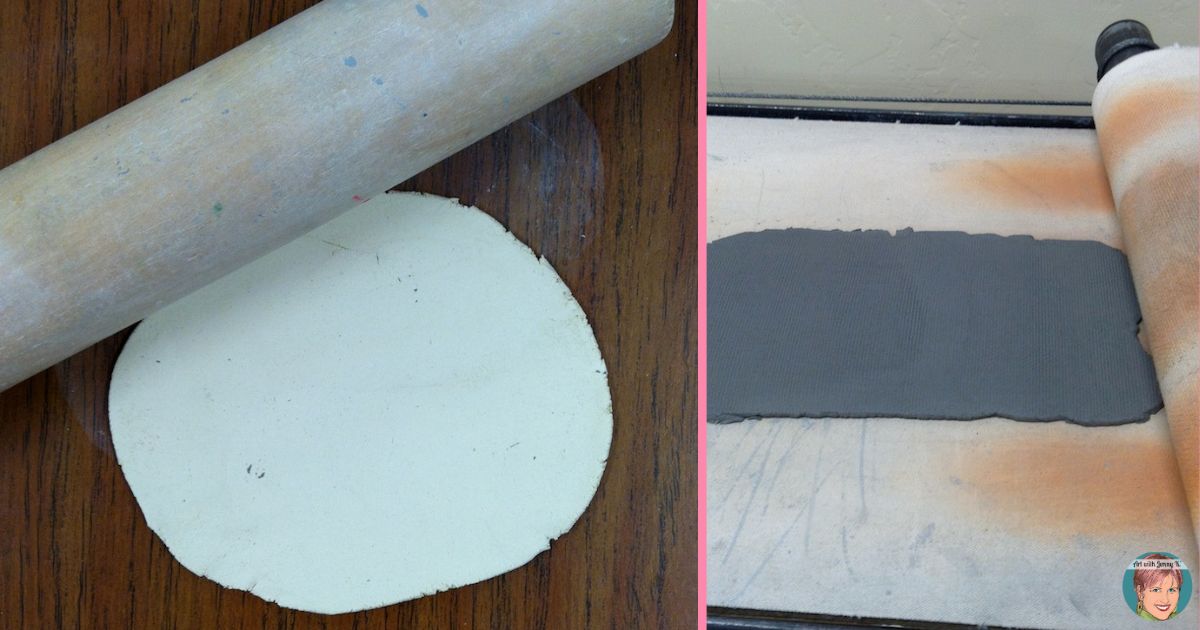
Once you have your templates made, you can then use them to start making the heart-shaped dish with your students. To do this, have each student roll out a piece of clay that is big enough for the heart templates. The rolled clay should be about 1/8 in. to 1/4 in. thick.
You can use rolling pins, slap rollers, or even the side of a jar. If you don’t have an easy way for kids to roll out the clay, you can always have them flatten it with their hands first and then share a rolling pin and pass it around (we don’t all have a class set of rolling pins—I get it!).
You will want to use a wire cutter or string to cut off clay from your clay brick.
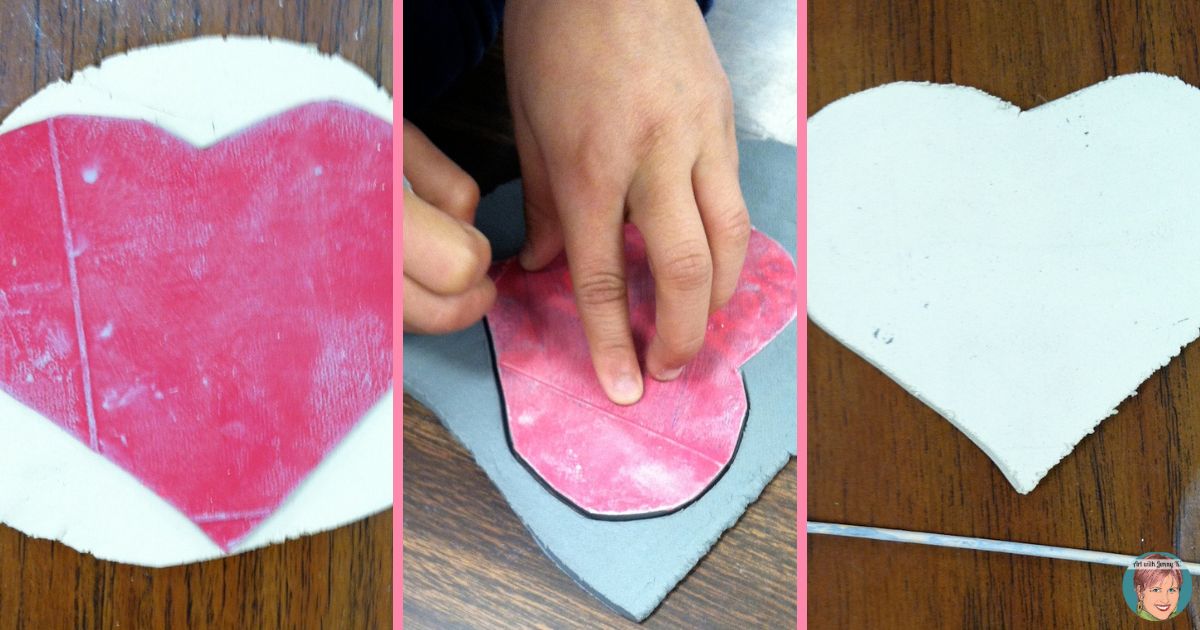
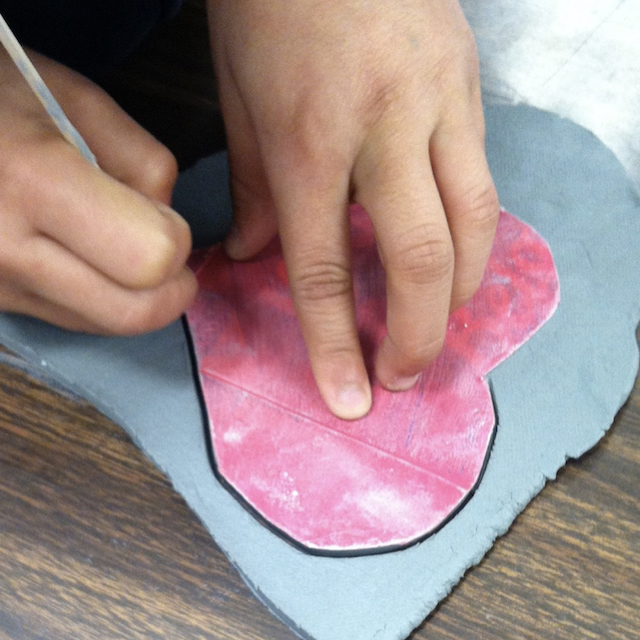
To “cut out” the heart-shaped dish, have your students place the heart template on top of the clay and trace around the outside with the wooden skewer. Press firmly to cut through the clay. Remove the excess clay to reveal the clay heart.
You can help kids make the connection to rolling out sugar cookies for this step. If you happen to be really fancy, maybe you have heart-shaped cookie cutters large enough for this project. If so, go for it! If not, then join me in using the super duper fancy wooden skewer stick to do the job!
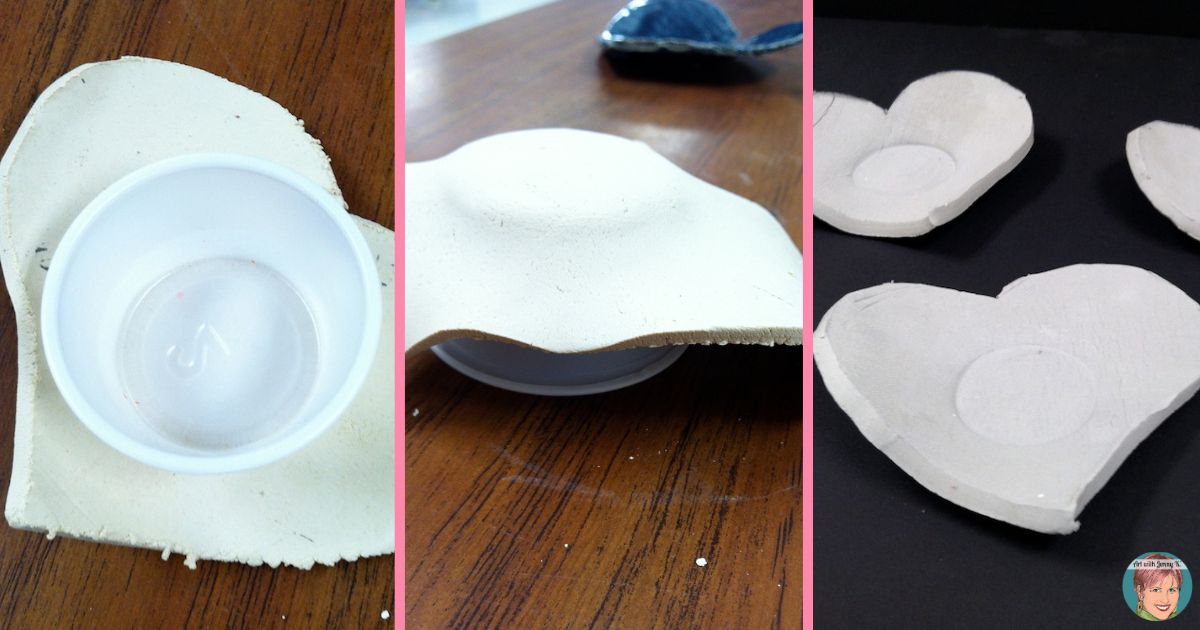
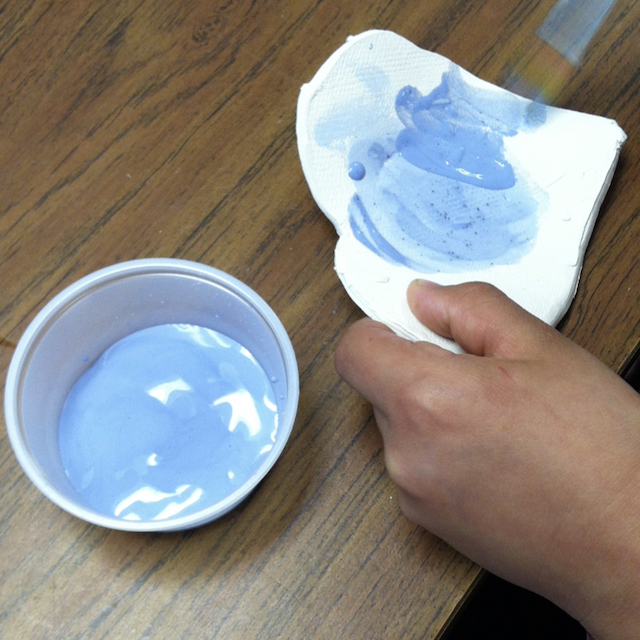
Gravity helps with this step! Place the plastic cup in the center of your heart. Don’t press too hard, but create a small impression of the circle from the cup into the clay.
Then, turn the clay and cup over so the heart dish rests upside down on the overturned cup. This is where gravity can do the work for us.
This is a good opportunity for students to scratch their initials into the bottom of the hearts with the wooden skewer so that you can keep track of which dish belongs to which student.
Then, let the clay dry in this position overnight. The cup will support the shape of the clay as it dries. Once dry, the clay hearts will easily release from the plastic cups when you turn them over.
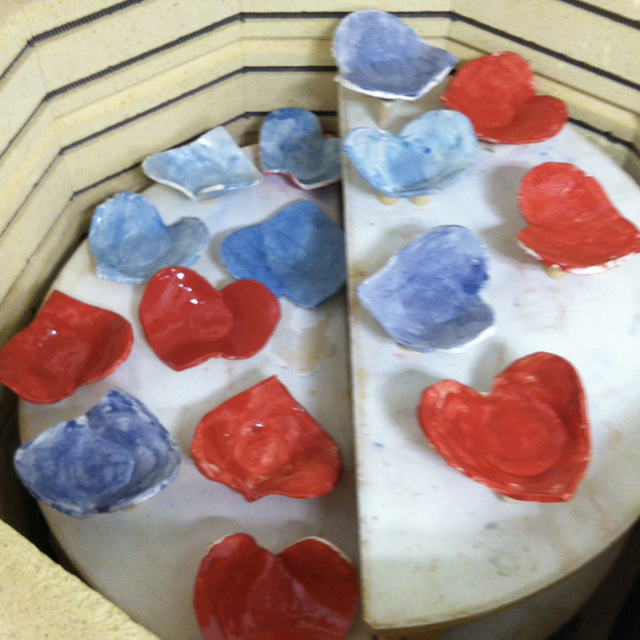
When your clay is dry, it will turn from a dark gray color to a light gray color. This stage is referred to as “leather hard.” When the clay is leather hard, you can load it in the kiln and run a bisque fire. If you have many hearts, it is okay to pile them on top of each other at this step. They will not stick together in the kiln (unless they aren’t dry to begin with). This helps make more room in the kiln. Follow the instructions from your kiln manual and the clay that you purchased to know what cone to fire your clay. I usually fire the clay I get at a cone 06. When the kiln fire is complete, and the hearts are cool, they will be hard and fragile and possibly a different color. The clay that I use turns white during the bisque fire.

Once your clay is dry, the kids can paint their heart dishes. I recommend using acrylic paint for this step. You don’t have to buy the expensive stuff. You can use cheap craft paint from the craft store. Acrylic has a plastic (flexible) finish, whereas anything with tempera has a chalky finish that cracks very easily.
Paint both sides of the heart with a solid base color. You can use any color you want. However, if you are planning to put any kind of pattern or design on top, I recommend using a lighter color.
I like to wax the bottom of the hearts so the glaze doesn’t stick to it, but this is optional. If glaze gets on the bottom, it can stick to the kiln shelf. You will need to refer to your glaze bottle instructions for painting. I use Mayco Stroke and Coat glazes, and they are very easy. I simply have the kids glaze everything two or three times.
When students glaze their heart dishes, the colors will be very dull—that is okay—don’t worry. Simply assure your students that the color will come out bright and shiny. If you have time, you can make small samples to show them what each color will look like. However, it’s actually more fun for them to be surprised when they get their hearts back, and they have gone from dull to shiny!
After students have glazed their hearts, I use a wet washcloth and wipe off the bottoms to be sure they don’t stick to the kiln. The wax burns off during the glaze fire. Again, refer to your glaze bottles to know what cone you should fire your hearts.

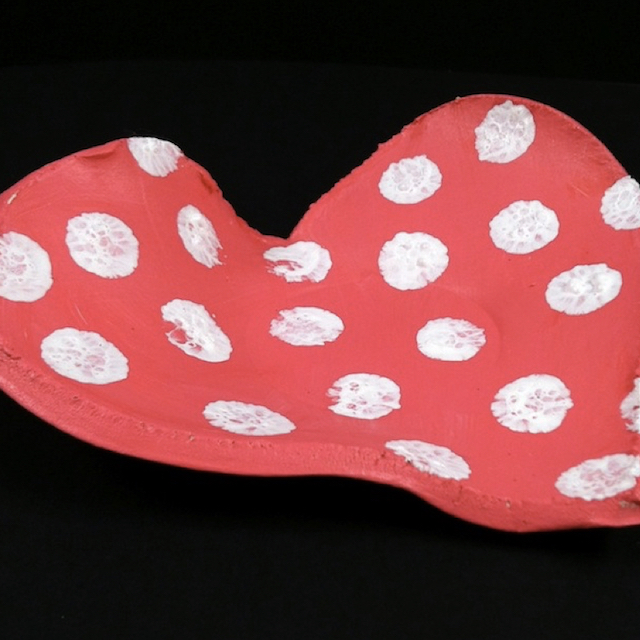
After the clay hearts have dried (coat one) then have your students finish them with decorations or patterns on top of the first coat of paint. Students can add patterns, write words or even use glue and glitter to make something really shiny and pretty (maybe glitter the edge?!).
The magic of glaze all happens when you fire the glazed hearts in your kiln. Students can never fully understand that the dull pastel colors they paint their hearts with will actually be bright and vibrant after this step. It’s magic for them (and for me!). After the hearts are glazed, place them on your kiln shelves and space them apart so they are not touching. They will get stuck together if they touch. Set your kiln to the cone setting instructed by the bottle of glaze you are using. Usually, cone 04 or 06. When the kiln fire is finished, let the hearts cool and then remove them.


Purchase on Amazon!
Purchase on Amazon!