
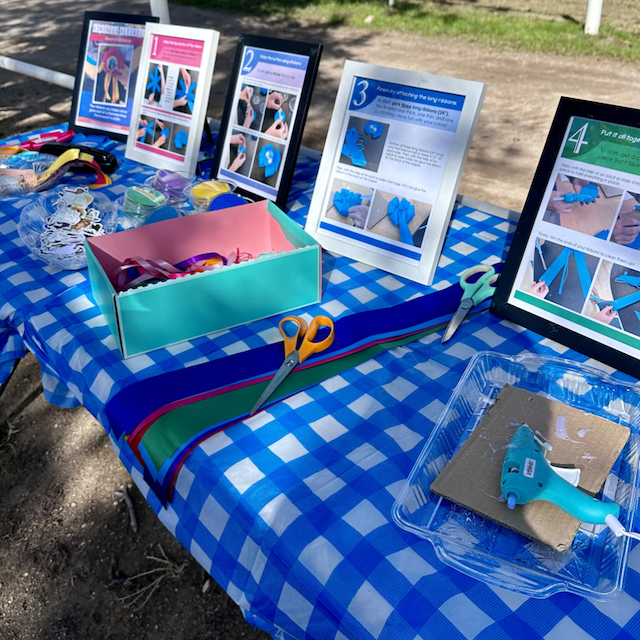
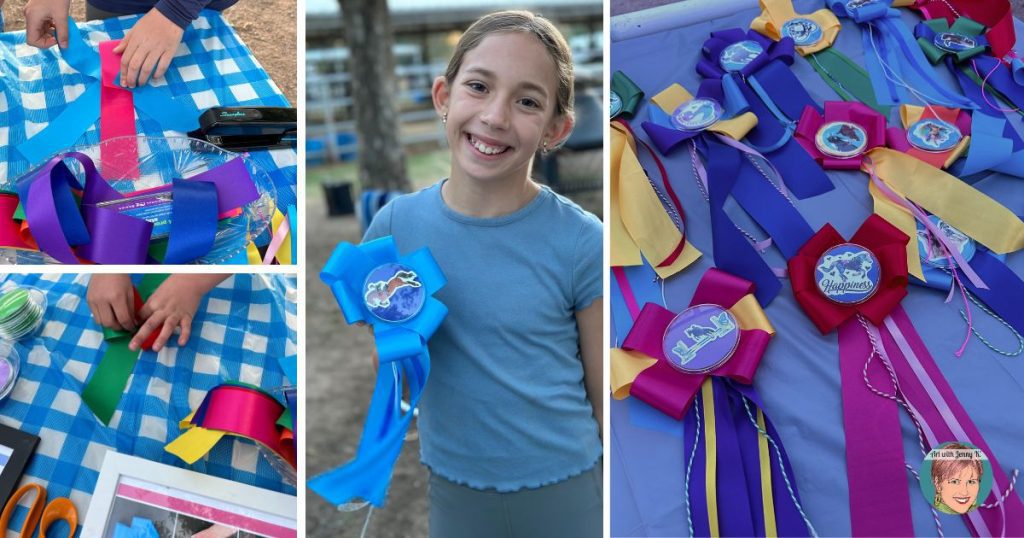
Each final award ribbon consisted of a button with a sticker inside, a 3 – 12″ piece of thick ribbon, a 1 – 24″ piece of thick ribbon, a 1 – 24″ piece of thin ribbon, a 1 – 24″ piece of cord/string and a piece of cardstock for the backer to hold it all together.
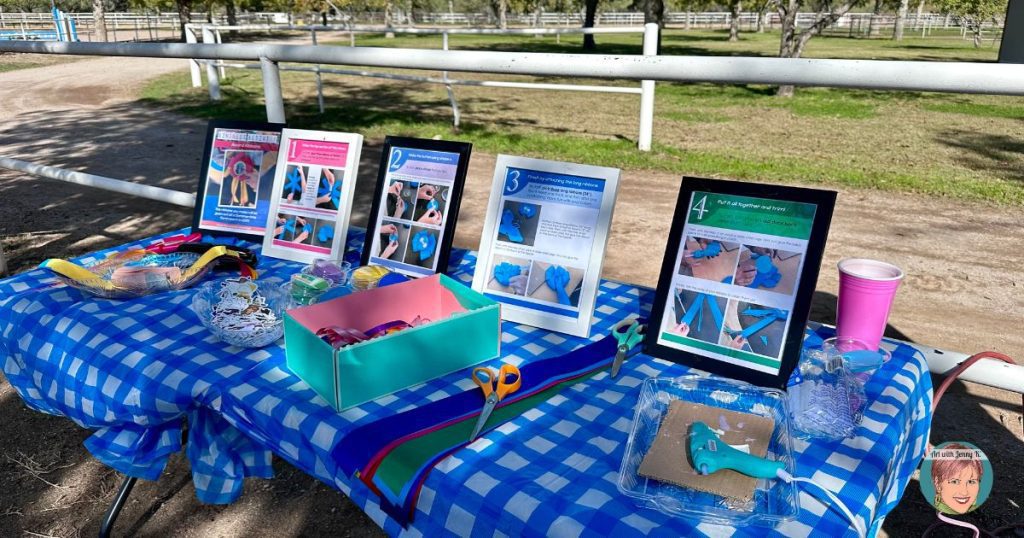
I did as much as I could ahead of time to make this project run smoothly the day the kids made their ribbons. I planned for 20 ribbons to be made (adjust your numbers based on how many final ribbons you need). To prepare, I did the following…
My daughter and the children at the barn made these ribbons for their equestrian event – however, I shared this project here on my site because I think it could easily be adapted for parents and teachers. Especially with how we designed the buttons – you could do just about anything!
Once you have prepared your supplies and set up for your students, then you can get started. I will explain each step so you can easily do this with your students! Don’t miss the photos of the kids making their ribbons at the end of this post!

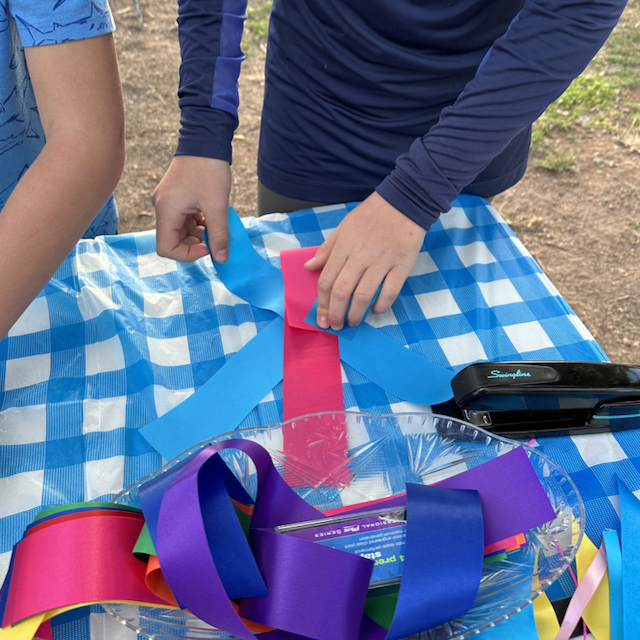
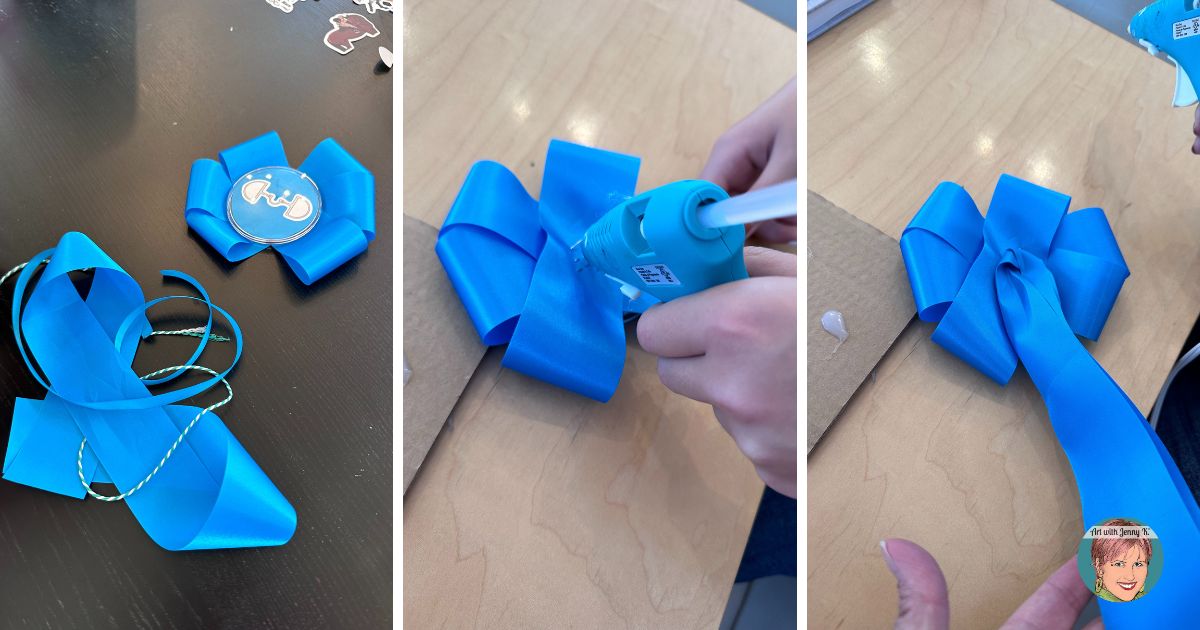
You’ll need 3 – 12″ pieces of thick ribbon to do this step. You can see the exact ribbon I used in the supplies list above. You can use one color for all three ribbons or use a variety of colors – designer’s choice!
First, arrange the pieces in a star shape and staple them in the middle to hold them together.
Then, fold each end into the middle – there will be 6 of these ends to fold into the center. Then, staple the middle to hold all the pieces together.

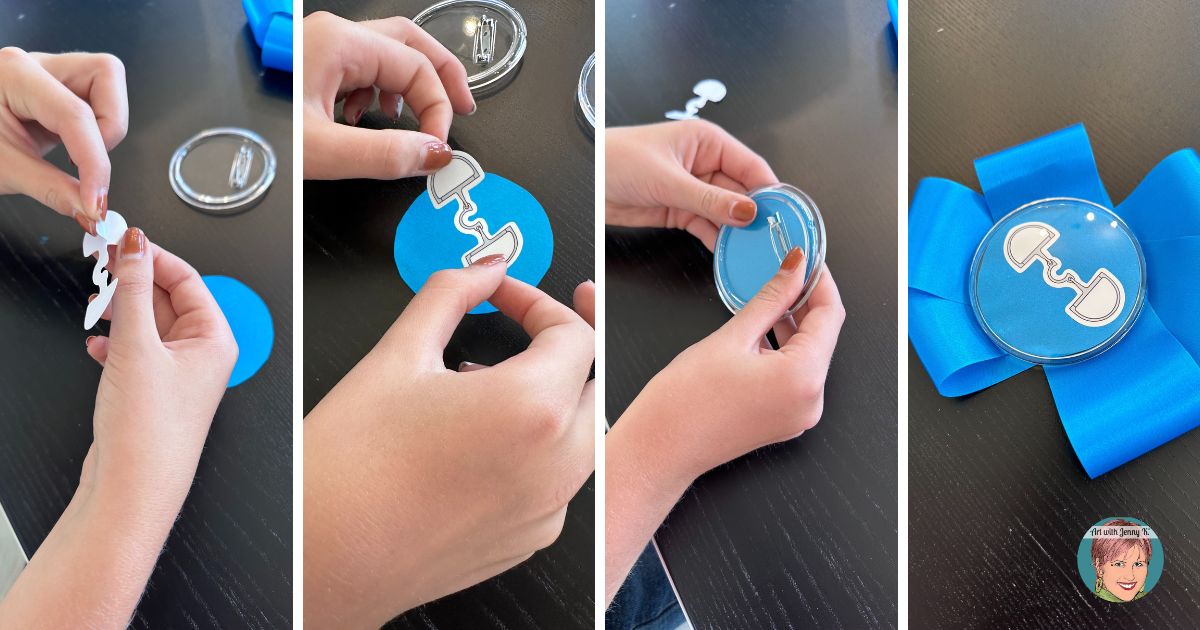
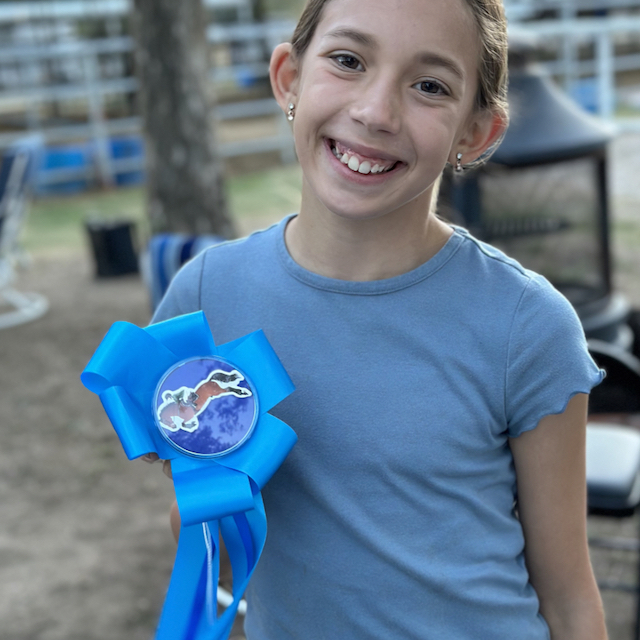
Now that the ribbon topper is created, you’ll want to make the button. To do this, I used a variety of fun horse stickers. However, you could draw your own pictures or cut pictures out of magazines for this. If you use stickers like we did, you’ll want to remove the back of the sticker first and place it on a circle piece of construction paper that fits inside the button.
Then, replace the back of the button and pin it to the ribbon topper (younger children might need help pinning to the ribbon so they don’t hurt themselves).
To start, pick three long ribbons (24″ long). You’ll need one 24″ thick ribbon, one 24″ thin ribbon and one 24″ string/cord. Have some fun with the colors! After you have gathered the three pieces then fold them in half so you have 12″ on each side. Then use hot glue to attach the long strands to the back of the ribbon. This step might need adult supervision with the glue gun (depending on age of students and the size of your group).
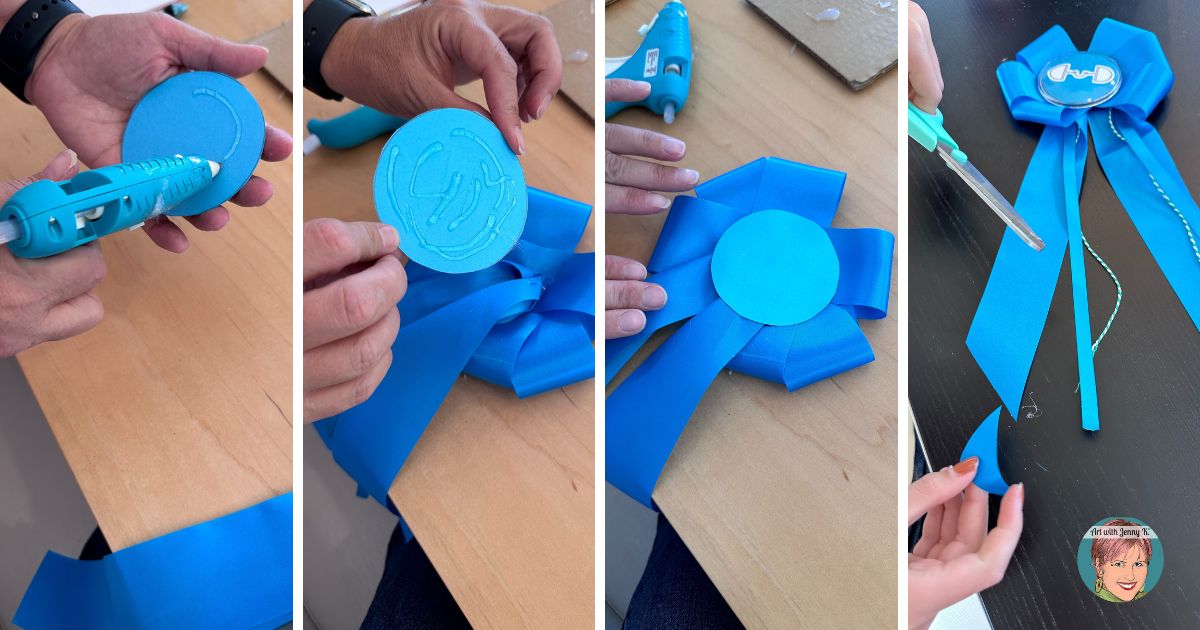
To start the last step of this DIY award ribbon project, you’ll want to cut a piece of card stock into a circle shape that is slightly larger than the button. Then (also with supervision), hot glue the back piece of card stock to the back of the ribbon – on top of the long strands you just added. Adding this piece will help hold everything together.
Then, trim the long strands to clean them up or angle them (if desired).
Optional: add a loop of yarn/string to the back so the final ribbon can be hung up.
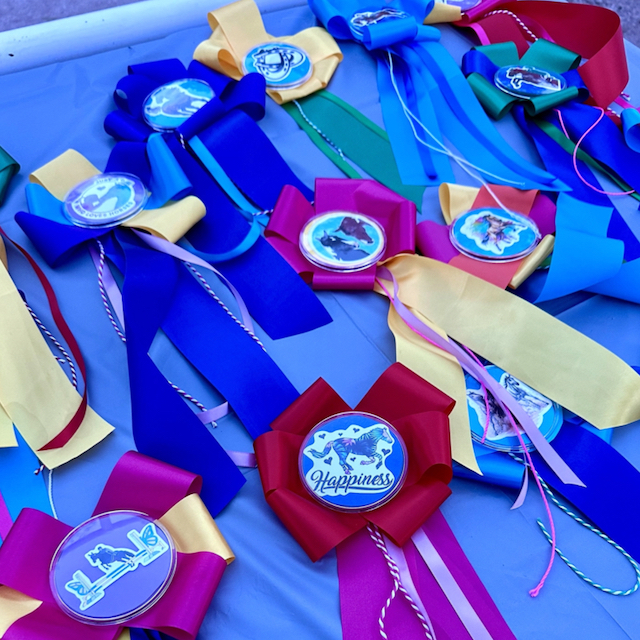
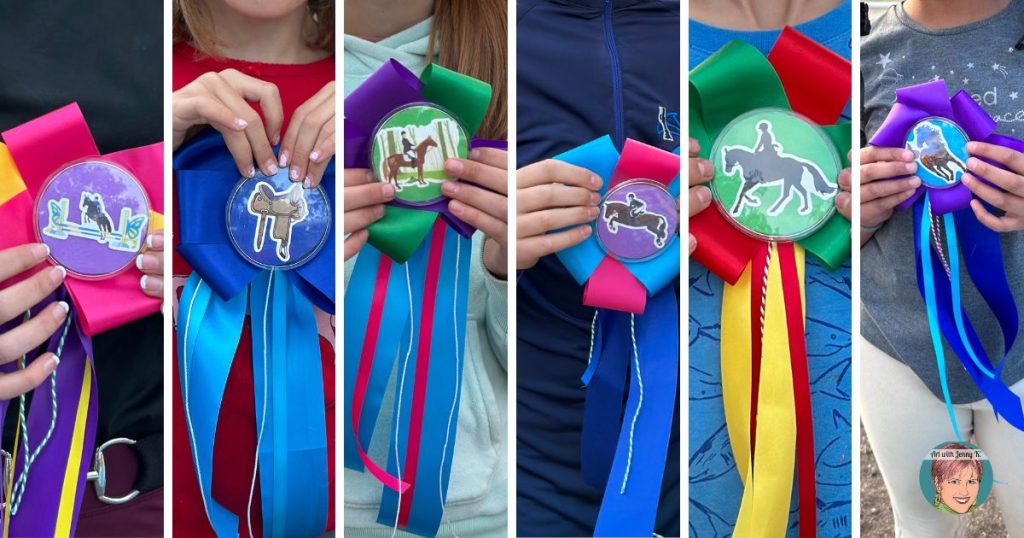
The kids and I made these ribbons, which were later used as prizes for a small barn school show. Here are some pictures of the kids making their unique ribbons.
If you decide to do this project, I’d love to see what you make. Please tag me on social media using @artwithjennyk and share the DIY award ribbons you’ve made!
Thanks for reading!
Jenny K.


Purchase on Amazon!
Purchase on Amazon!