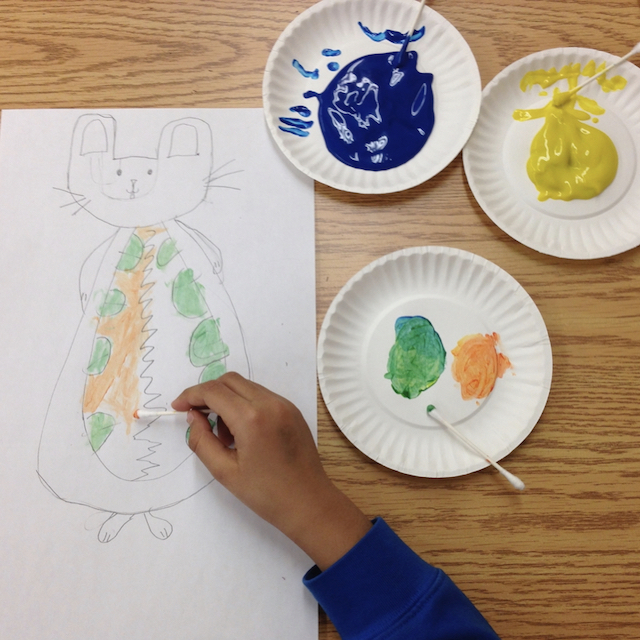
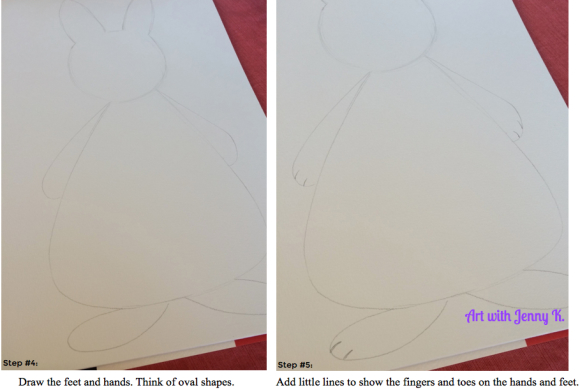
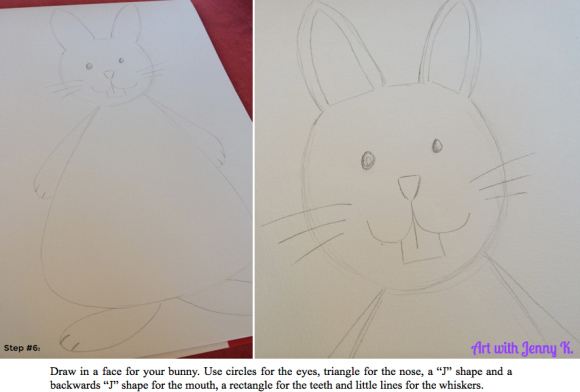
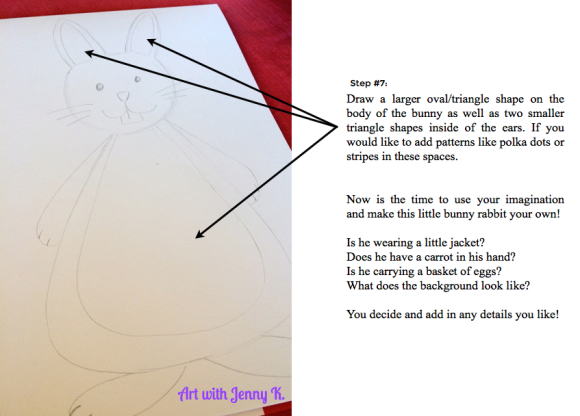
Follow the steps on the handout to draw your bunny rabbit. Try to think of everything as a basic shape (or parts of shapes). For example, the body is like a triangle with the top not showing and the corners rounded. Draw lightly so you can erase later if you need to.
The final rabbit will be in proportion to the size you draw the “U” shape for the head. If you draw the “U” very large, the entire bunny will not fit on the paper (which can be fine). If you draw it very small, the bunny will be very small. You will want to place the “U” slightly higher than the middle of the paper, leaving room above for the ears.

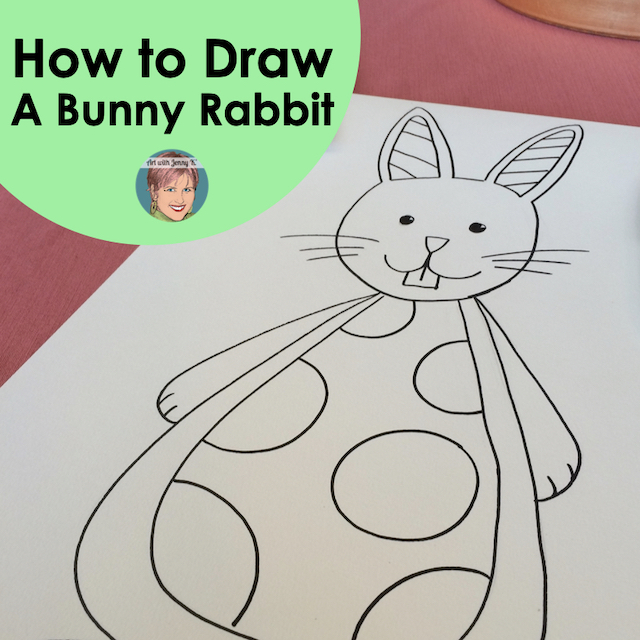
For a printable version of these instructions and the “How to draw a rabbit” handout, click HERE or on the image below.
Suggestions
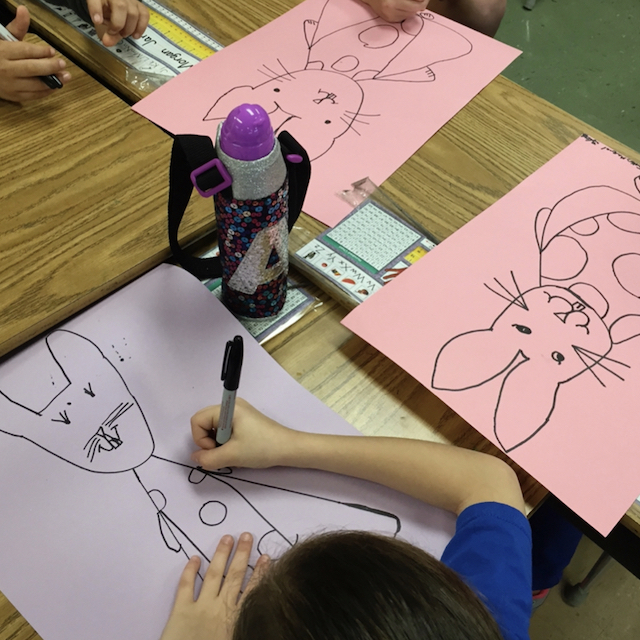
When I do any directed drawing activity with my students, I like to “sing” the part of the drawing and then let them sing along with me. It’s kind of like Simon says-but for drawing. So, for example, I might say in a singing (silly) voice, “Draw a U” as I draw the shape of the head. Then the kids would repeat what I just said and sing and draw along with me. This works really great for little kids because it keeps them on pace with you…and they think you are pretty cool for singing and being silly with them.
I always tell them to stay with me and remind them they can go back, erase and make changes at the end. Older students can use the handout or preview the video and learn that way—but they like it when you sing to them too. It’s silly and fun, and it’s very effective!
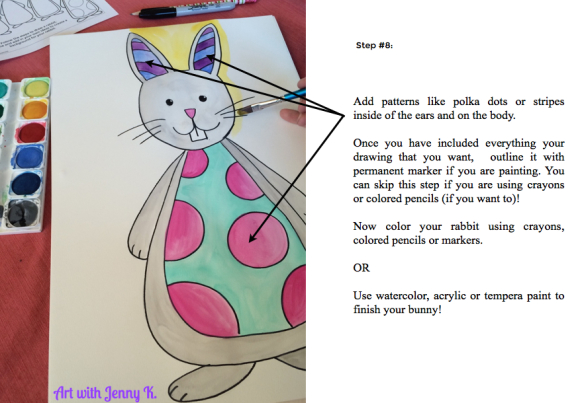
Here are the steps written out with pictures. Be sure to click HERE to download the handout and steps as a PDF.

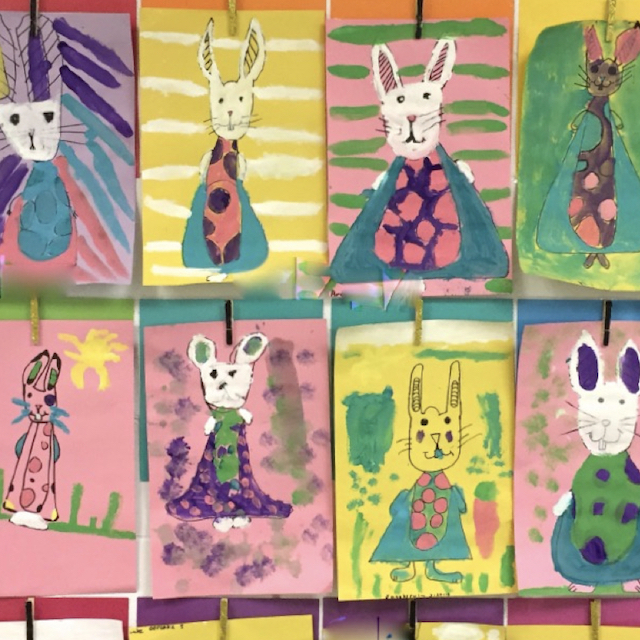
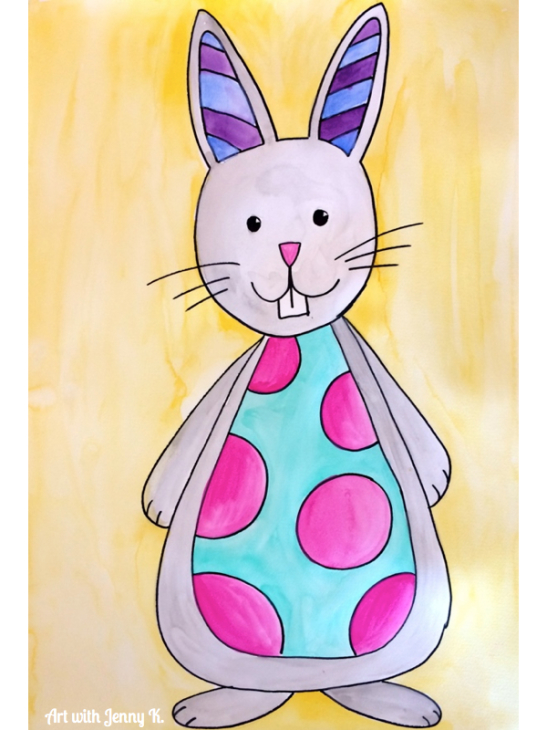
Hang up your final artwork for all to enjoy!
Thank you for reading and for making art with your kids!
Jenny K.