Art With Jenny K.

Holiday

Creating Animal Themed Relief Clay Tiles with Kids A Step-by-Step Guide

Relief Clay Tiles | Kid Made | Animal Themed

Category

Tags

Description

Creating animal themed relief clay tiles with kids is so much fun! Clay projects offer a wonderful blend of creativity and tactile engagement, making this project perfect for children (and adults, too). In this post, I’ll focus on how you can make these with children. You can do this at home or at school (I’ve done both). The final relief clay tiles are stunning—each unique, like the artist who made them.

Any supply linked to Amazon is an affiliate link. That means if you purchase it or another item after clicking on my link, I get a small (very small) percentage from Amazon. Thank you for supporting me in this way. It doesn’t keep the lights on, but every little bit helps. You can see my full disclosure HERE.


This project has extra credit! Check it out!

Supplies

Clay is fun, but clay is also messy, and there are a lot of moving parts. Depending on your teaching situation, you’ll want to prepare as much as possible.

If you are working one-on-one with your own child at home or in a mentoring/tutoring situation, you don’t need to do as much as you do if you will have 20+ students showing up all ready to do this project.

I like to pre-cut the actual tile pieces using a tile slab cutter. I found a special multi-slab clay tile cutter from Sheffield Pottery and demonstrated it on my Instagram page HERE. I pre-cut the tiles to the desired size and then put them in zip-lock bags to keep them moist. Of course, you can skip this and let your students cut out their clay tile themselves; that is totally up to you!

If you don’t want to pre-cut the clay tiles, you can use a rolling pin with adjustable thickness rings. In the supply section of this post, I linked to rolling pins with adjustable thickness rings. I don’t have the budget to buy many of these, but I do have one from Joseph Joseph, and it’s great for getting a consistent thickness. You can also see them HERE.

If you intend to hang the final tiles (like I did), then you’ll want to make sure you or your students put holes in the top corners before you fire the tiles.

Preparation

A Theme

Choosing animals as the theme is wonderful because it allows for so much creativity and exploration—and animals are awesome! Kids love animals, so it’s a win-win!

Ocean animals would be a great variation, and focusing on specific ecosystems or habitats could add another layer of educational value to the project and make it a wonderful art integration project.

Difficulty Level

This project isn’t hard—but it’s clay, so I can’t really say it’s “easy” either—or you know I’d be lying.

That said, it’s 100% worth the effort to create these animal-themed relief clay tiles with kids. The easy part is that I’ll walk you through what I did step-by-step so you can get started. Also, since I’ve done this project myself and have first-hand knowledge of how it works, you can always contact me through my contact page if you’ve read this post and if anything is unclear. I’m always happy to help.

I recommend this for middle school students. However, if you work with small groups or one-on-one, you could also do this with younger children.

Instructions

Creating relief clay tiles with an animal theme is not only a fun and rewarding activity but also a wonderful way to explore art and nature simultaneously. Whether you’re making these tiles solo or with a group, each piece will undoubtedly carry its own charm and personality—that’s the magic!

Please take your time, have fun, and experiment with ideas and techniques!

***I highly recommend that you make an example and test your supplies before you embark on a big project like this with your students. If there are any issues, you want to know about them early—not with a big group of children—right?!***

  1. Planning and Design

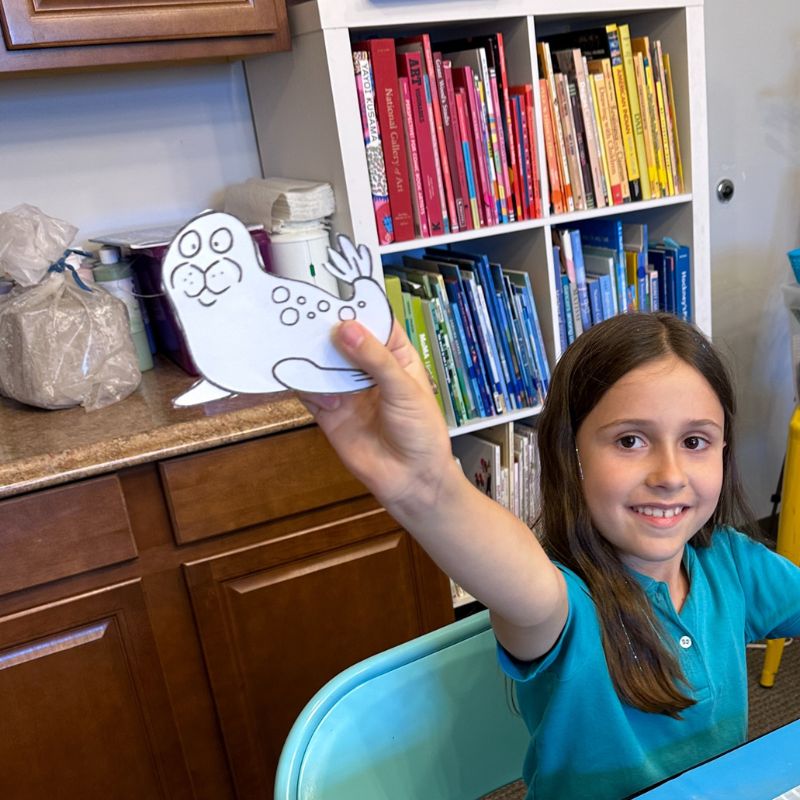
    Choose Your Animal: Decide which animals you want to feature on your tiles. This could range from woodland creatures to pattern-filled jungle animals or mythical creatures like dragons and unicorns.

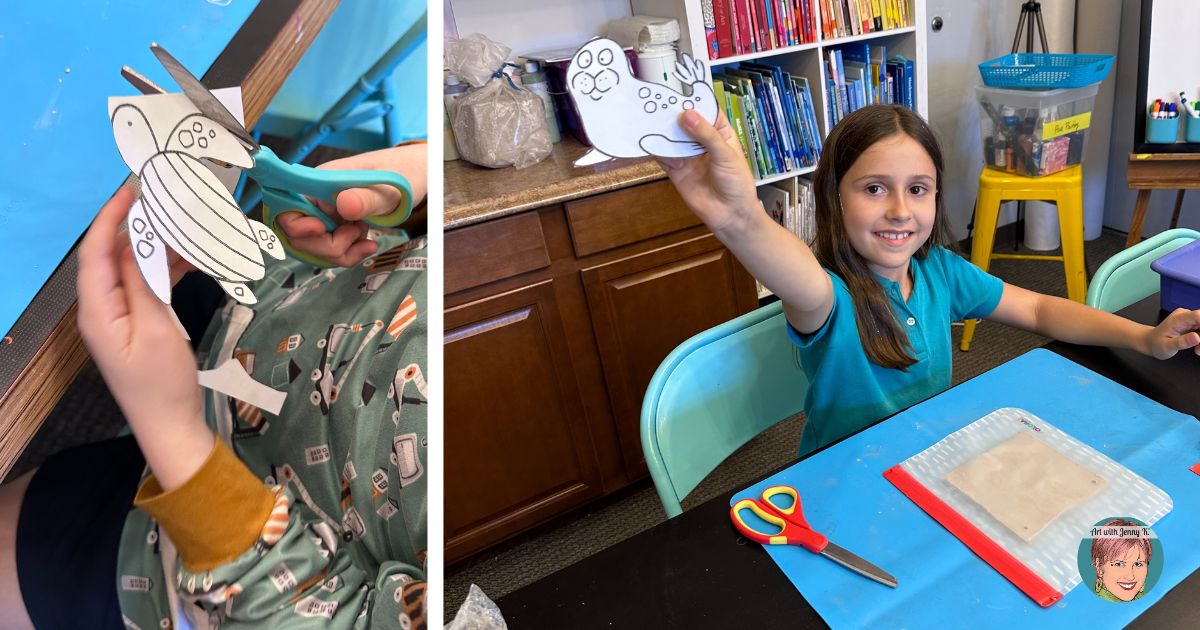
    Sketch Your Designs: On a piece of paper, roughly sketch out the shapes and details of each animal. This will serve as your guide when working with the clay. Once your design is sketched, you can cut it out to make a shape you can trace around.

    I love to use this book: How to Draw 101 Animals, by Barry Green and Dan Green.

    TIP

    To make this even easier, you can copy images of animals from books and use a copy machine or printer to enlarge or reduce them to the size of your tile.

  2. Prep the Clay and Cut out the Animal

    Knead the Clay: Before rolling it out, knead the clay to soften it and remove any air bubbles. If you know how to wedge clay you can demonstrate that process to your students. If not, that’s okay because you’ll be flattening this clay in the next step – this will also help remove any air bubbles.

    Roll Out the Clay: Use a rolling pin to flatten the clay to your desired thickness. Aim for an even thickness across the entire sheet. See the tip below.

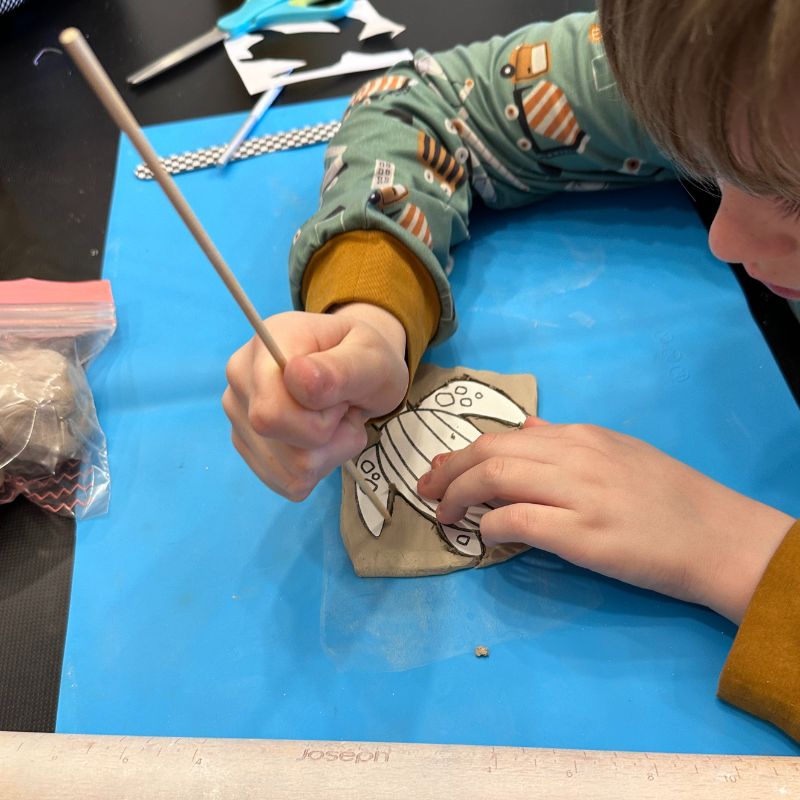
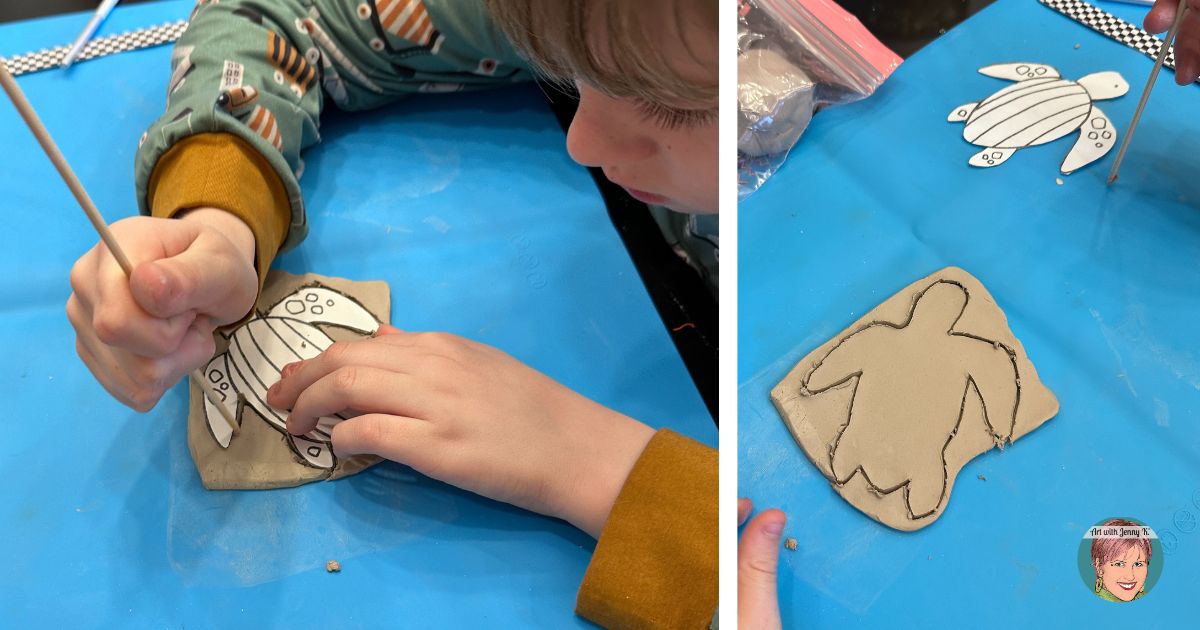
    Cut out the Animal Shape: With your sketch as a template, use a wooden skewer to cut out the shapes of your animals from the clay sheet by placing the template (already cut out) on top of the clay and cutting around it.

    TIP

    I often liken the process of rolling out the clay and cutting out the animal shapes to making sugar cookies. Many kids are familiar with this method, and when they see the similarity, they realize this new project isn’t as difficult as they might think. It’s important to roll out the clay, turn it over, and flip it repeatedly so it doesn’t get smashed into the table (again, just like cookies).

  3. Attach the Body to the Clay Tile

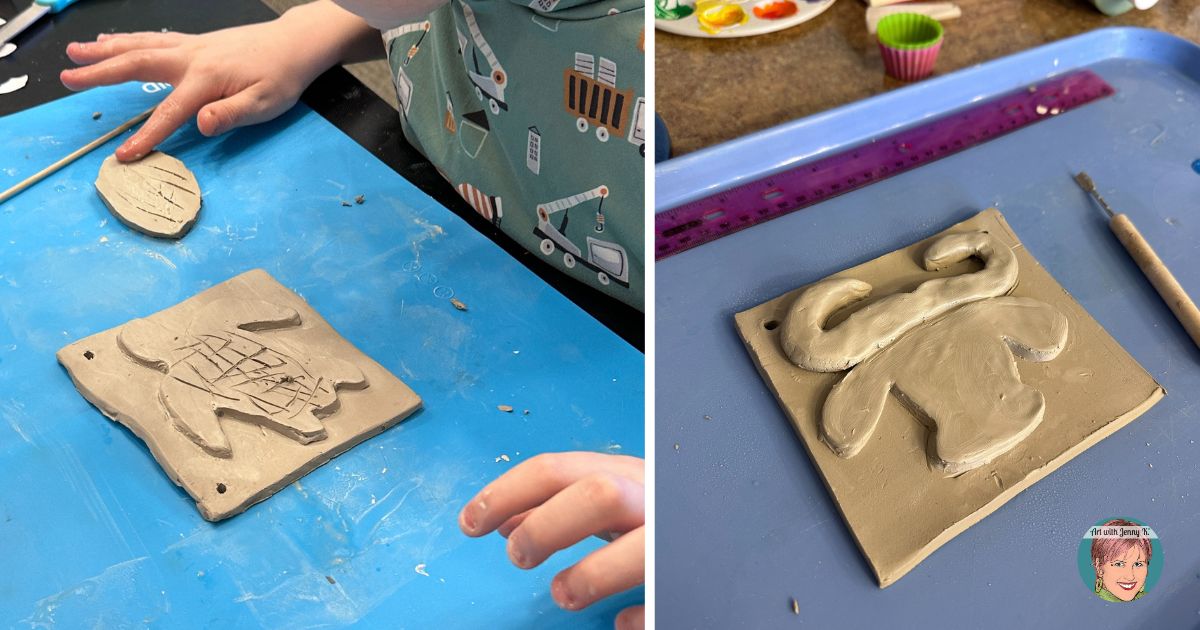
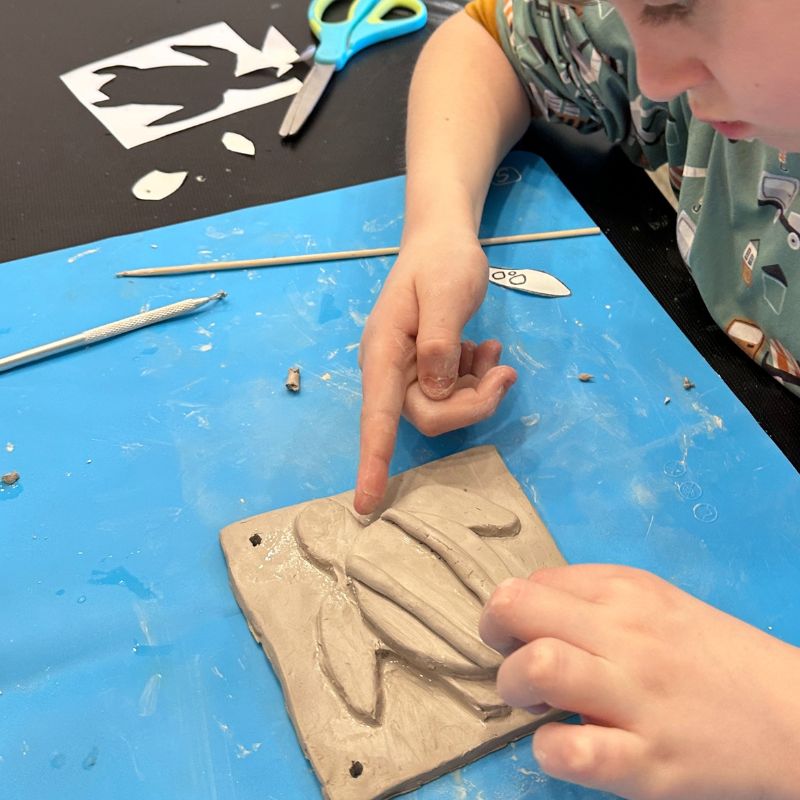
    Attach the clay animal to the clay tile: After the main part of the animal is cut out, you can attach it to the clay tile. It is very important to use the “score and slip” technique to attach the animal shape to the clay tile.

    To score and slip, create little lines/marks with your wooden skewer and rub a little water onto the area, wetting the clay. Then, the two pieces of clay can be attached. It’s important to score and slip both sides of the pieces you are trying to attach to make a stronger bond/hold.

    *Technically, “slip” is liquid clay, but for a project this small, students can wet the clay simply by putting their finger in water and rubbing the areas they want to attach.

    TIP

    Don’t Forget: If you intend to hang the final tiles (like I did), you or your students should put holes in the top corners before you fire the tiles.

  4. Add Details

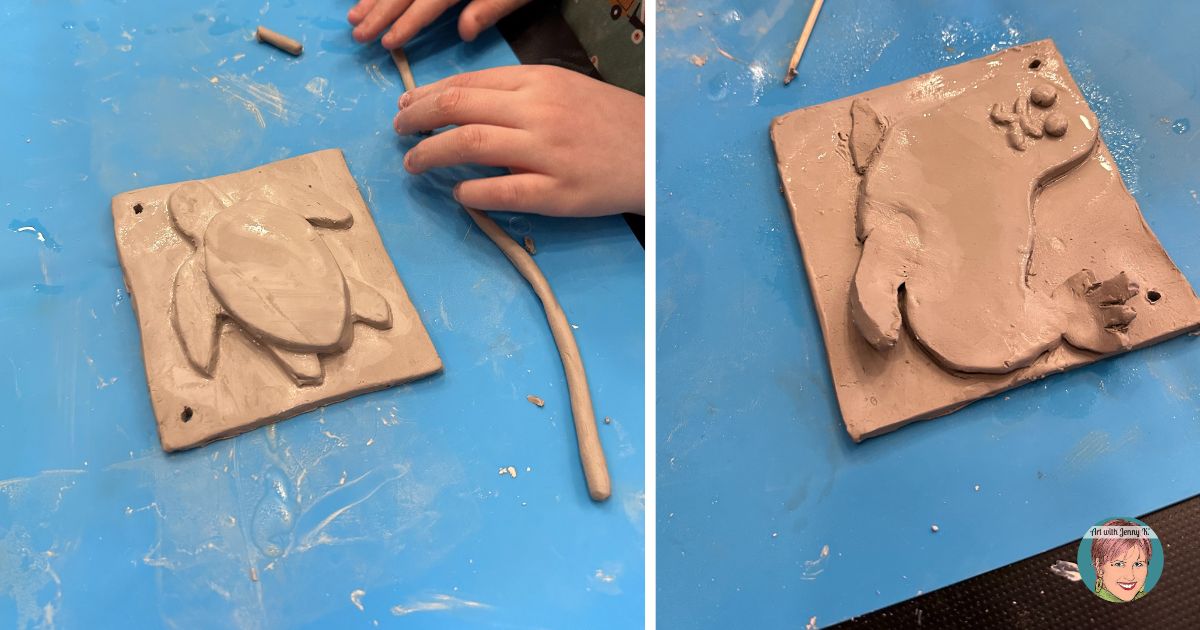
    Carve or Sculpt Details: Use sculpting tools or even toothpicks to add finer details like fur, scales, or feathers to your animal shapes. All details attached to the animal, such as eyes, fins, and horns, should be attached using the score and slip method described above.

    Adding Texture (optional): To add texture to your tiles, press stamps, textured rollers, or natural materials gently onto the surface of the clay. You can even use your wooden skewer to add simple texture—just be careful not to press too hard.

  5. Kiln — Bisque Fire

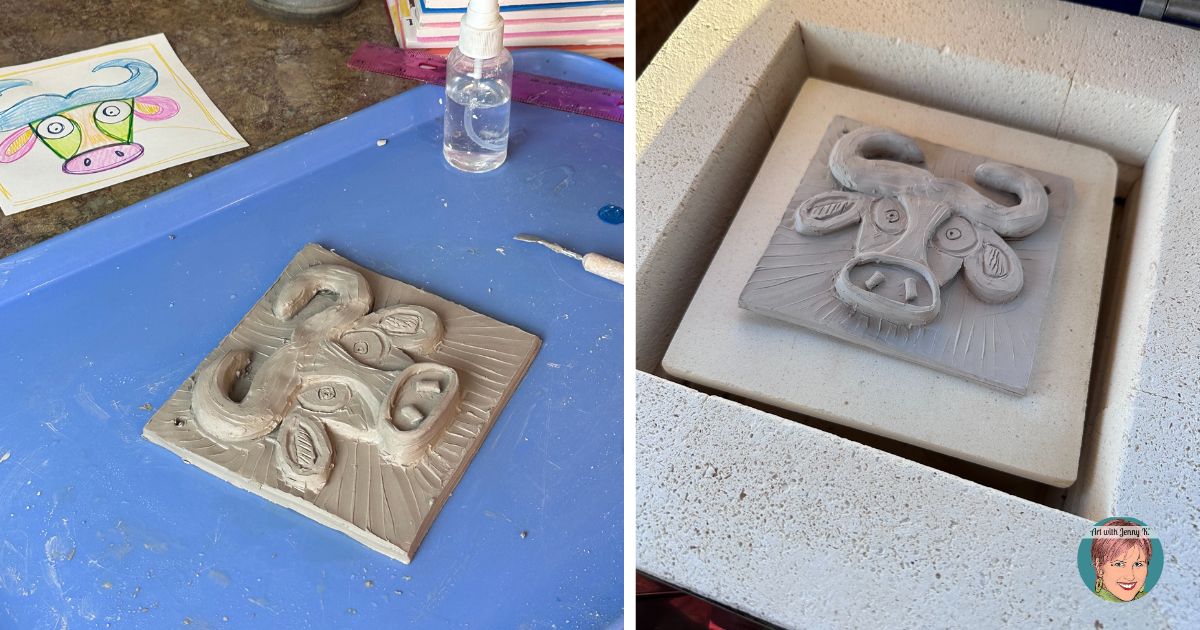
    Allow tiles time to Dry: Once the clay tiles are complete, you’ll want to let them dry to “leather hard.” This means that the clay is mostly dry, and the clay has become stiff (it’s still very fragile; please be careful).

    Warping and cracking can occur if the wetness of the clay tile and the animal attached to it is too different. For this reason, it’s important to keep the clay tile wet (sealed in a zip-lock bag) until you are ready to attach the animal to the tile.

    Fire in the Kiln: After a day or two, the tiles will be leather-hard and ready to put in your kiln. Please see the instructions in your kiln manual for firing your clay (also based on the type of clay you use). I fire my clay to bisque 06.

    TIP

    While the final tiles are drying, I spray them lightly with a water bottle every few hours to help them dry slowly. I live in Arizona, and we don’t have a lot of humidity, so this could be different depending on where you live.

    Spraying with a water bottle slows the drying process and helps prevent the clay from drying too quickly and cracking.

  6. Kiln — Glazes

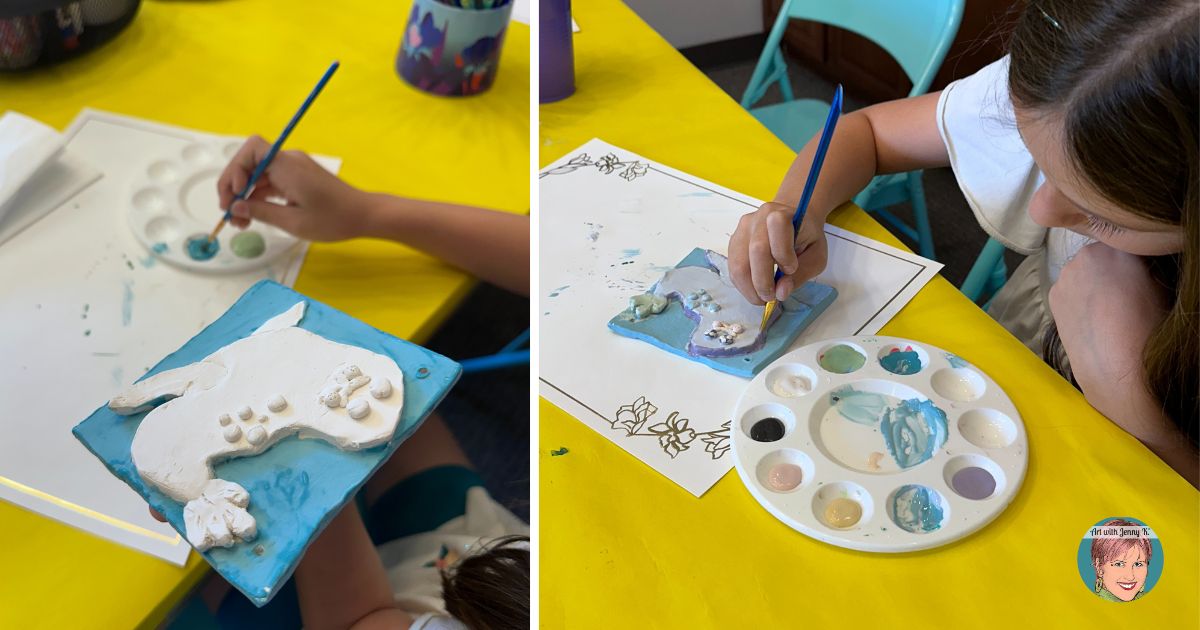
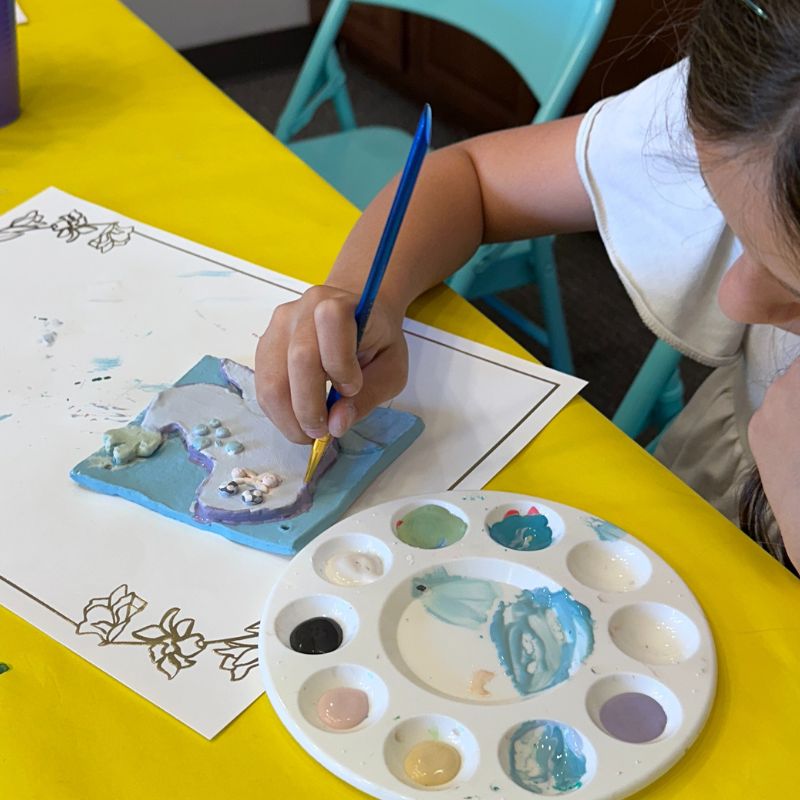
    Once the tiles have been fired in the kiln, you can take your bisque-fired clay out and have your students glaze it. Again, all supplies vary, so you’ll want to follow the instructions on your glazes to finish this step.

    Relief Clay Tiles | Kid Made | Animal Themed

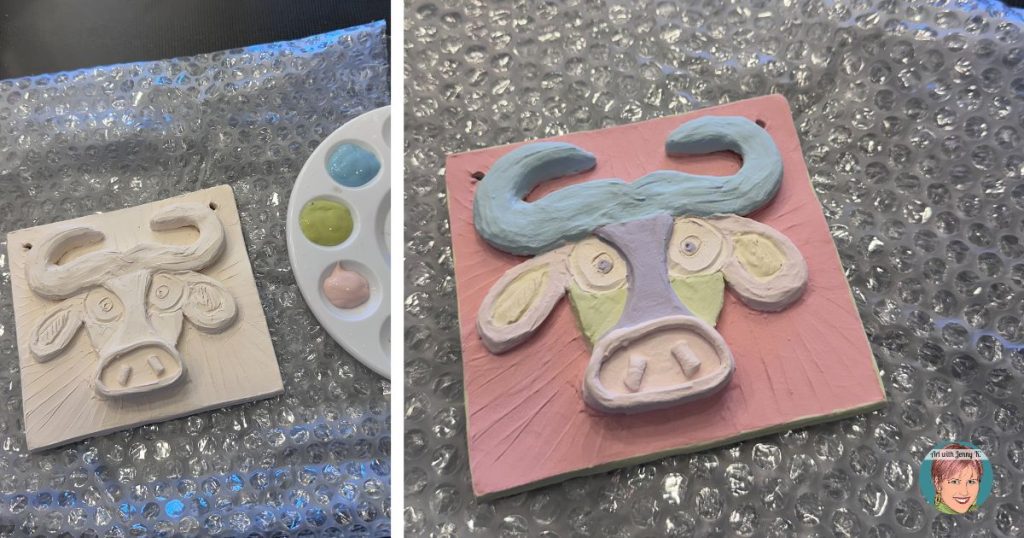
    I like to use Stroke and Coat glazes by Mayco with my students because we can add three coats and be done. However, remember that if a student wants an area to stay white, you’ll need to add a clear glaze at the end before you fire the tiles, or the white areas will remain “scratchy” and won’t be shiny like the rest of the tile.

    If there are glazes on the back of the tiles, they will stick to your kiln shelf. Add clay pointed stilts under the tiles to keep them from getting stuck.

  7. Display & Enjoy!

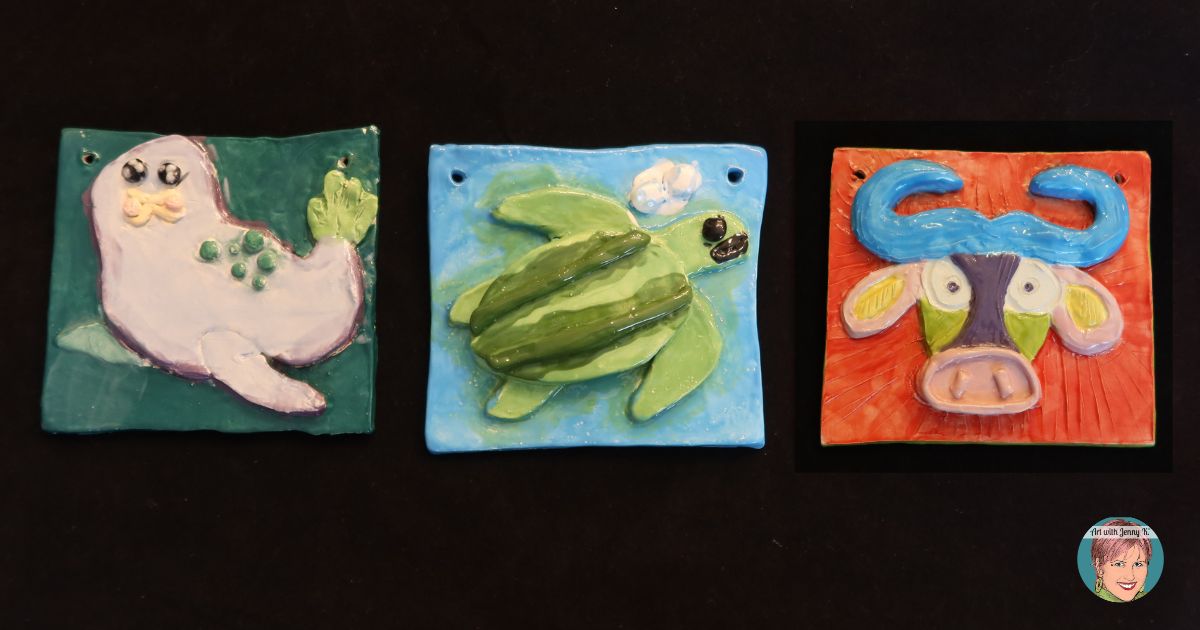
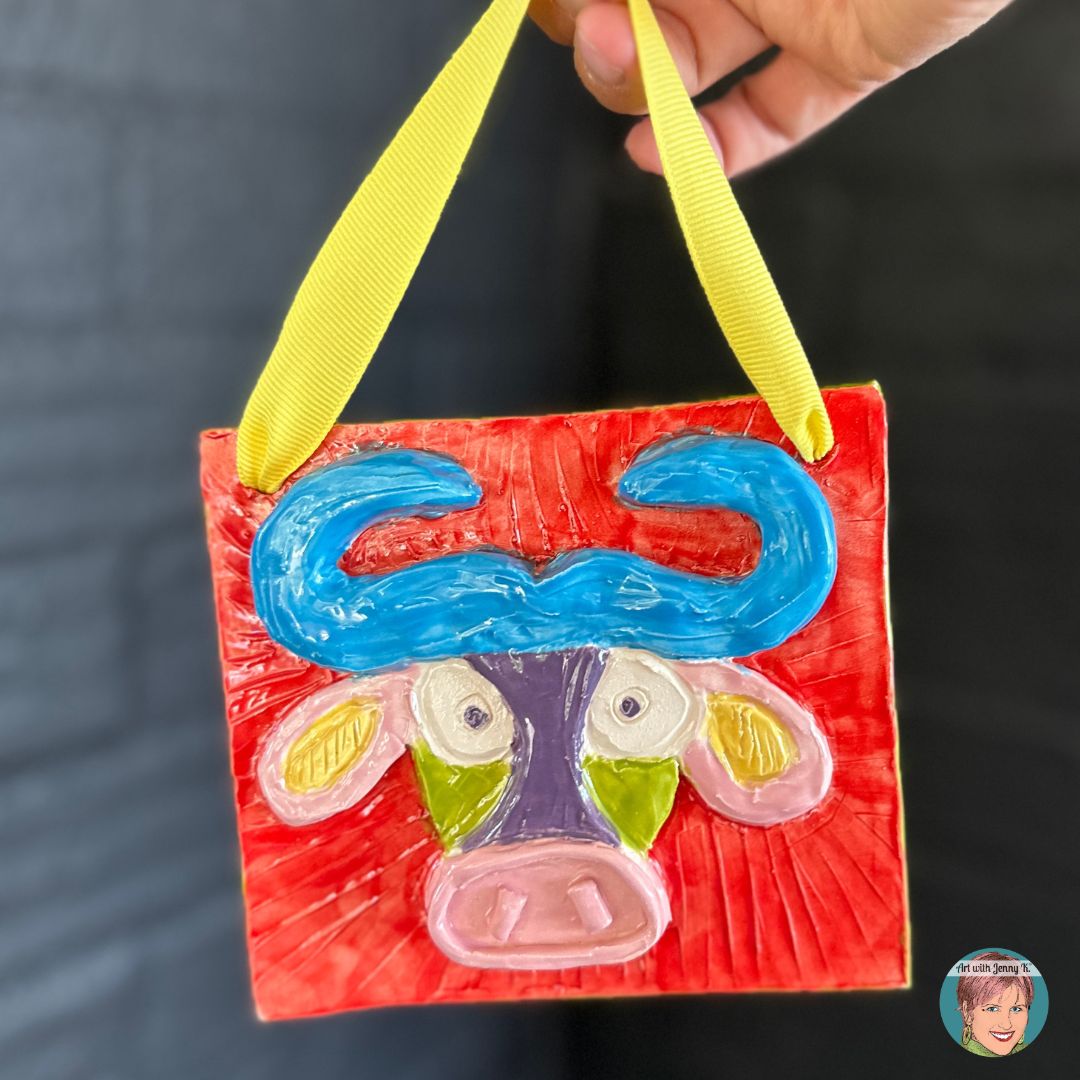
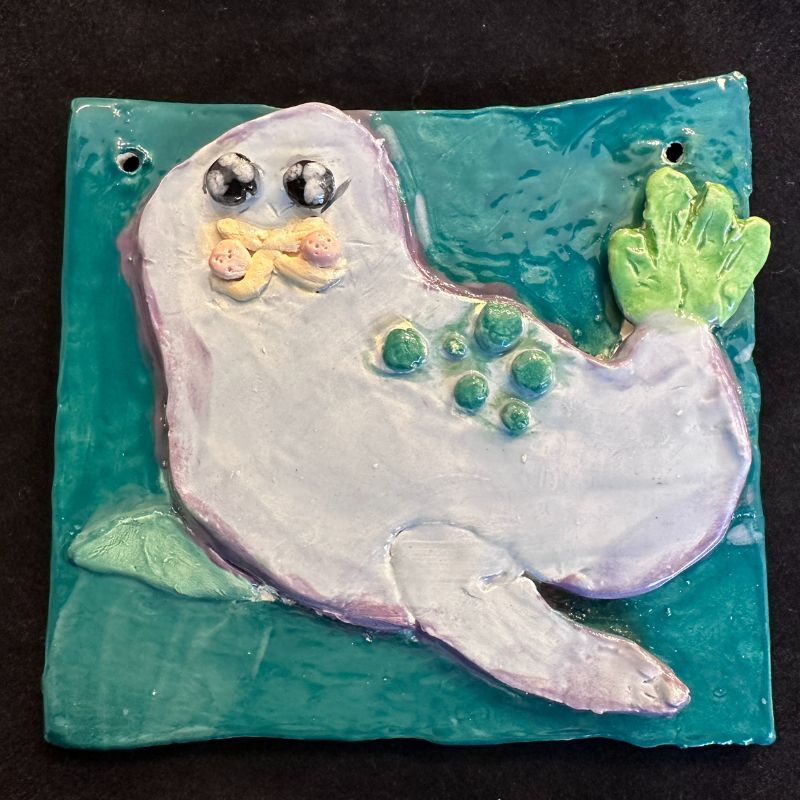
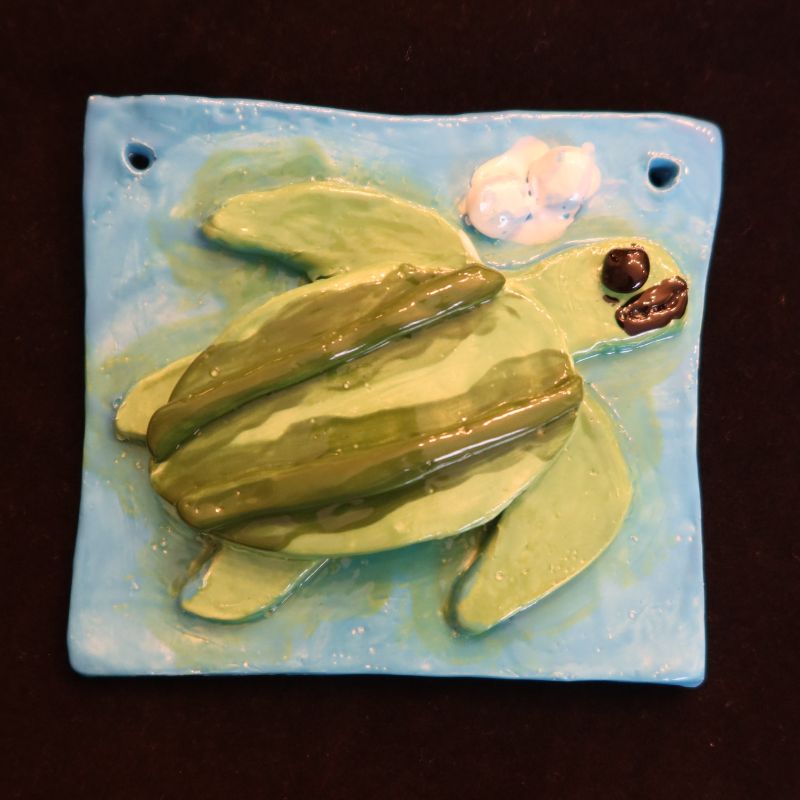
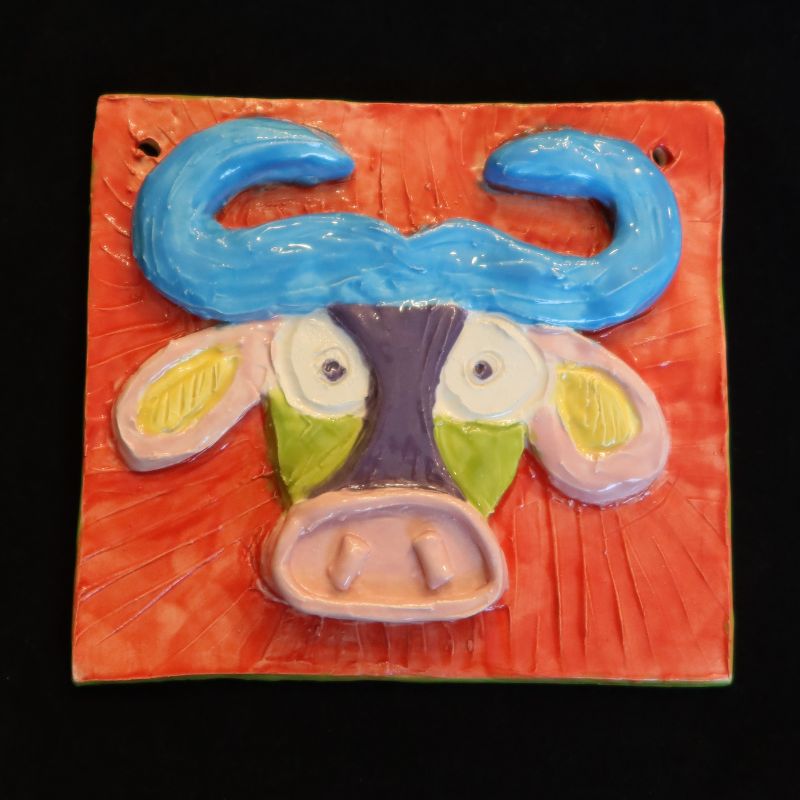
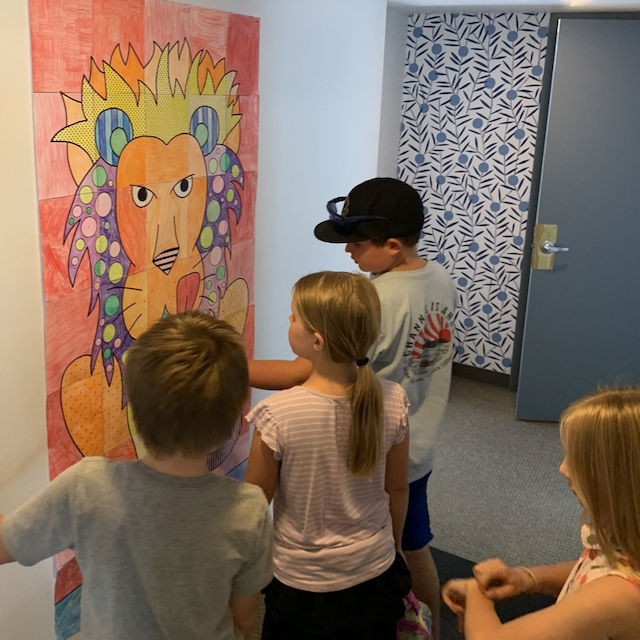
    Your animal-themed clay tiles are now ready to be displayed for all to enjoy. It’s wonderful when individual students can make something as beautiful as these animal themed relief clay tiles. It’s made even better when they can see them displayed with their peers and look at all their classmates’ lovely creations.

    Children love to show off their work and point out which one they did. If you can, display these in a semi-public (but safe) place where many people can celebrate your student’s hard work with you!

Please share!

If you are doing (or did) this project, please tag me on social @artwithjennyk or submit photos here on my website so I can celebrate with you and your students.

Pin It!

Extra Credit!

Lion Activities for Kids

When you work with clay, kids will finish at different times. For that reason, I like to have an easy finisher project they can work on as they complete their tiles. My lion collaboration poster makes a great activity for your students to do as they finish their individual tiles.

Lion Collaboration Poster: The final poster makes a great classroom focal point and a lasting example of collaboration for your students—not to mention that it makes a bright and beautiful display for your door, bulletin board, or hallway!

There are two options, so you can choose what works best for you and your students. Both options are very easy. Each student is given one page of the poster to color. Once all sheets are colored and cut out, they are then assembled to reveal a large collaboration mosaic/poster/mural of Pop Art Lion.

Poster #1: The colors have been assigned. Students will follow the colors assigned using a color key on each page.

Poster #2: The colors have not been assigned. Let your students color the poster whatever colors they want (or that you assign).

I also have a Sea Turtle collaboration poster if, by chance, you are doing ocean-themed animals.

Purchase Extra Credit Add-on

$5.99
Submit Your Extra Credit for a Chance to Be Featured!

Share & Save!

Out of the box ideas to your inbox!

Sign up today to receive Art with Jenny K’s eBook, The Benefits of Directed Drawing for Kids, and gain access to the AWJK Subscriber Library of freebies!

More Tested & Approved Projects

Integrate art into your classroom!

Sign up for my newsletter and get out of the box ideas to your inbox!

Fill out and submit this form for a chance to be featured on ArtWithJennyK.com!

Grade
Grade
Category
Category