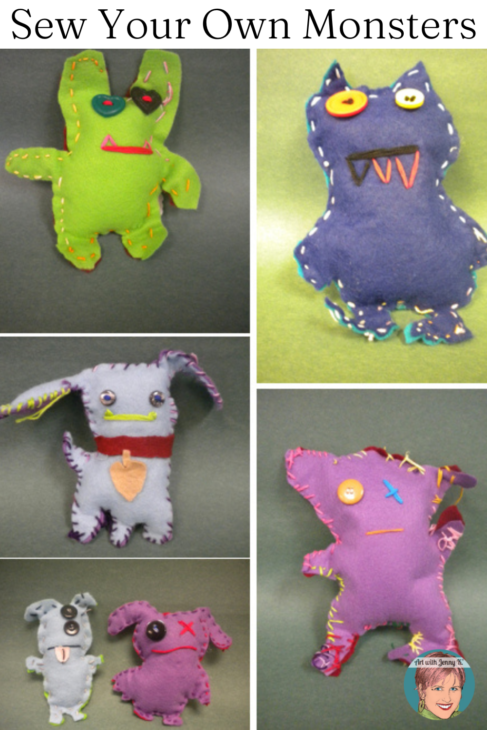
So I dug up a few pics from the archives and threw them up on FB. A few teachers asked for the how-to, so without further ado here you go!
Kids love to sew but boys can sometimes be turned off by things that seem too “girly,” even though we all know every boy should be able to know the basics of sewing, if for no other reason than to sew a button back on his shirt when he’s a grown man! I found that by teaching the kids how to make monsters or “Ugly Dolls” then the boys were “safe” to have fun with this. Not one boy complained about this project.
You Will Need…
-
-
- 8 1/2″ x 11″ paper
- Pencils
- Embroidery thread (variety of colors)
- Sewing needles & straight pins
- Craft felt (variety of colors 8 1/2″ x 11″)
- Buttons
- Pillow stuffing
-
The Steps
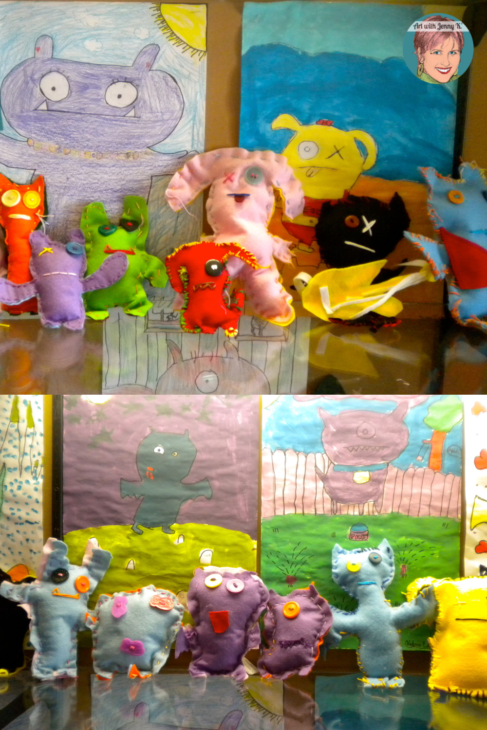
1. Talk to the kids about designing an “Ugly Doll” or monster. Show them pictures from the web and have them brainstorm things they see in common, like only 1 eye or mismatched features. Use Where the Wild Things Are as an introduction to make a connection to children’s literature. I created these monsters with fourth and fifth-grade students.
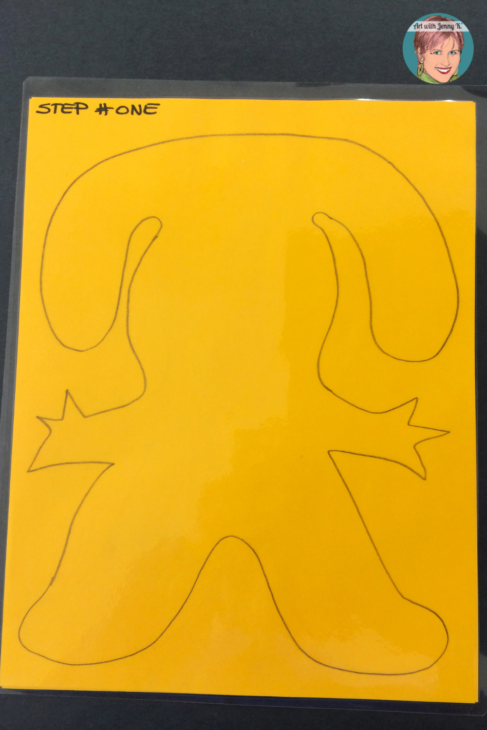
2. Have students design a monster on paper (8 1/2″ x 11″). Remind them that this will be a sewing project so the details should stay very minimal. Basically, you are looking for the main outline of the doll so you can use this as a pattern and it should fill as much of the paper as possible.
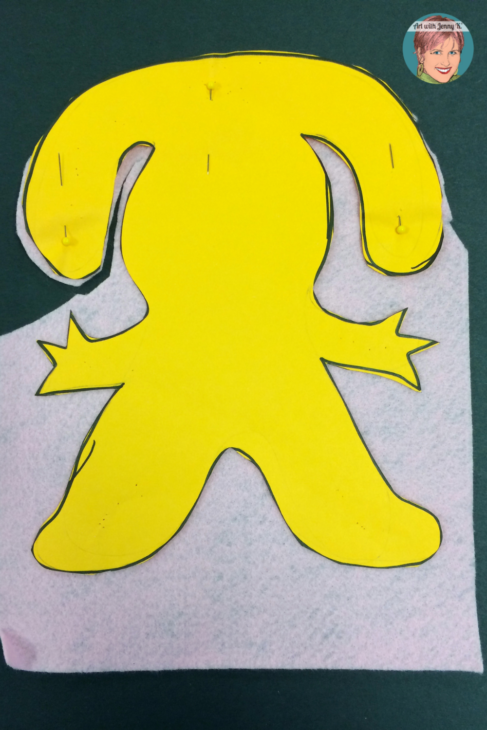
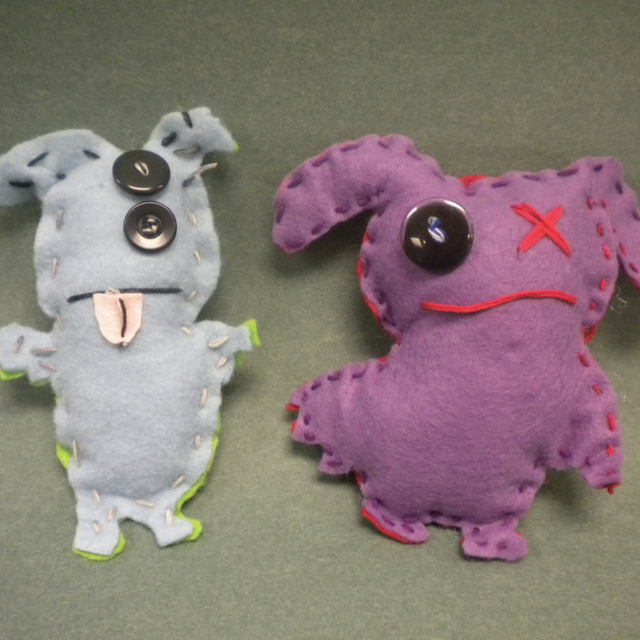
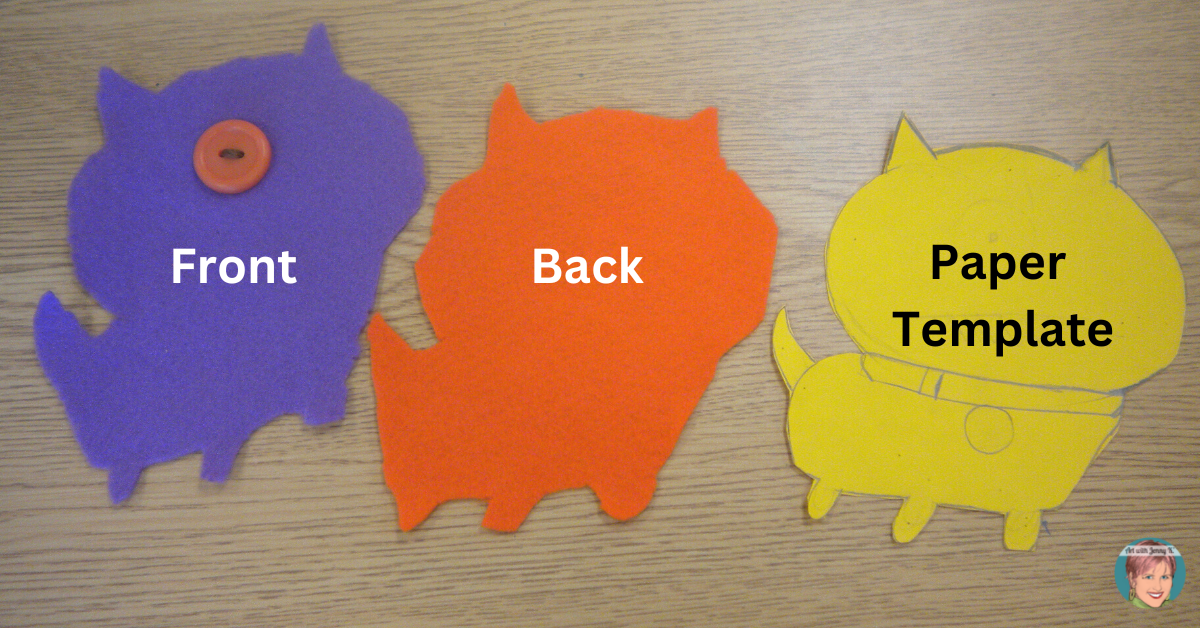
3. Once the design is made, have students cut out their paper design to serve as a pattern. They should then pin it to their first piece of felt. They will cut one side of the monster and then pin that to their second piece of felt. It’s nice when the front and back are different colors but of course, they don’t have to be.

4. Once the sewing “phase” begins, I like to give kids some scrap paper and let them practice a few stitches. I show them a few ways they could sew and let them play around before the real sewing begins. This builds their confidence a bit.
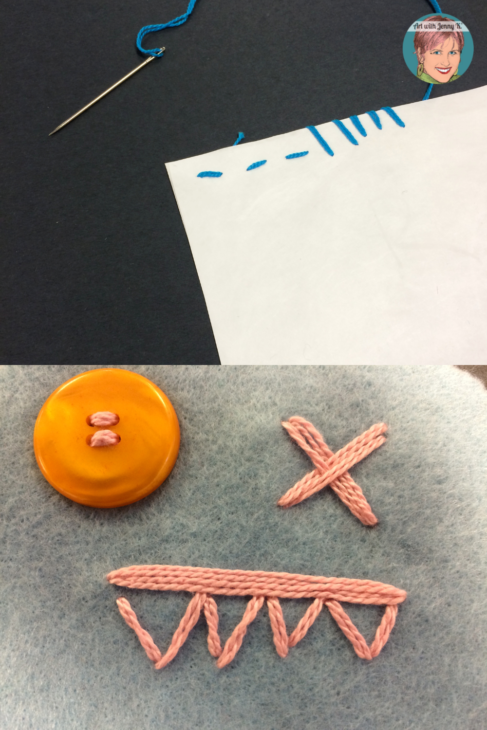
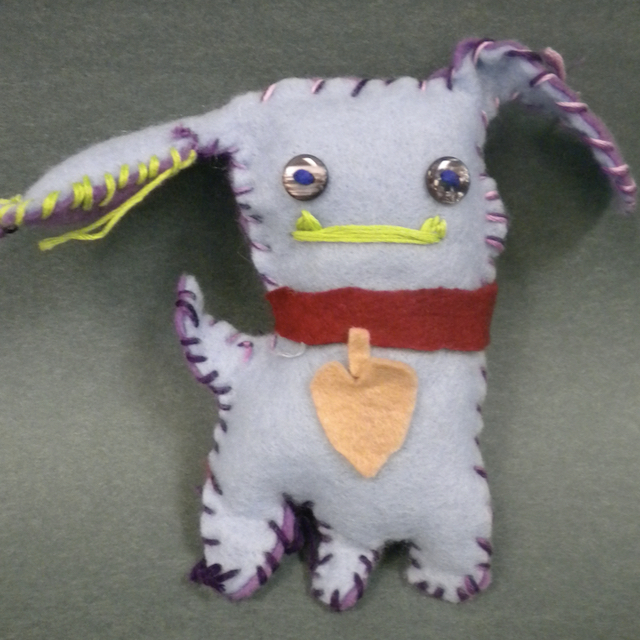
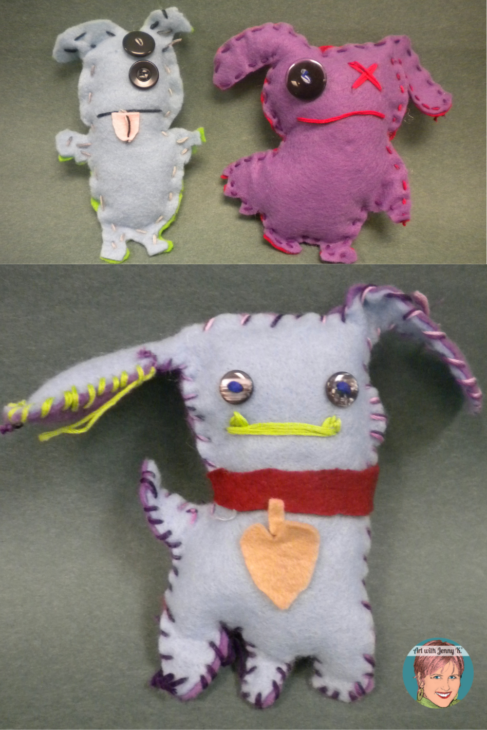
Have students sew buttons and details like the mouth, nose, etc., to the “front” of the doll (BEFORE you sew it closed). Again, let them practice on scrap paper whenever they are unsure.
5. Once all the details are added to the front of the monster, then have your students place the back piece on and start sewing the two pieces together. You can have them sew over and under or they can go around the edges, the idea is to let the thread show and to use a variety of colors to enhance the fun of these creatures. Just before they finish sewing it closed, have them stuff it with pillow stuffing or some shredded paper. Then finish sewing and close it up!
Extension
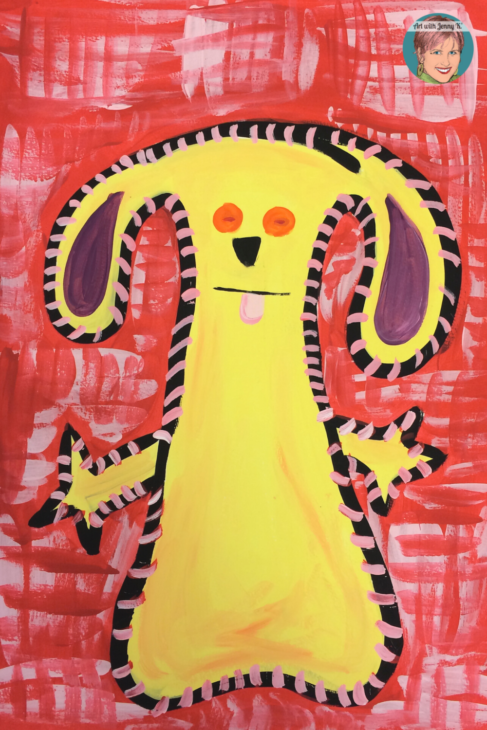
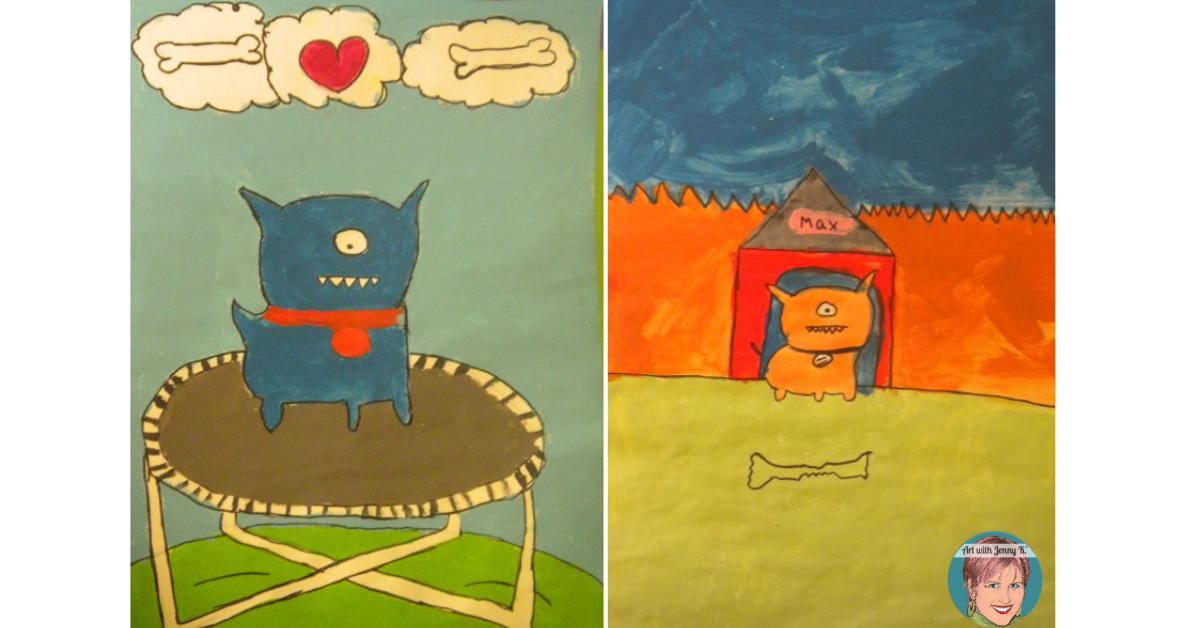
Extension: Paint your Monster. Just like any project some kids will finish fast and others will take every last second you allow them to work. As an extension, you can have your students that finish early paint pictures of their final monsters. This is a still life or “portrait” of their monster. I encourage them to make up the backgrounds and have some fun with these paintings by adding their unique style.
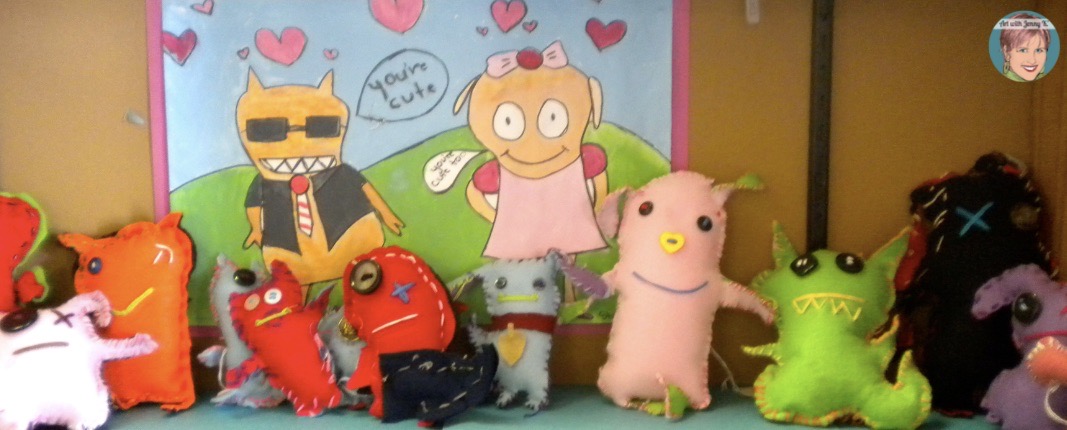
If you have a good space to display these dolls —er, I mean monsters, when they are finished, I really encourage you to do so. The kids will be so proud of their work, and the other kids, parents, and teachers will truly enjoy looking at the designs the kids came up with!
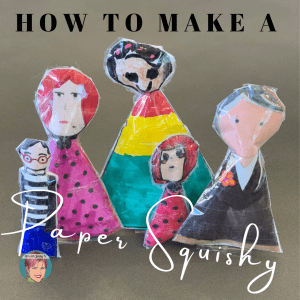
If you want a no-sew option for empowering your students to make art that they can hold and squish, you may like my blog post How to Make a Paper Squishy. This post is co-written and created by my daughter and her friend!
I would LOVE to see your students’ work if you decide to create any of my projects with them. Feel free to tag me (@artwithjennyk or #artwithjennyk) on social media so I can see what they make! You’ll find me on Twitter, Facebook, and Instagram!
Thank you for reading and making art with your students!
Jenny K.