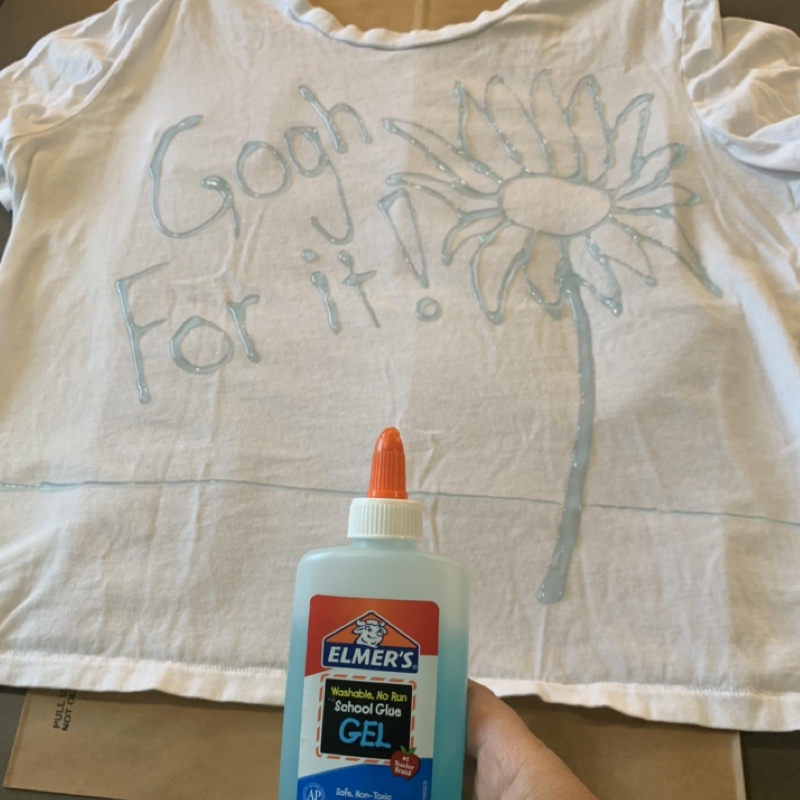
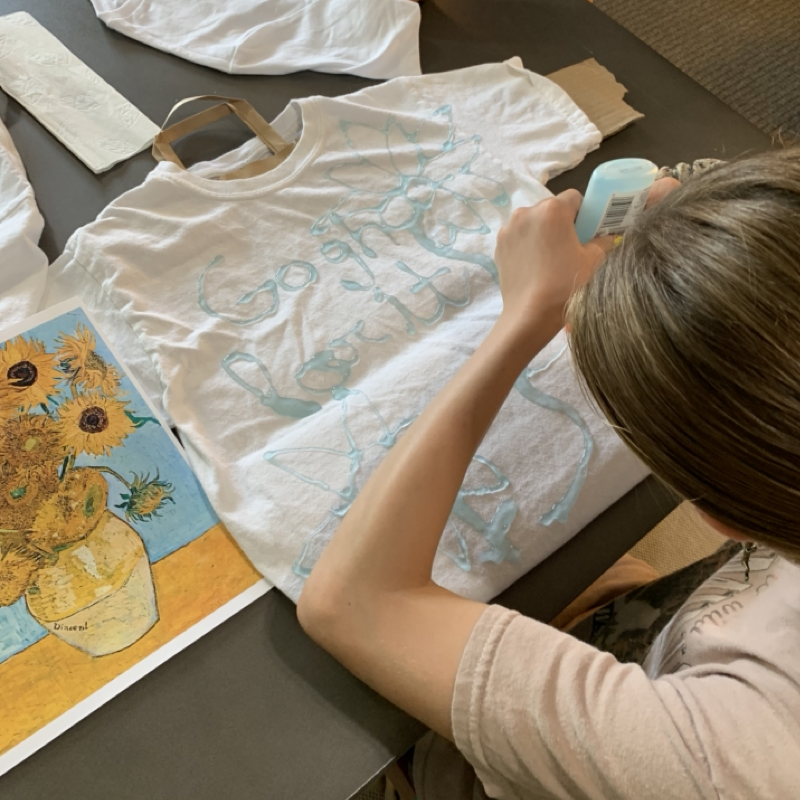


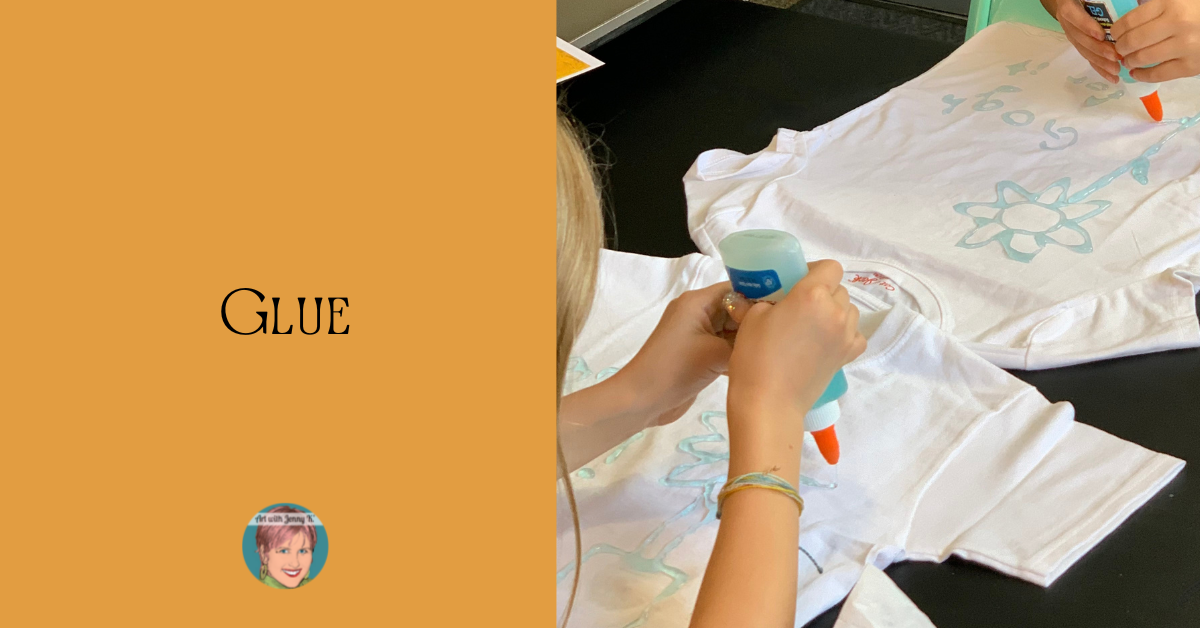
To start, I had my students “draw” sunflower designs on their t-shirts using Blue Elmers Glue. The blue helps the design show up, and the gel comes off beautifully at the end (when you want it to).
Each student brought their own t-shirt from home. This is important to note because the type of shirt they use makes a difference in how the glue comes off at the end (I’ll talk more about that in a minute).
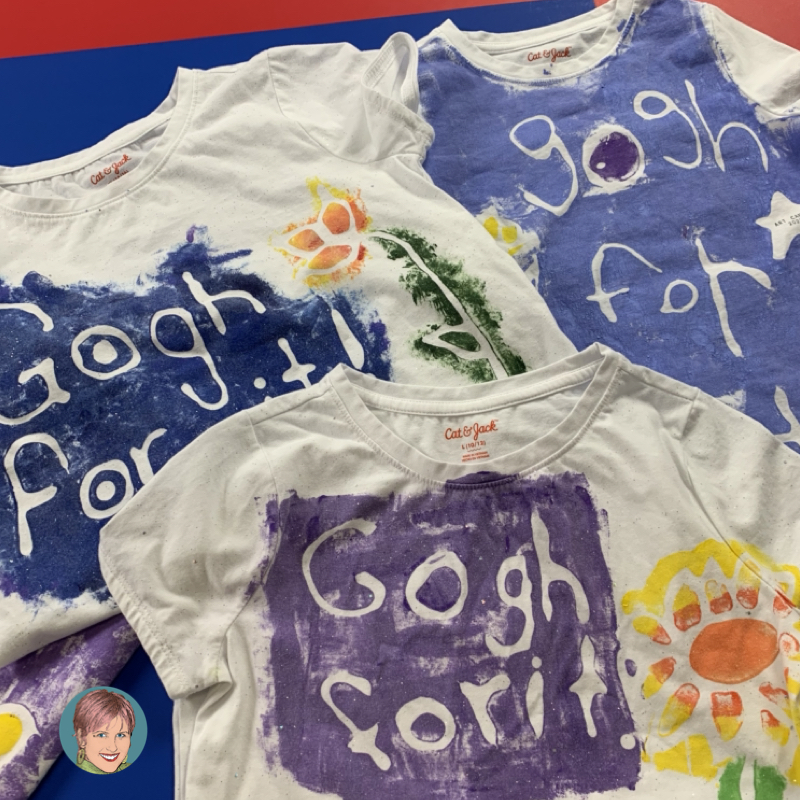
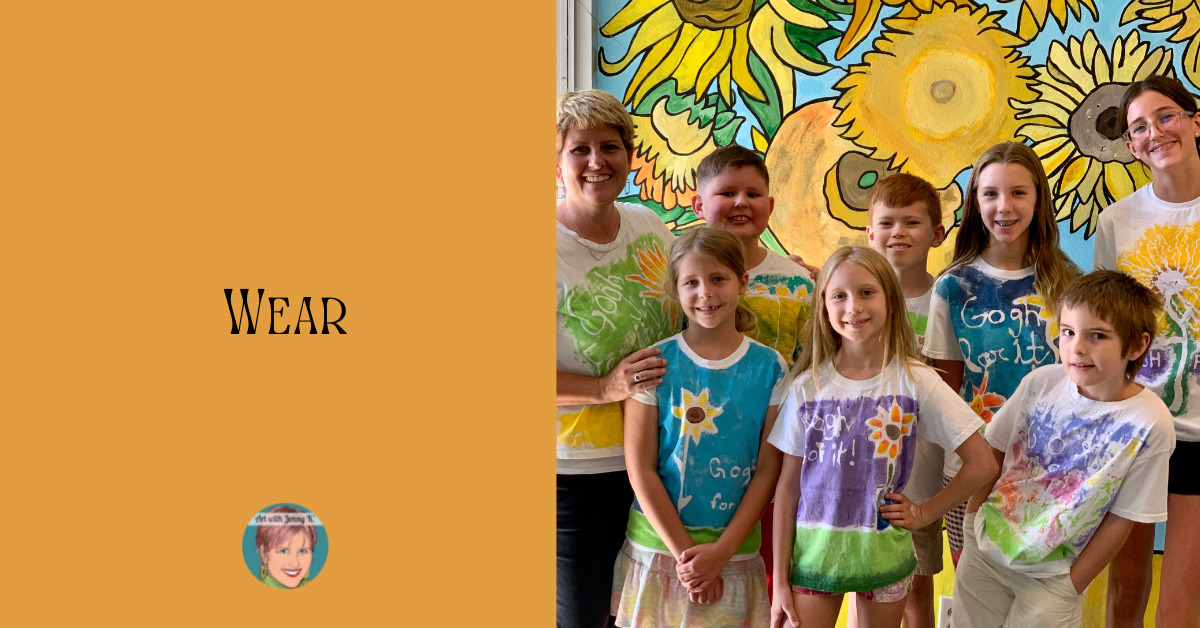
Along with their sunflower design, I also asked my students to write “Gogh For It!” on their t-shirts. I loved that my students jumped in and created all their different designs. Kids are so predicably creative. It is one of the reasons I love working with them.
I should also mention that I did test this entire process before trying it with my students. I did this for two reasons. First, I wanted to have a shirt to wear when I showed them what we would be making, and second, so I could be sure this was actually going to work.
How long does this take? I should mention that this step went much quicker than I expected. I had set aside a full hour to do this step, and it took the kids closer to 20 minutes. Luckily they had sketchbooks and books they could read as they finished.
After my students finished their designs, we let them dry overnight. This is why, in fact, I had my students do this activity as the last thing of the day. I didn’t want to have to move the shirts around while they were wet. Doing this at the end of the day allowed us to leave them where they were overnight.
Be sure to put something inside your shirt so that colors don’t bleed through. I used paper shopping bags.

In the morning, students came back to their shirts, and the glue was dry.
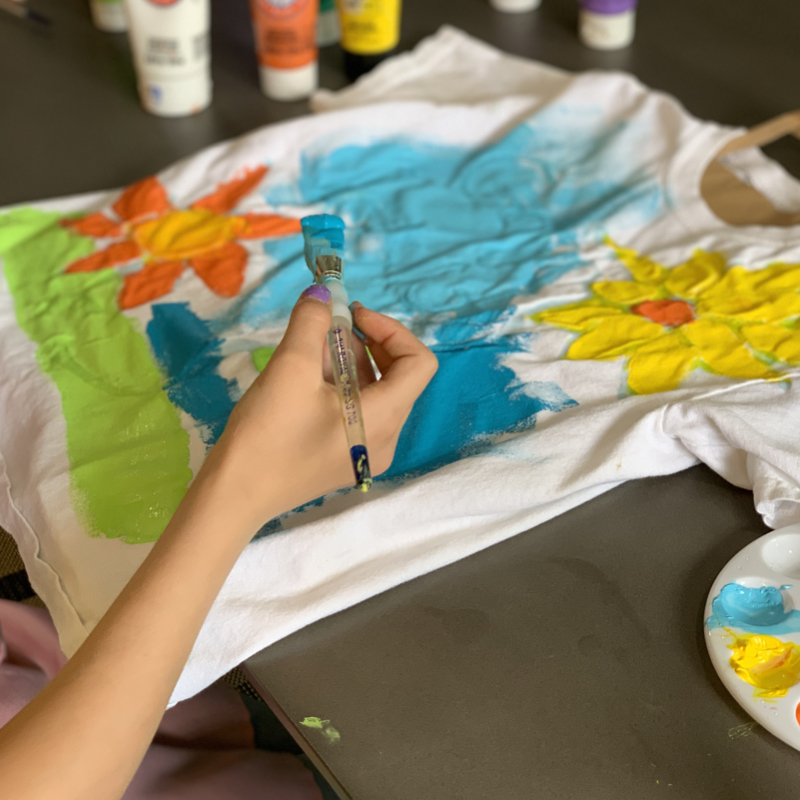
Then, I gave my students acrylic paint and let them paint their shirts however they wanted to. I didn’t give them much guidance on this because I wanted them to be free to do whatever they wanted.
However, I did warn them that the paint needed to completely cover any area where there was glue. It’s important to remind kids that where they see glue, it will ultimately be white, so if they don’t put paint on all sides of the glue, some details they create won’t show up.
How long does this step take?
Again we did this part at the end of the day, and again, we let the shirts dry overnight.
This step took the full hour I had planned for. As is always the case, some students finished quicker than others. But as a whole, the kids were able to complete their shirts in an hour.

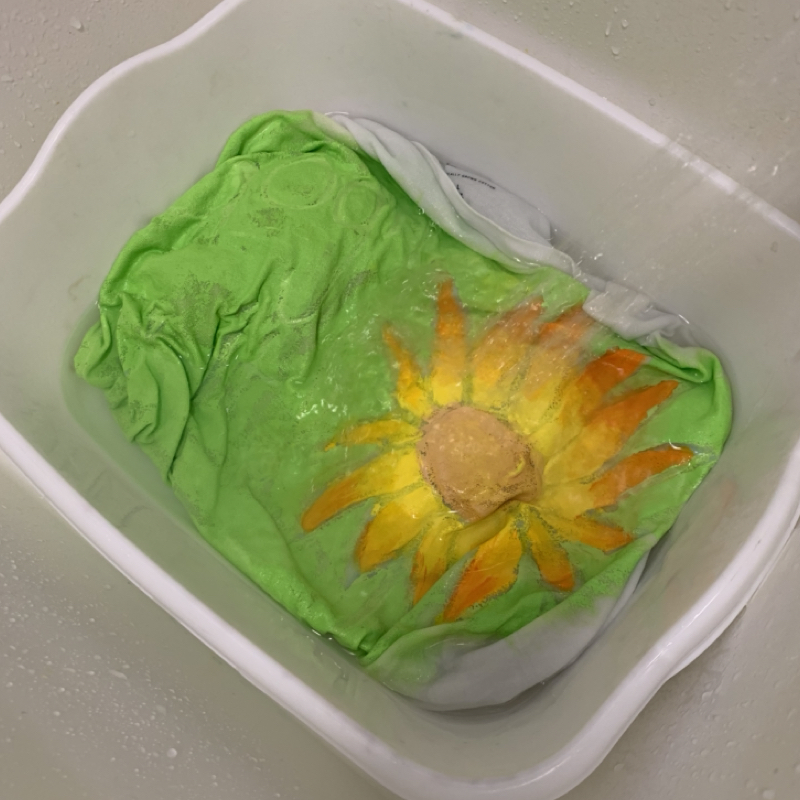
On the third day of camp, my students came in to see their shirts with acrylic paint (dry). To manage this next step, I had my students wash the glue off in shifts all day. While they were working on other activities, I had pairs of kids use our utility sink to wash off the glue and paint.
This process is so “satisfying,” as my students like to say! As you wash the shirt in a sink, the white areas start to reveal themself, as the glue dissolves (science and art). This is when the magic of this lesson happens.
As one pair of students finished, we would reveal the shirts to the rest of the group, and they would always cheer and clap because they came out so great.
I would then repeat the process of soaking more shirts in hot water, and having the kids work together to rinse them off. I soaked each shirt on its own (not in shared containers).
When I tested this project, I was very skeptical that it would work well enough to do with a large group of kids. However, I was pleasantly surprised. My students also seemed skeptical until they saw the final shirts washed off to reveal their designs.
We found that t-shirts made from different materials held the glue differently. The shirts with higher concentrations of cotton were the ones that were the hardest to get the glue out of. Those with synthetic materials were easier to get the glue to release from. Shirts with a 60/40 blend were the easiest. For the 100% cotton shirts, I had to soak them a few times.
Now, onto the last “scary” part of this project. I took these shirts home to wash before giving them to my students. I was TERRIFIED I was going to ruin my washing machine or that the shirts were going to ruin one another. However, I reminded myself to “Gogh For It!” and put them all in my washing machine (on hot).
I think you can tell from the picture above that they turned out GREAT.
…and I’m happy to report that my washing machine still works fine.


Purchase on Amazon!
Purchase on Amazon!