

I love using these types of projects to talk to my students about recycling. I asked one of my classes if they knew what “recycling” means, and a little girl replied, “It’s when you put your trash in the other trash can.”…honestly can it get any cuter than that? That was years ago, and now I have a toddler, and she and I even have a goofy song about the “blue and green” trash cans!
Step 1: Preparing the Old Crayons
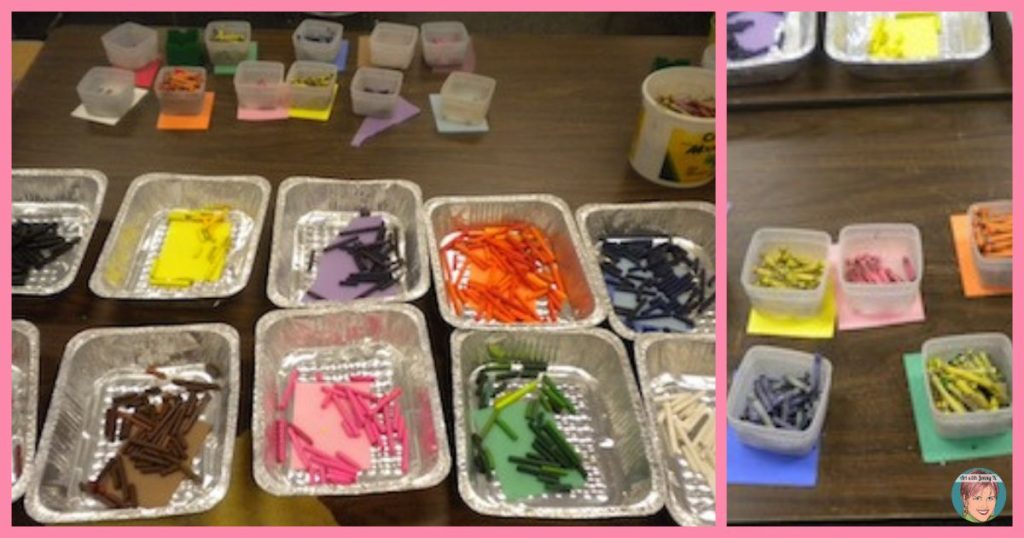
I’m not going to sugarcoat it; taking off the paper is the worst part of this process. Sometimes the paper pops right off, and sometimes…well, it’s frustrating. SO, what I learned to do was go around while the kids were peeling the paper, using an X-acto knife, and scoring the paper. I could do this very quickly to many crayons, and then the kids would take the paper off. But obviously, that should only be done by an adult. Also–VERY IMPORTANT–you need to use good crayons like CRAYOLA (no, they haven’t paid me to say that). The wax-to-pigment ratio in crayons like Crayola is the right mix to melt again. Cheaper crayons are cheaper because they have more wax, and that wax bubbles up and is hard to melt.
Step 2: Melting the Crayons (Adults only)
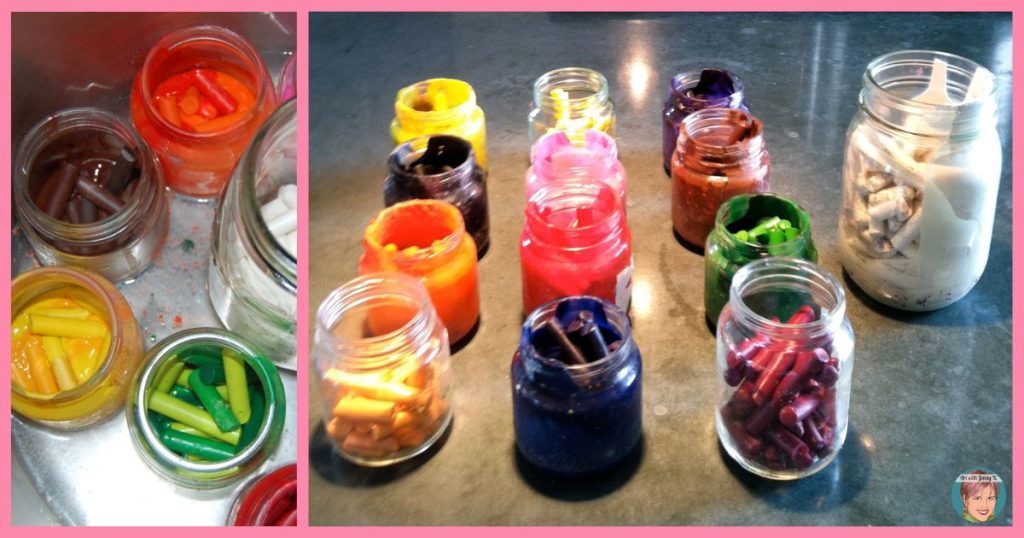
Break up the crayons into smaller pieces and put them in glass jars (baby food jars are ideal).
(You can melt in the microwave, but the fumes are pretty nasty. I prefer the stove with the exhaust fan on HIGH)!
Put a small amount of water in the bottom of the pan. You will bring it to a boil, so you’ll only want the water to come up to about 1/2 the height of the jars you are using. Add the jars in (before you turn on the burner) and fit them in as tightly as possible so they don’t tip over.
Step 3: Filling the Molds
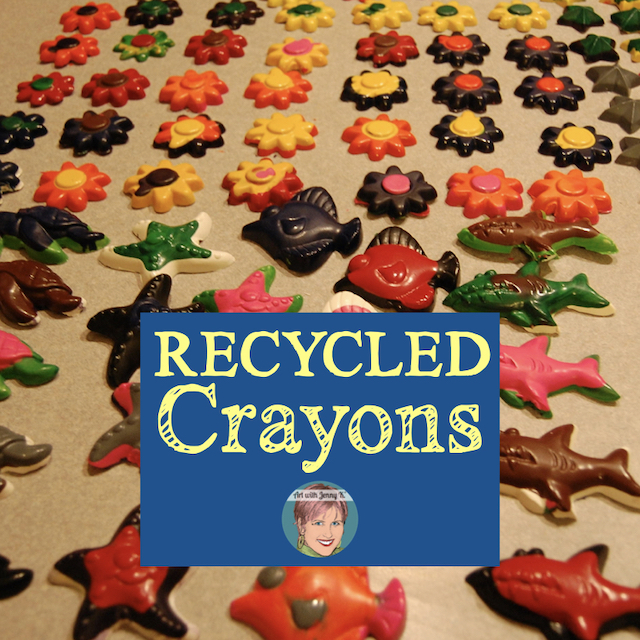
Once the wax is melted, use an oven mitt (jars will be VERY hot) and pour the wax into candy molds. I’ve found these molds at craft stores in the candy-making section and even at IKEA. They are easy to find now because making your own crayons has become very popular. Mix up the colors and make fun combinations. If you don’t want two colors to mix in the mold, let the first layer dry a little before adding the next color.
I’m impatient sometimes and like to move along fast, so I found that putting the molds in the refrigerator sped up the cooling process. It only takes a little while. You’ll know when they are ready because the new recycled crayons will pop right out of the molds…and Voila!!!!
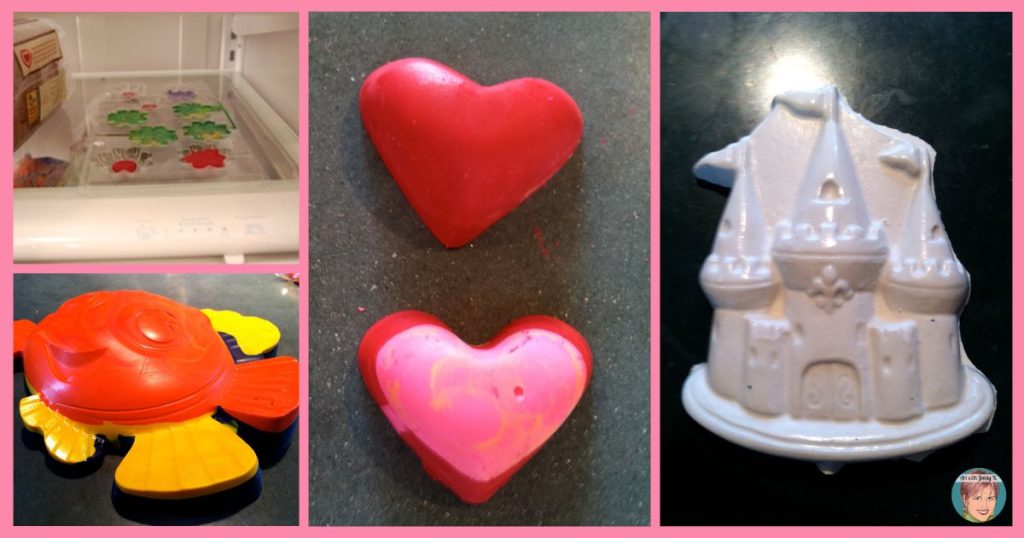
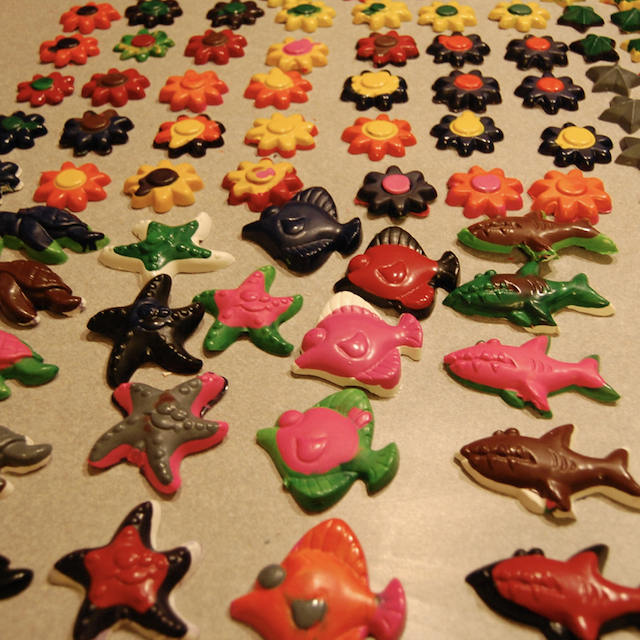
For some reason, I always have TONS (and I mean TONS) of orange crayons. So I actually used an old sand toy in the shape of Flounder the fish (above figure, lower left panel) and used up a bunch of that orange. Those really big crayons make excellent gifts.
I might have gone a little crazy with these the first time I made these recycled crayons in 2011, but it was so much fun, and I’ve gotten tons of use from them.
Using the Crayons
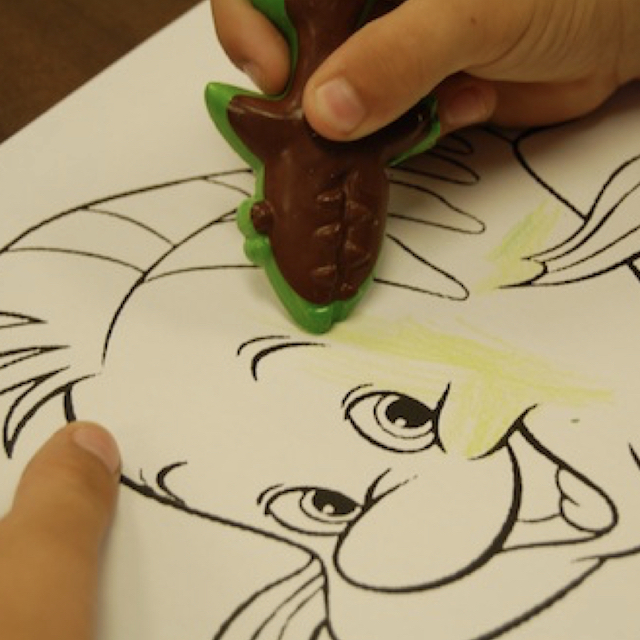
Little hands-on recycled crayons: I wanted to see how it would go with the new crayons, so I gave my students a basic coloring sheet and let them work. I liked how they had to turn the crayons in all different directions to get the color they wanted. This made me think about how I’ll make them in the future to have certain color combinations together in one crayon. For example, a “landscape” crayon would have blues and greens altogether…things like that. Perhaps you may think of other color combinations that would be good together.
I have used these recycled crayons for all sorts of things over the years: gifts, reward systems…you name it! The kids think it’s very special when you give them their own crayons. They sort of cup their hands out and hold it like a little nugget of gold. It’s sweet.
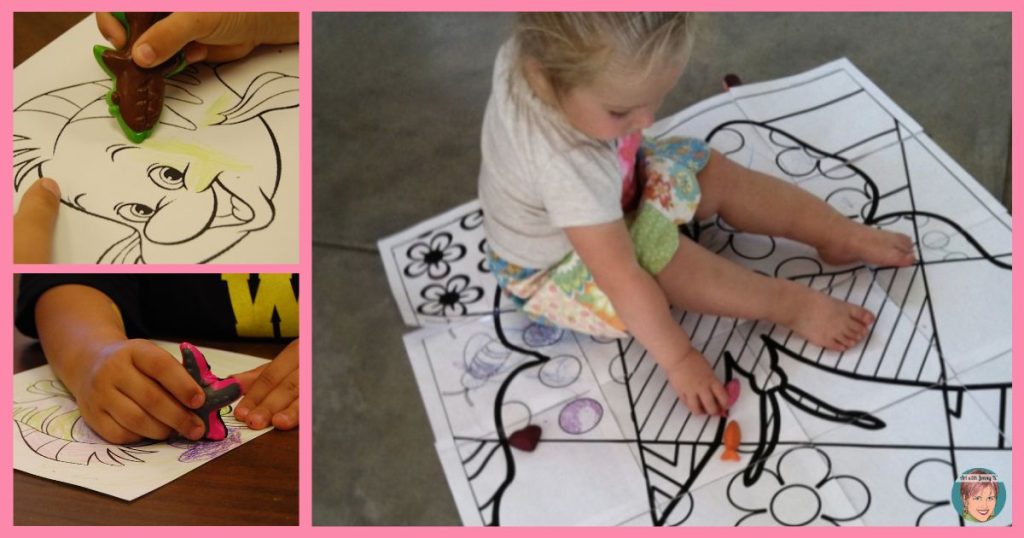
I use them with my own daughter all the time, and when she was about 18 months, I put her down on my butterfly poster and gave her some of these recycled crayons to use. She loves them, too… You can see my post about this HERE or by clicking on the picture below.
For all of my art integration resources for classroom teachers, art teachers, and parents, check them out HERE.
Other recycled material posts:
Thanks for reading and for making art with your kids!
Jenny K.