
Supplies
-
-
- Pencil
- Ruler
- Watercolor/thick paper (12″ x 18″ is what I used)
- Sharpie or permanent black marker
- Watercolor paint
- Watercolor brush
-
Steps

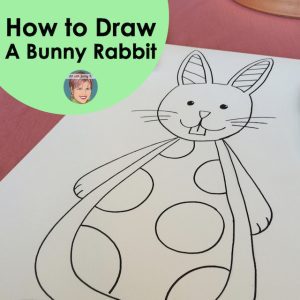
Draw: To start these pumpkin pie paintings for kids—or WITH kids rather—you first want to draw a slice of pumpkin pie. Choose to let your students draw these in their own way or provide them with some drawing instructions (see below). Whatever way you decide to do this, be sure you give them time to practice drawing pumpkin pie slices before they draw onto the final piece of paper. Watercolor paper is hard to erase, so you’ll want your students to feel confident about their drawing before putting it on the larger paper.
I have provided some basic instructions below in case it is helpful to you.
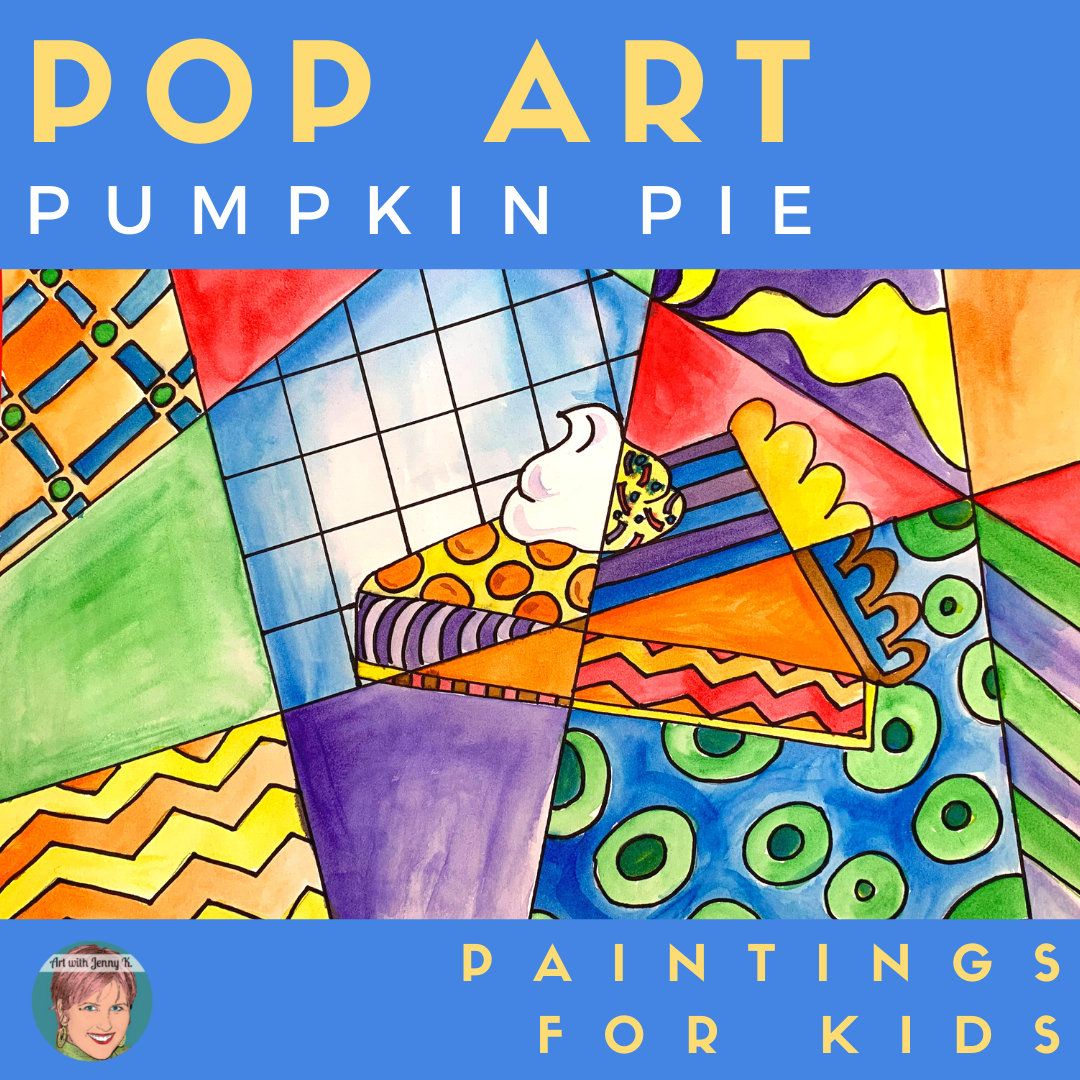
Pumpkin Pie Drawing Steps:
You can look at the image in this post, or you can download a file with these steps HERE. Downloading it will make it easy for you to make copies and provide them for your students. If you’d like this entire lesson in PDF form, please read to the end to download it in that format from Teachers Pay Teachers (for free).


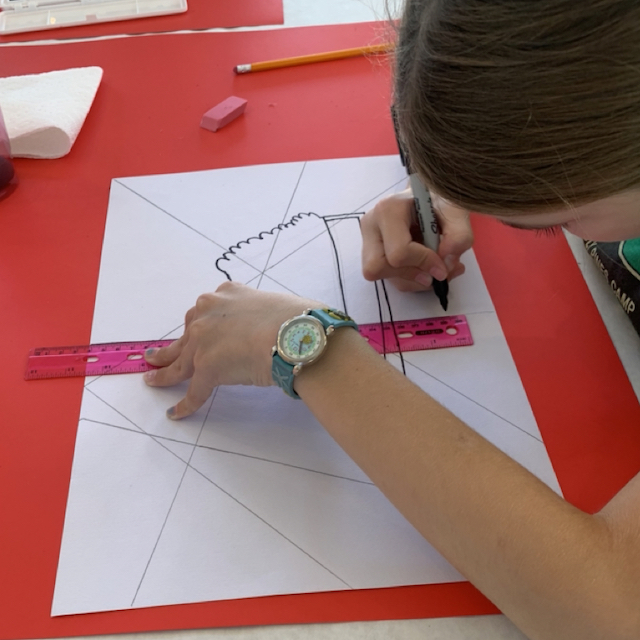
Divide: Once your pumpkin pie is drawn, divide the paper using lines. Use a ruler or straight edge for this part of the lesson to ensure the lines are straight.
I recommend that each line start on one side of the paper and go to the side across from it. For example, top to bottom and side to side. How many lines you add and where you put them is entirely up to you. I try to think about how the lines are crossing the image (in this case, the pumpkin pie slice) AND how they are dividing up the background.

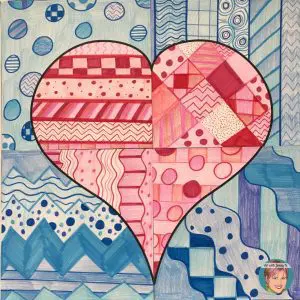
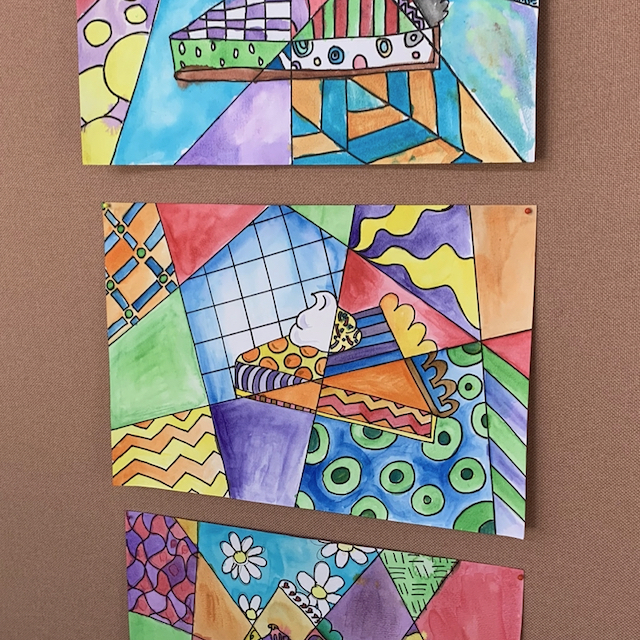
Shapes: Adding the lines across the artwork divides the space and creates more areas where you can add shapes. It is in these divided-up areas that you are going to add patterns and designs. You can add stripes, polka dots, chevron stripes, and any other shapes, patterns, designs, or doodles that you can come up with.
One of the best ways to do this is to vary your patterns throughout the artwork AND to vary the size.

Keep in mind that you will be adding watercolor paint to these Pop Art pumpkin pie paintings. If you make the shapes and/or patterns too small, it will be hard to paint them. I recommend that you err on the side of large rather than small. It’s easy to make small shapes with a pencil—but not as easy with paint.

Outline: Great, now your design is complete. I recommend taking a black permanent marker and going over all of the lines you just drew with a pencil. This step could be optional if you work with younger children and don’t want to use permanent markers. Also, if you wanted to, you could wait until the end for this step—once your painting is dry.
Be sure to use a permanent marker if you are painting because the watercolors will make water-soluble markers run and ruin the final artwork.

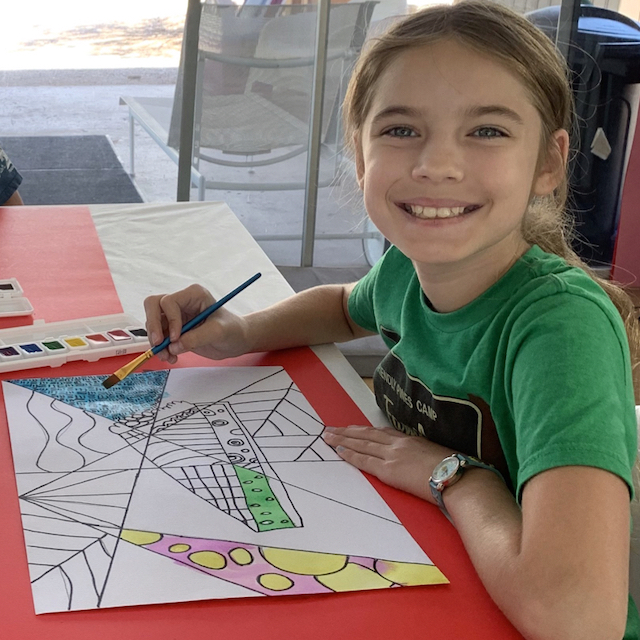
Paint: Now it’s time to paint! What would a Pop Art Pumpkin Pie Paintings for Kids art project be without the paint?
Don’t say, “Easier.” Haha!
You can use any kind of paint that you are comfortable using. I used watercolor paint, but you can use acrylic or tempera paint as well.
I’ve said this before in other posts. However, let me say it again in case this is the first time you’ve heard it.
When you paint, especially with watercolors, it’s helpful to start with light colors like yellow or orange and work toward dark colors like blue or purple. This helps to keep your water clean longer and also your artwork.
This project is fun to paint because there are so many shapes, patterns, and designs to add color to. It’s good to take a color, let’s say yellow, and then work it all around your design. You might add some yellow to the lower right, middle, and upper left of your artwork. You might add some yellow for the shapes AND some for the background behind the shapes in other areas.
Then, after you select your next color, you can work that color throughout the design in much the same way.
Painting your Pop Art Pumpkin Pie Paintings in this way keeps the colors moving throughout the artwork and allows you to see the entire composition as it unfolds. This method takes a little forethought but, in the end, tends to work out better than working in one area, coloring everything in that area with different colors, and then moving to another area of the painting.

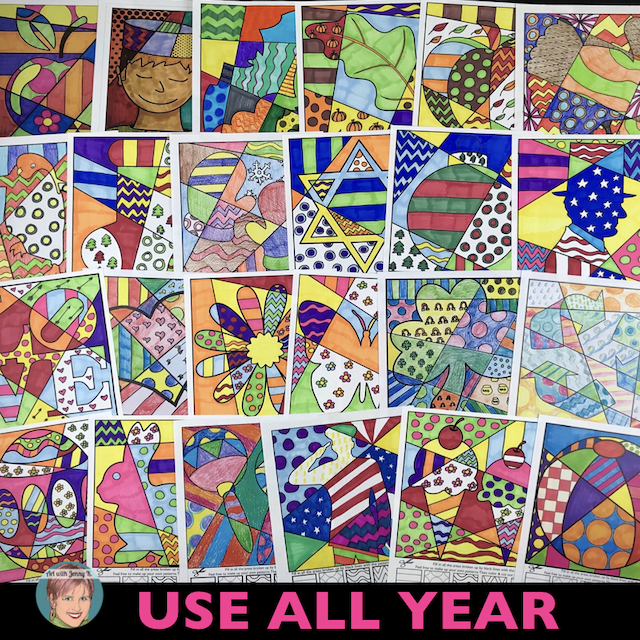
Display: Great job! After your Pop Art pumpkin pie paintings are complete, hang them up and display them for others to enjoy. These paintings have so many fun things to look at. I have no doubt your students will enjoy walking from one image to the next and looking at all the details in them.

When your students are finished, I hope they think differently about how a painting of pumpkin pie should look!
FREE PDF ON TPT
This entire art lesson is also put together in a PDF on Teachers Pay Teachers (for free). You can download it HERE if you’d like this lesson in that format.

Email Sign Up
I love to spoil teachers, parents, and administrators who sign up for my emails by sending exclusive freebies, tips, and tricks, as well as special announcements of sales. Not to mention, after you join, you’ll get invited to my “Subscribers Library” of freebies like my stacked pumpkin interactive coloring pages.

Join today to get your copy of my stacked pumpkin coloring page!
Thanks for reading,
Jenny K.