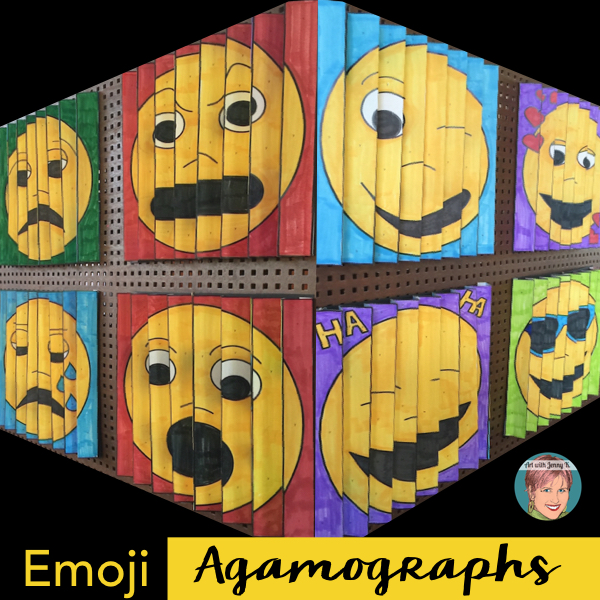
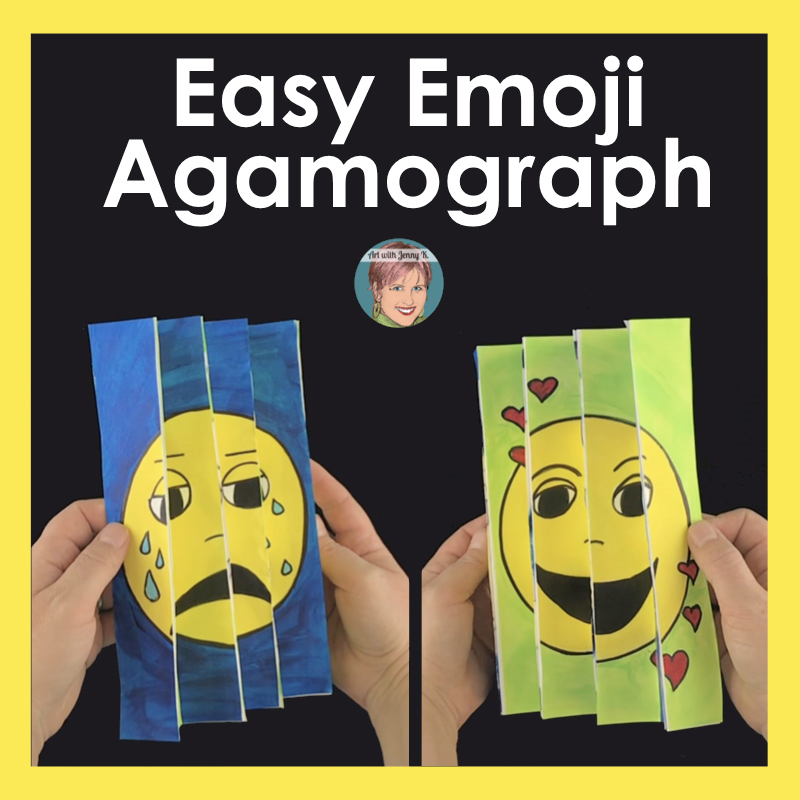
Easy Emoji Agamographs
Materials:
-
-
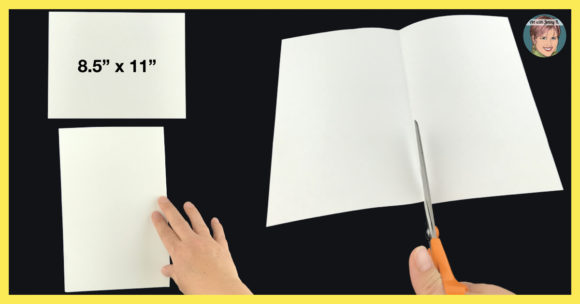
- 2 pieces of paper 8.5” x 11”
- Pencil and eraser
- Permanent marker
- Paint
- Paintbrushes
- Scissors
- Glue or glue stick
-
Step 1: Start with your paper in front of you and fold the paper in half from right to left.
Step 2: Unfold the paper and cut the paper in half along the crease.
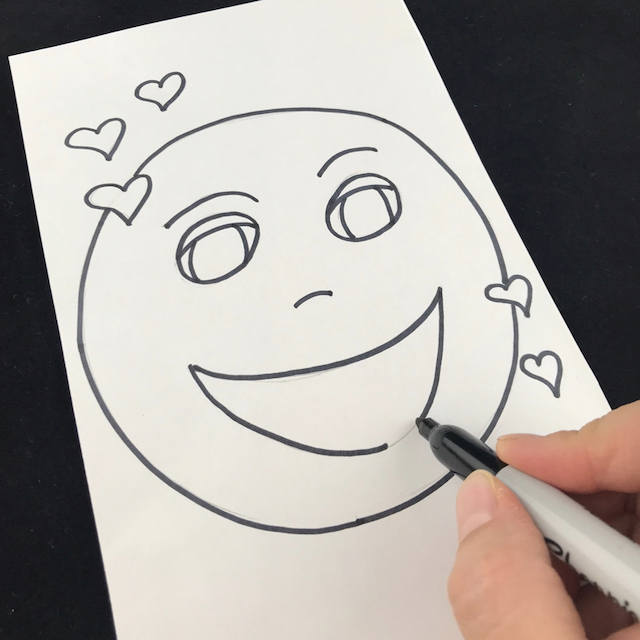
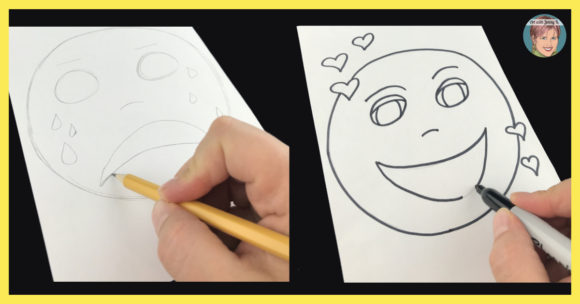
Step 3: Draw an emoji expression on each page with a pencil. Pick two different emoji expressions that you think go well together. Opposite expressions work well, but you can draw any two that you want. Once you have the drawings the way you want them, outline them with a permanent marker.
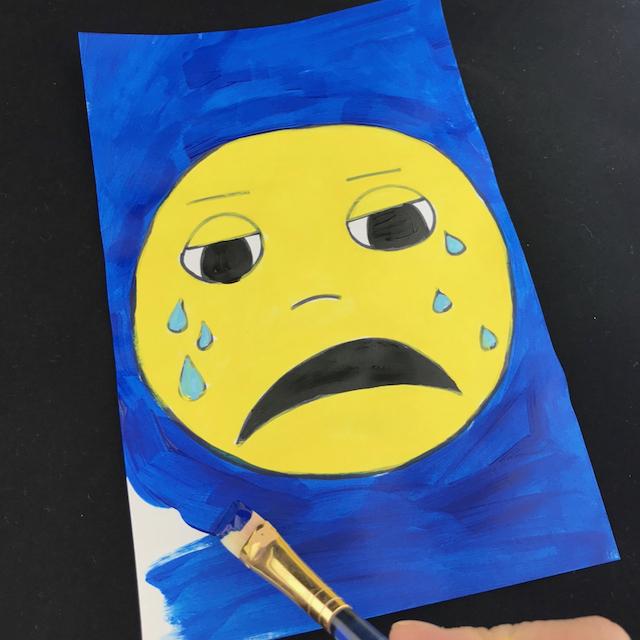
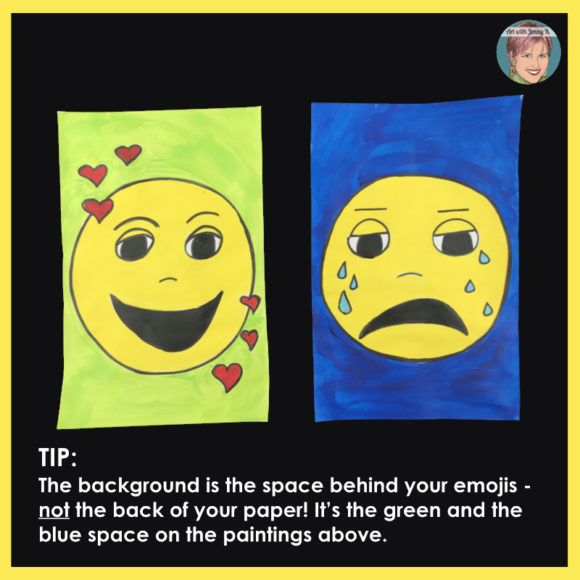
Step 4: With your paintbrushes, paint both of your emoji expressions. Paint the backgrounds with contrasting (different) colors. Let them dry!

After the paint dries, you can outline with marker again to make the black lines stand out!
Tip: This may seem obvious to you as an adult, but so often, children do not actually know what the “background” of their artwork is. When I say, “color the background,” they often think that I mean the back of the paper. This is a good time to reinforce this to ensure you are all on the same page (pun intended, of course!).
Do steps 5, 6, and 7 for both of your emoji paintings.
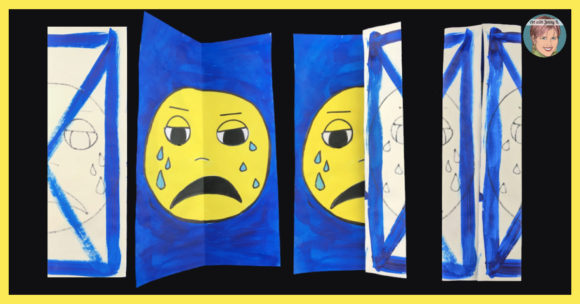
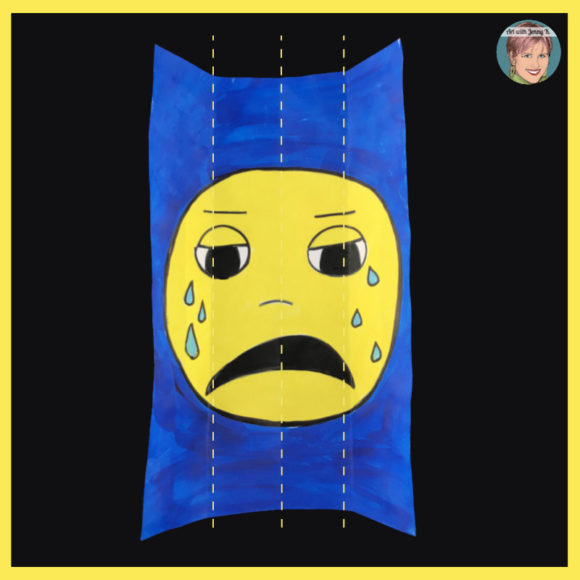
Step 5: Fold your emoji painting in half. Open your painting and then fold in each side to line up with the crease you have made in the middle.
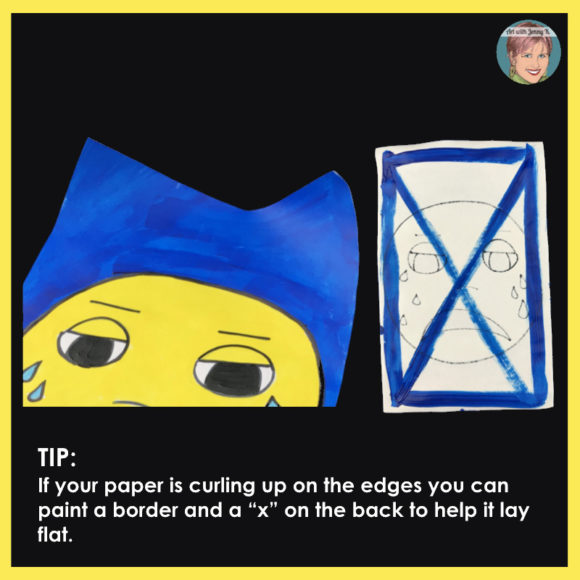
Tip: Depending on what kind of paint you use, your paper may curl. This isn’t a huge deal – but it can be frustrating. So an easy tip is to paint a border and an “x” on the back of the page to help it lay flat. Just be cautious about using color the same as the background color (or lighter), so it doesn’t show through on the front.
When you are finished, you will have three fold lines on your page – for both of your emoji paintings.
Step 6: Turn over your paintings and number the four sections. Use odd numbers for one of your paintings (1, 3, 5, 7) and use even numbers for the second painting (2, 4, 6, 8).
Step 7: With your scissors, cut along the folded lines so you have 4 pieces of the same size.
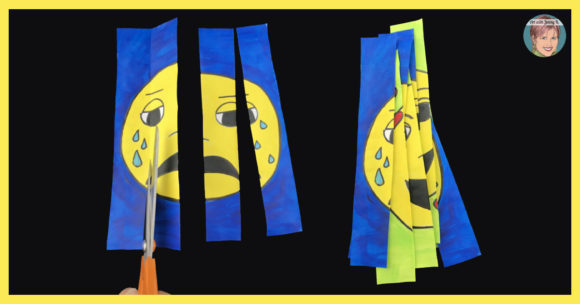
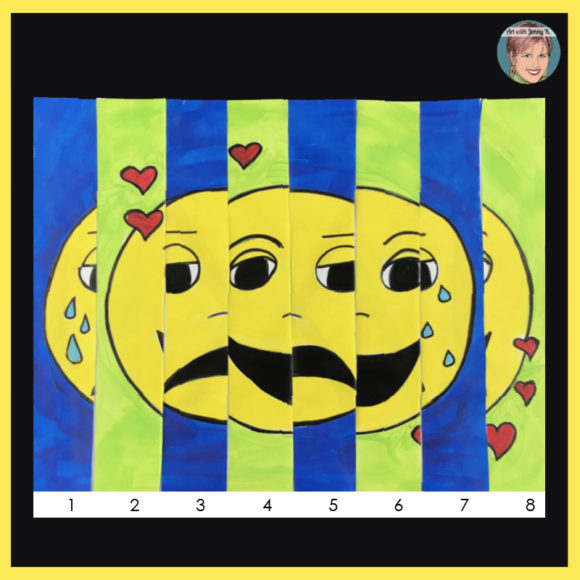
When you have cut all the pieces, you will have something that looks like this…
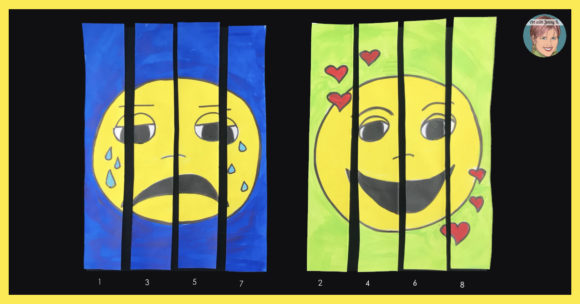
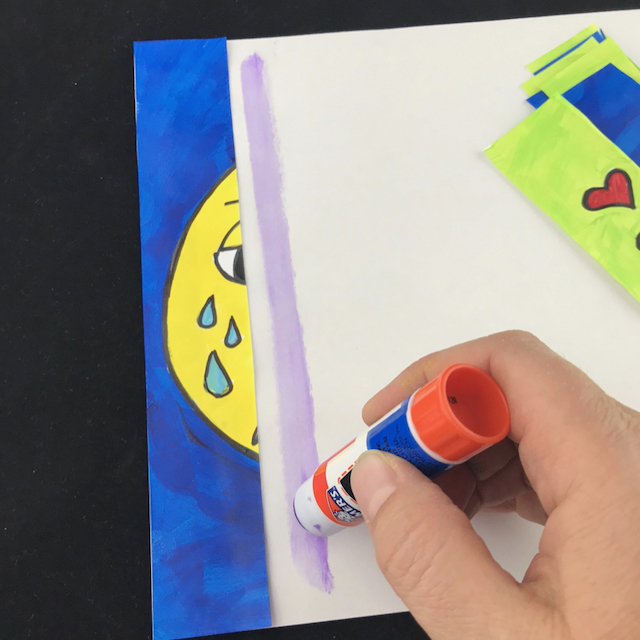
Step 8: With glue or glue sticks, glue the pieces onto the second 8.5″ x 11″ paper.
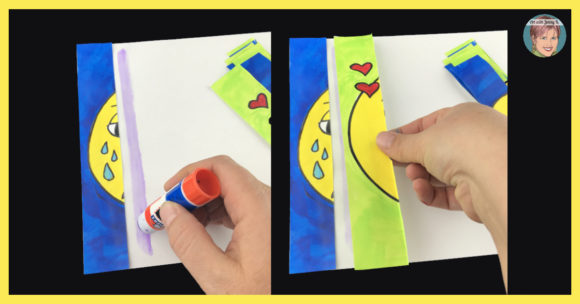
Glue them in order: 1, 2, 3, 4, 5, 6, 7, 8. You will be alternating between the two different paintings, so they look mixed up like this…
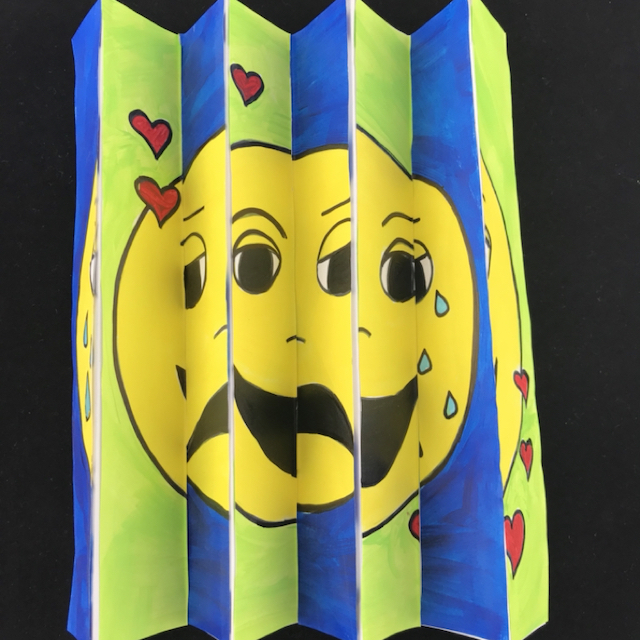
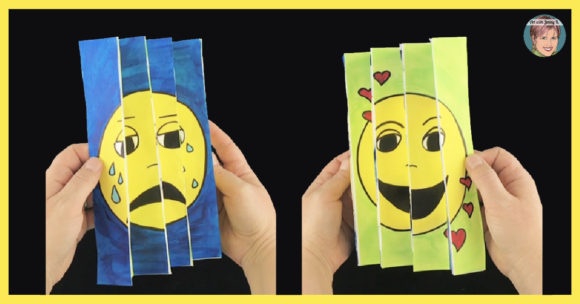
Step 9: Once your pieces are dry, fold the page using an accordion fold (fanfold). The first fold should be backward.
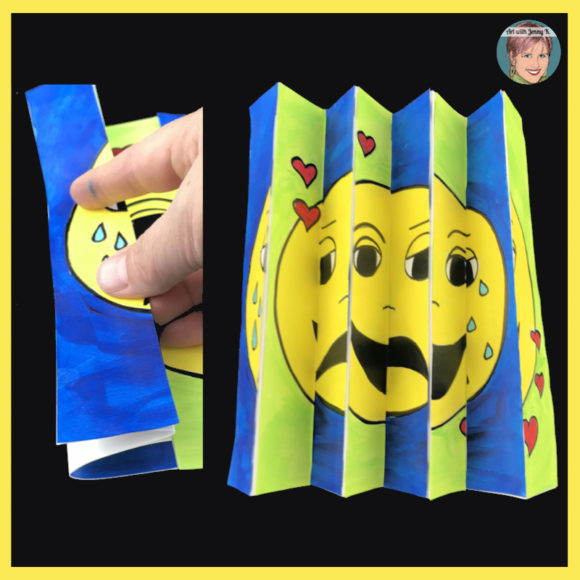
Hold your final artwork out in front of you. You’ll see the two images as you move the agamograph back and forth!
You could also try these other ideas for your easy emoji agamograph:
-
-
- Making an agamograph with larger paper and more pieces.
- Use two of the four seasons, like winter and summer.
- Make one image in black and white and one in color.
-
E-Mail Sign Up
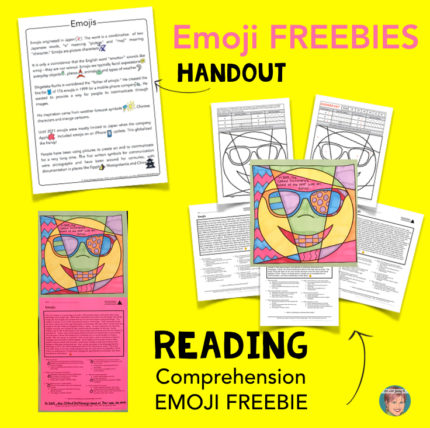
When you join my email list, I will send you a free set of my emoji reading comprehension pages (great for grades 3-8th). I love to spoil teachers on my email list with tips and tricks, freebies, special sale announcements, and more. Not to mention, after you’ve joined, you will be invited to my subscribers-only library of freebies (just like this one). Sign up below, and of course, unsubscribe at any time (but let’s hope you never want to!).
Thanks for making art with your kids!
Jenny K.