Art integration is the best “tool” for any teacher to have. Especially when you are trying to incorporate project-based learning (PBL) activities. PBL is considered an alternative to paper-based, rote memorization, teacher-led classrooms. John Dewey is credited with the idea of “learning by doing.” I have many PBL lessons, such as my Salvador Dali Telling Time lesson, my Brown Bag Art Challenge, and my Selfie Lesson, but one of my most popular is my Quadrilateral Robots.
Common Core Standards
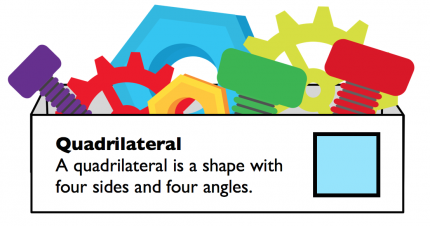
3rd grade: CCSS.Math.Content.3.G.A.1 Understand that shapes in different categories (e.g., rhombuses, rectangles, and others) may share attributes (e.g., having four sides), and that the shared attributes can define a larger category (e.g., quadrilaterals). Recognize rhombuses, rectangles, and squares as examples of quadrilaterals, and draw examples of quadrilaterals that do not belong to any of these subcategories.
4th grade: CCSS.Math.Content.4.G.A.2 Classify two-dimensional figures based on the presence or absence of parallel or perpendicular lines or the presence or absence of angles of a specified size. Recognize right triangles as a category, and identify right triangles.
5th grade: CCSS.Math.Content.5.G.B.3 Understand that attributes belonging to a category of two-dimensional figures also belong to all subcategories of that category. For example, all rectangles have four right angles, and squares are rectangles, so all squares have four right angles.
5th grade: CCSS.Math.Content.5.G.B.4 Classify two-dimensional figures in a hierarchy based on properties.
Quadrilateral Robot Steps
Step #1
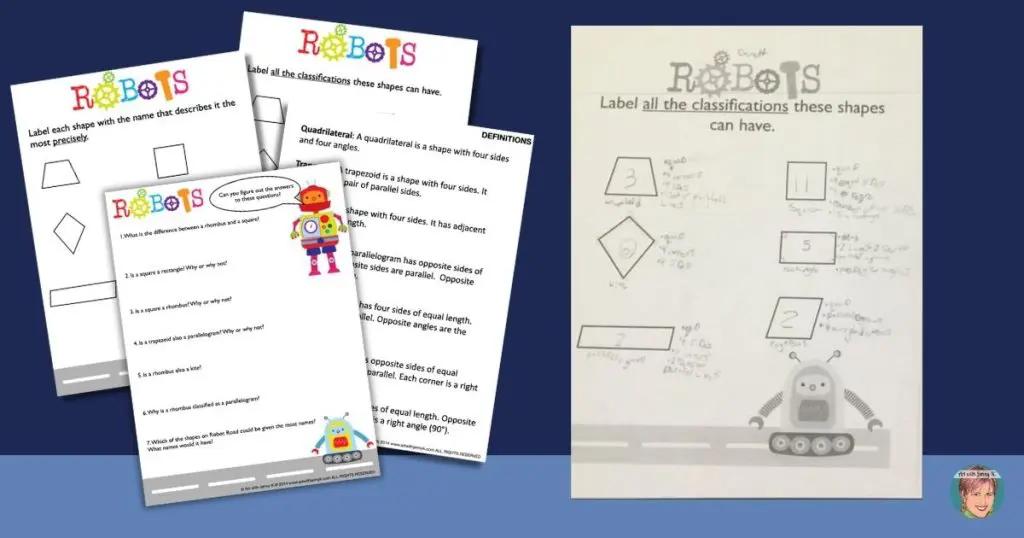
Teach students what quadrilaterals are. My TPT resource has handouts with definitions to help with this.
Step #2
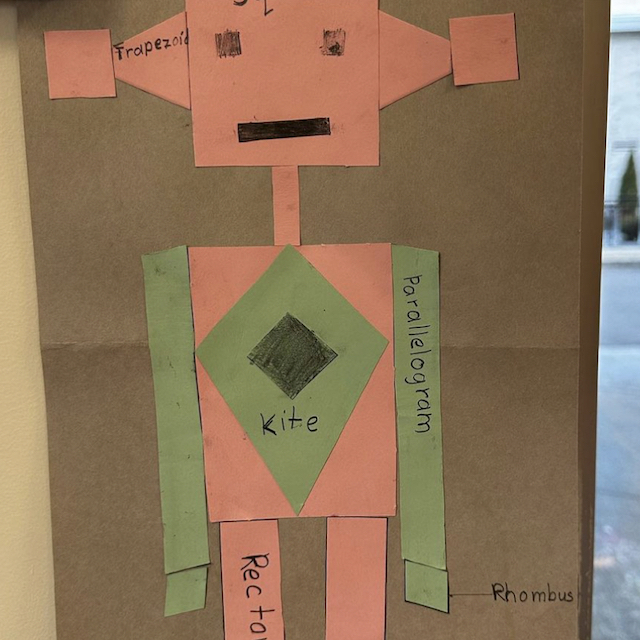
Draw each quadrilateral shape on the board: square, rectangle, trapezoid, rhombus, parallelogram, and kite. Instruct students that they will be making a robot using only these shapes. Encourage them to use their imaginations to create their robots.
Step #3
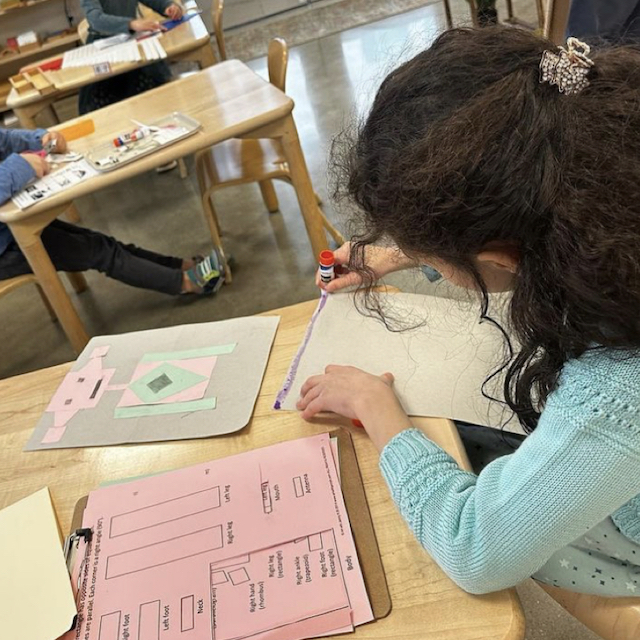
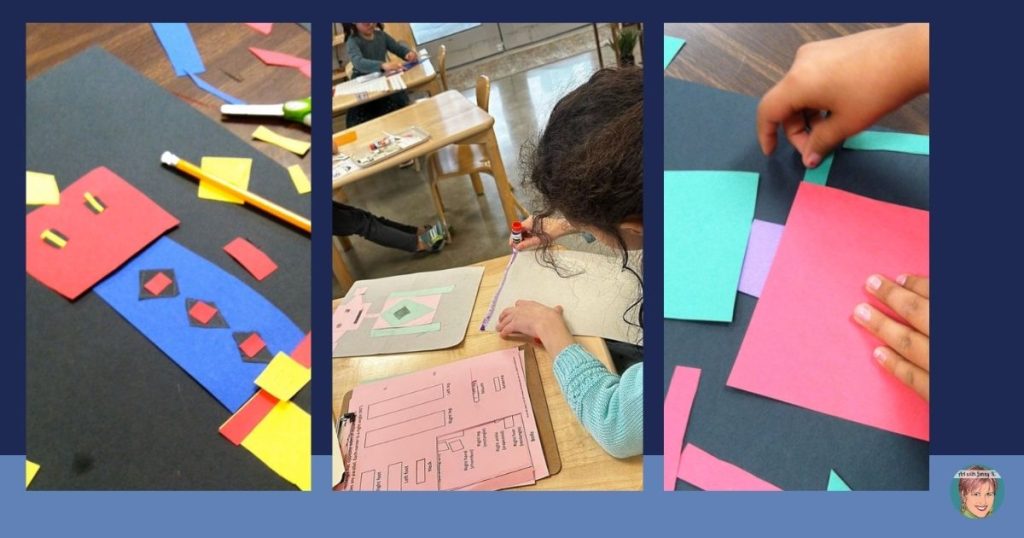
Give students a 12” x 18” sheet of black paper and a variety of colored construction paper. You can choose a color scheme or just let the kids pick!
Step #4
Give students scissors and have them cut out quadrilateral shapes for the body, head, arms, & legs using the primary colored construction paper (students should not glue yet). Some students like to use a pencil at this step and first draw the shape before they cut it out. Other students like to cut without drawing first. Let the artists decide how they would like to solve this. Encourage student to describe the quadrilateral shapes they are making to one another
Step #5
Have students cut out smaller details for the robot, such as the eyes, mouth, hands, feet, and other smaller shapes. Remind students that they are using only quadrilateral shapes.
Step #6
Once students have cut out and roughly assembled all of the pieces on the black paper, give them glue sticks so they can begin gluing down each piece.
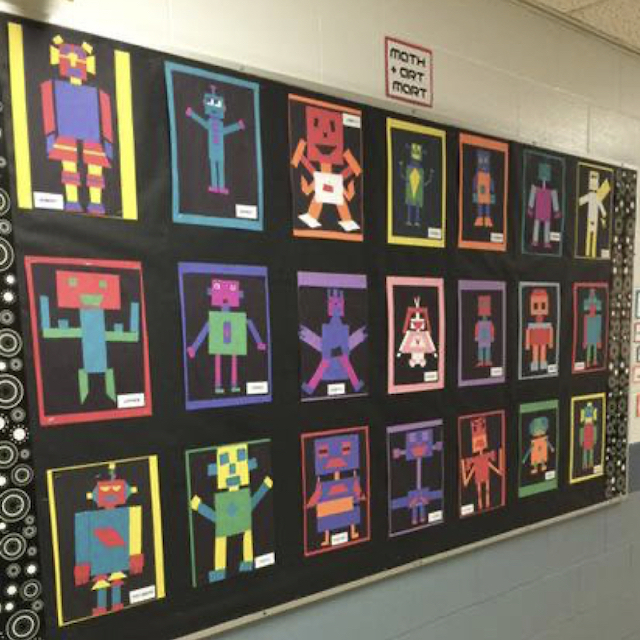
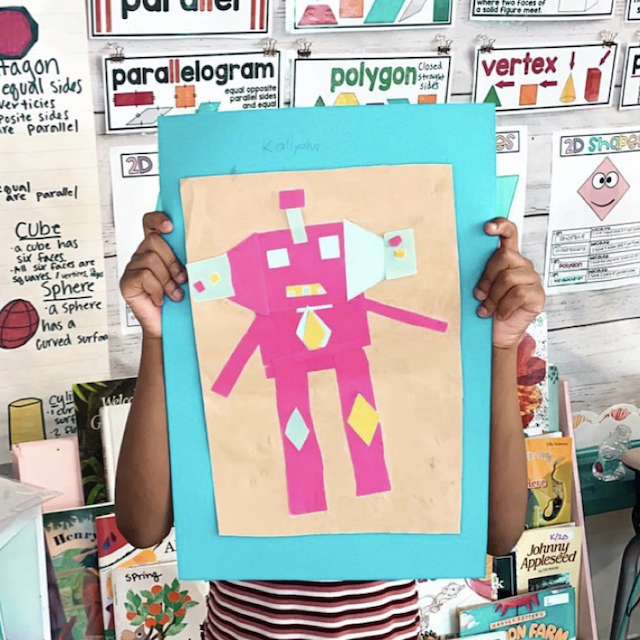
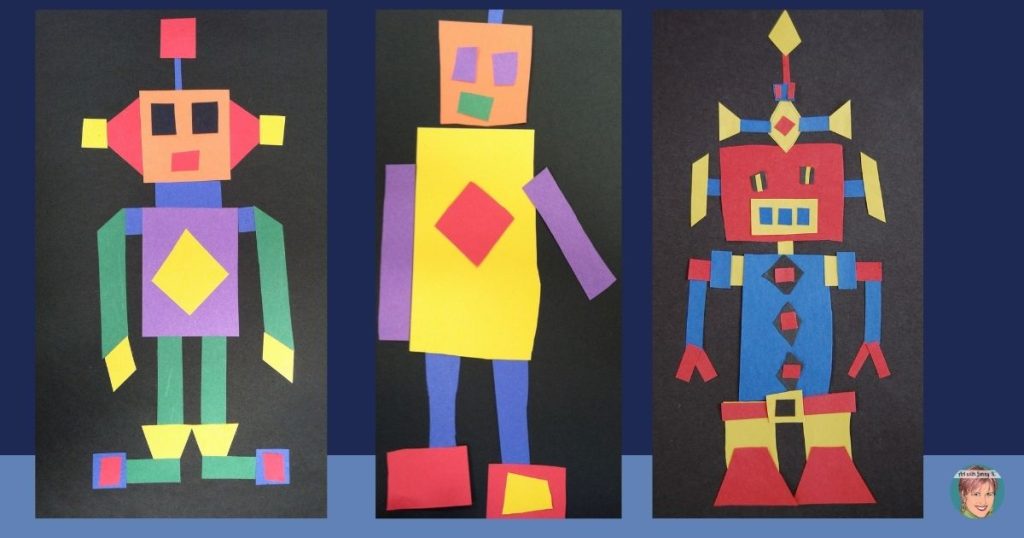
Voila! Your finished work will be a fun, creative, and colorful quadrilateral robot. Not only will students have a lot of fun dreaming up their Robot but they will also become familiar with all types of Quadrilaterals in a very fun and easy way!
Here are some of the finished Robots.
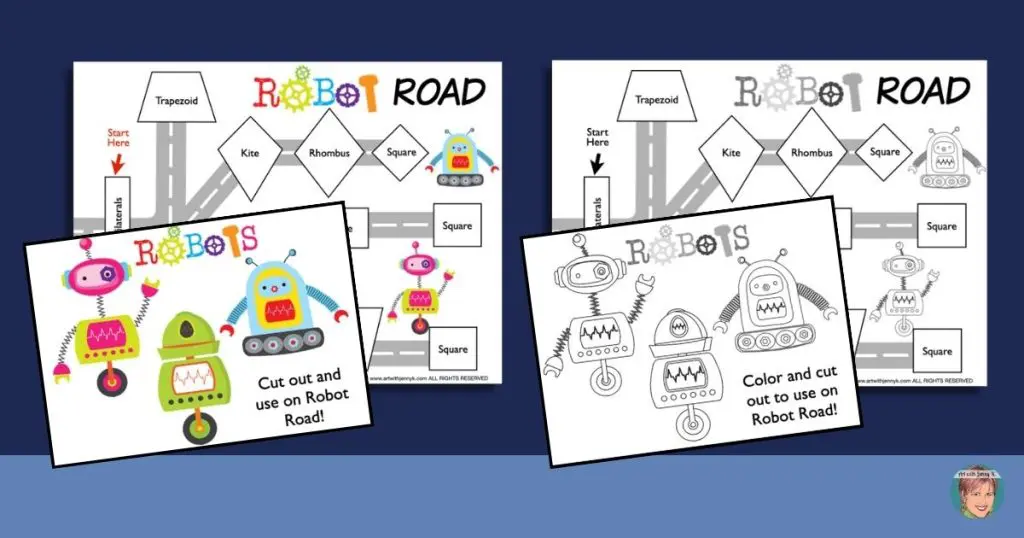
Project-based learning is about “in-depth inquiry.” In order to expand this lesson to see if students gained a deep understanding of quadrilaterals, I created a game called “Robot Road,” and students use their knowledge of quadrilaterals and all the subsets to answer higher-level thinking questions. Students get to use a paper robot to move along the “road” and discover what quadrilateral is a subset of another. If you are interested in the game and worksheets, click here.
Holiday Variation
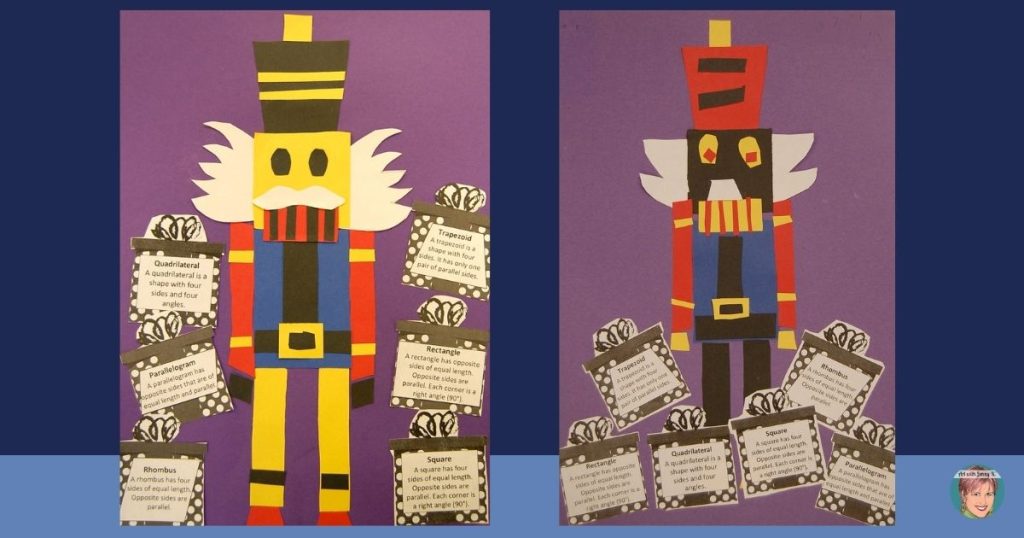
This lesson was so fun I even created a holiday version: Quadrilateral Nutcracker.
I thank you for reading my post, and I hope you see how helpful art integration can be for PBL. Strive to be a child-centered classroom full of project-based learning, art integration, and art infusion!
Jenny K.