
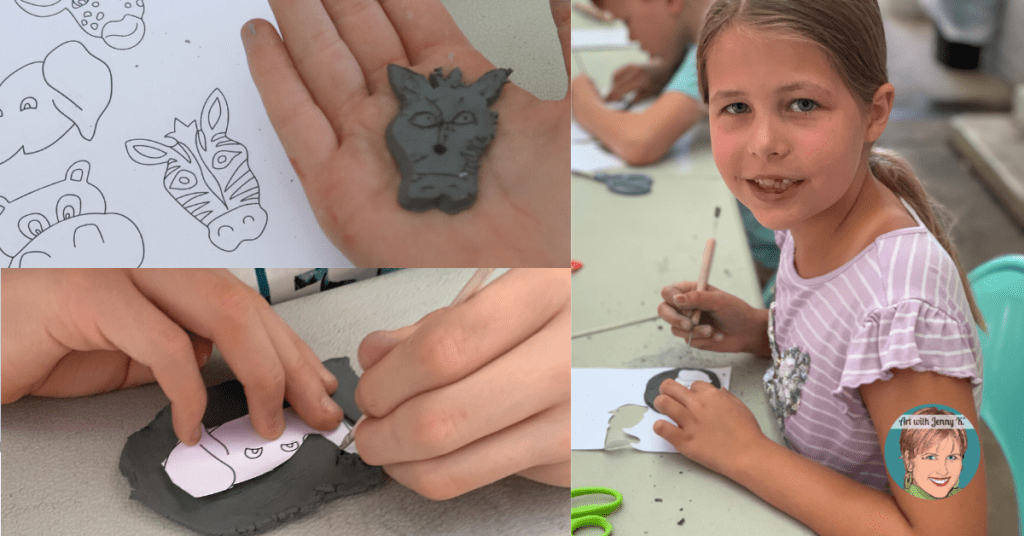
To get started on this project, you’ll want to have students create their shapes using clay. I printed a sheet with animals on it, and my students cut the images out. They then rolled out their clay and used the paper animals as templates to trace around. This process feels a lot like making cookies when you roll out the cookie dough and use cookie cutters. Which, by the way, you can also use with clay if you have some very small ones for this project.
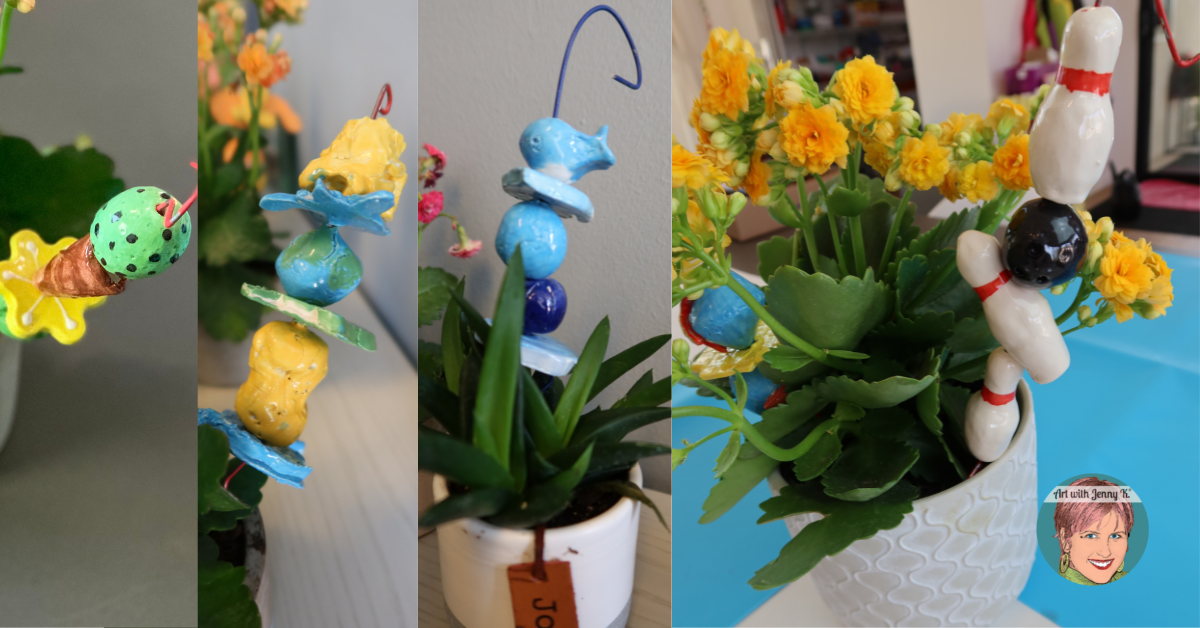
My students made both flat shapes and rounded shapes. Not all shapes had to be in the “theme.” They could make balls, cubes, cones, etc. In fact, I encouraged them to make several different kids of shapes, so their final clay kabobs had variety when it was assembled.
Don’t forget the holes! You will want to make the holes a little bigger than you think they need to be, especially if you are firing your clay in a kiln since the clay will shrink a little. This will make it easier to put it all together at the end. To make the hole, I used a skewer from the grocery store.
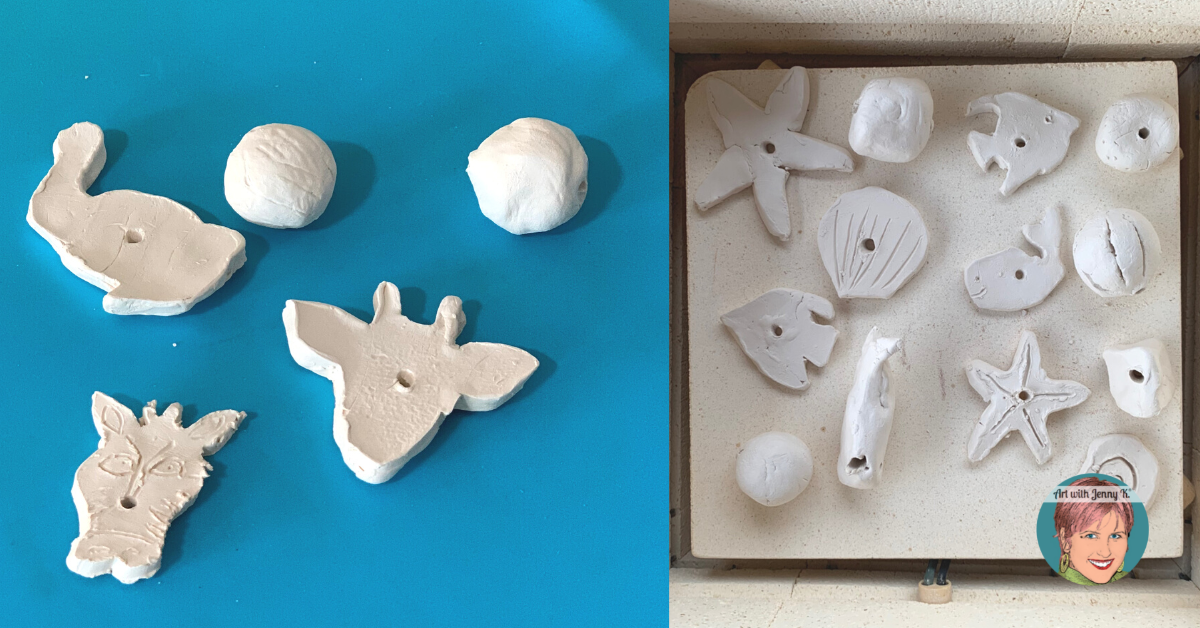
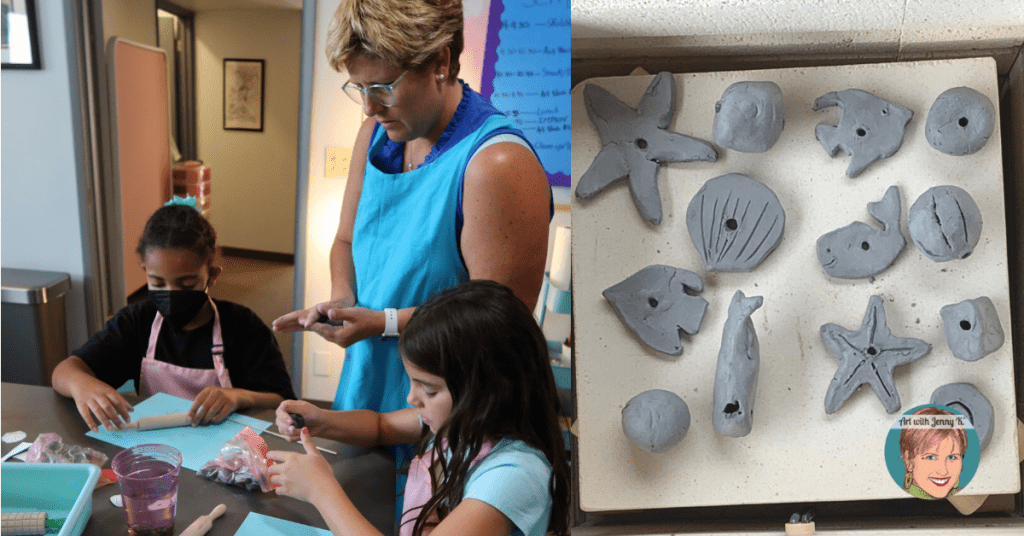
Once the clay pieces have dried to a “leather-hard” consistency (a day or two), then you can put them in the kiln. Since this post isn’t about how to fire in a kiln, I won’t go into great depth here. however, I fire my pieces to cone 06 overnight. When they are done, they are what is called bisque fired. After the kiln, they turn white. They are also hard but fragile (careful).
If you are using air dry clay, you’ll probably need to wait a few days for the clay to dry before you paint the individual pieces (next step).
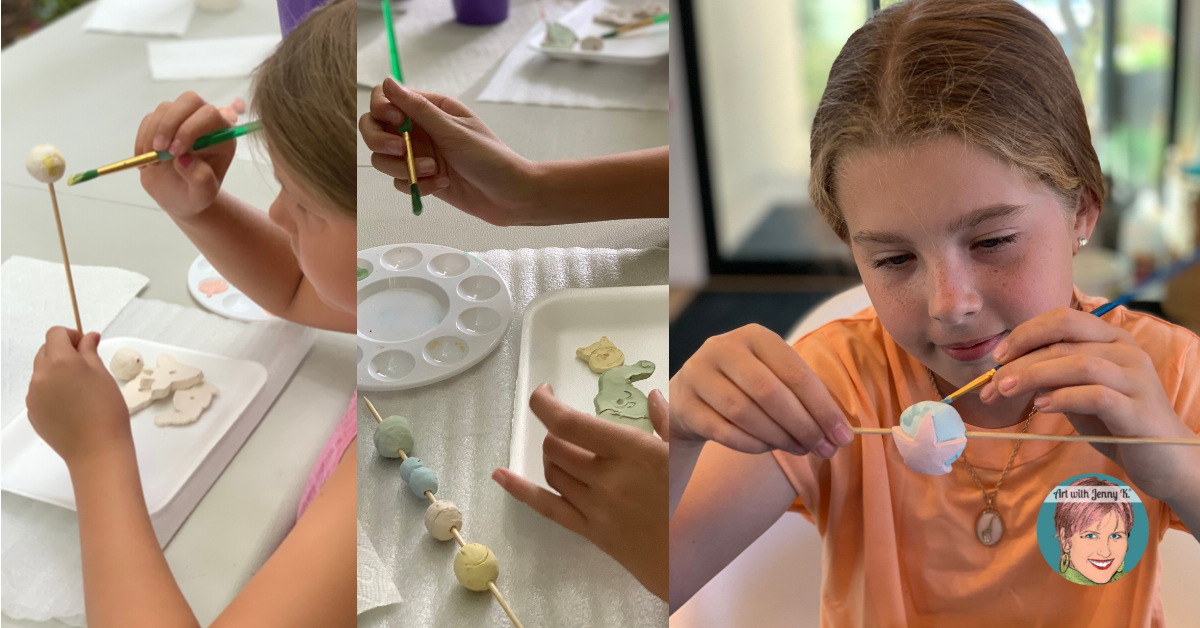
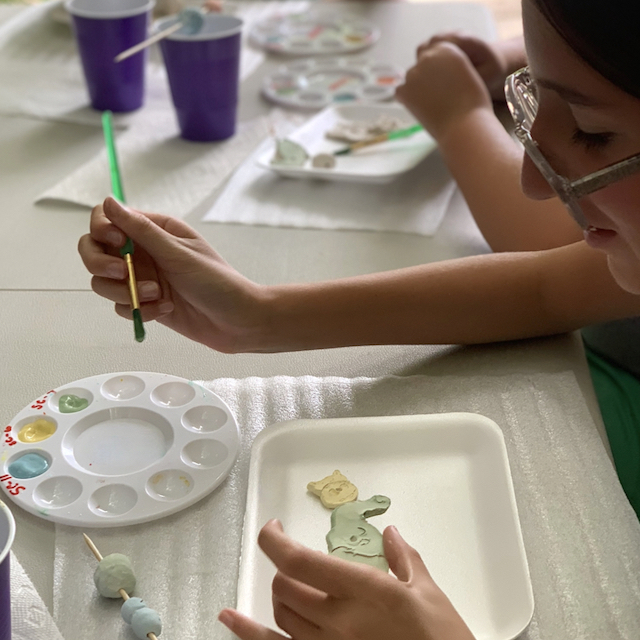
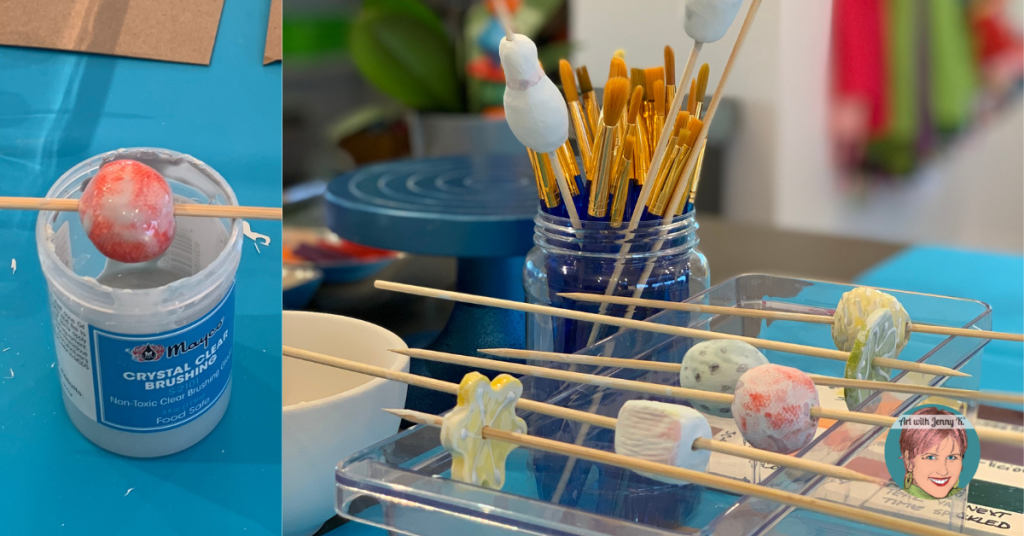
Once your clay pieces are bisque fired, then your students can glaze them. To do this, I had my students put their pieces on a wooden skewer and paint with the underglazes. You’ll want to read the instructions on the glazes that you are using, but typically underglazing requires three coats for each color.
If you are painting air dry clay, you’ll want to use acrylic paint so it adheres to the clay.
Once all of the pieces have their underglaze on them and are dry, you can add a final coat of clear glaze to the pieces (pictured below).
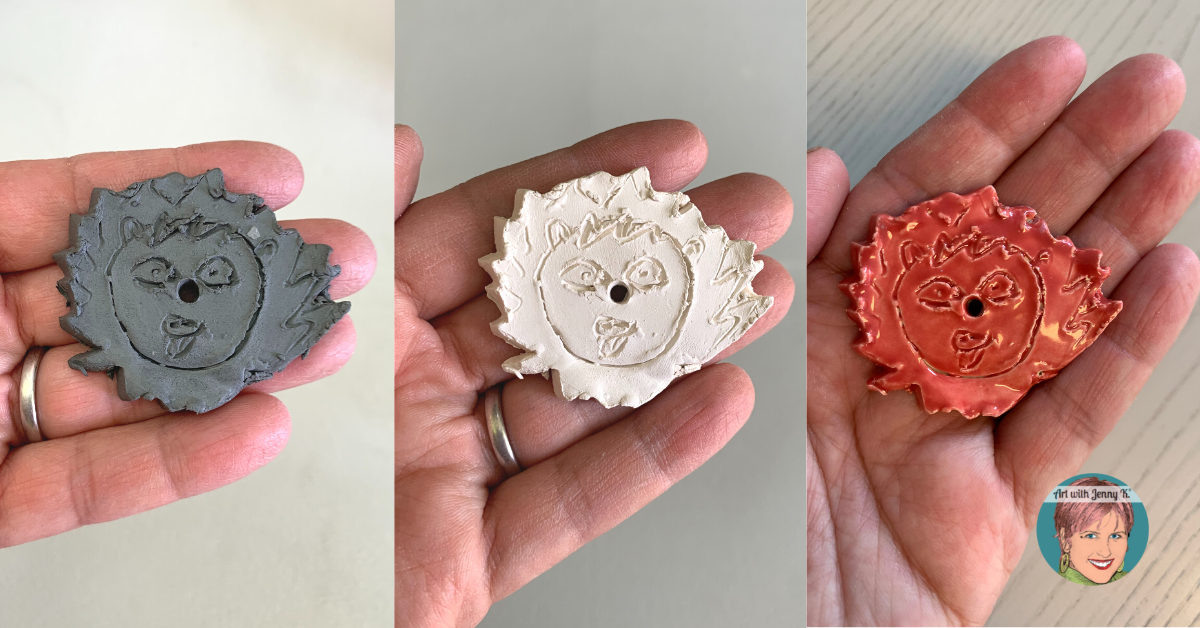
Below is an example of the process from clay to bisque to the final glazed piece. This process progression is demonstrated using one of my student’s pieces—a lion (isn’t it cute?!).
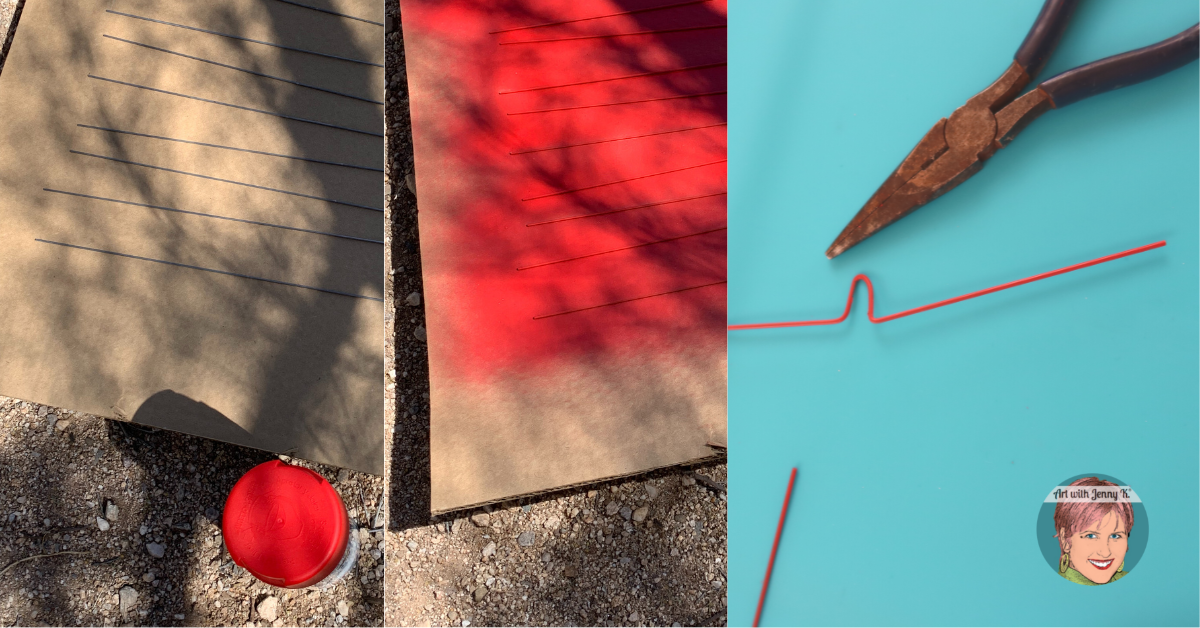
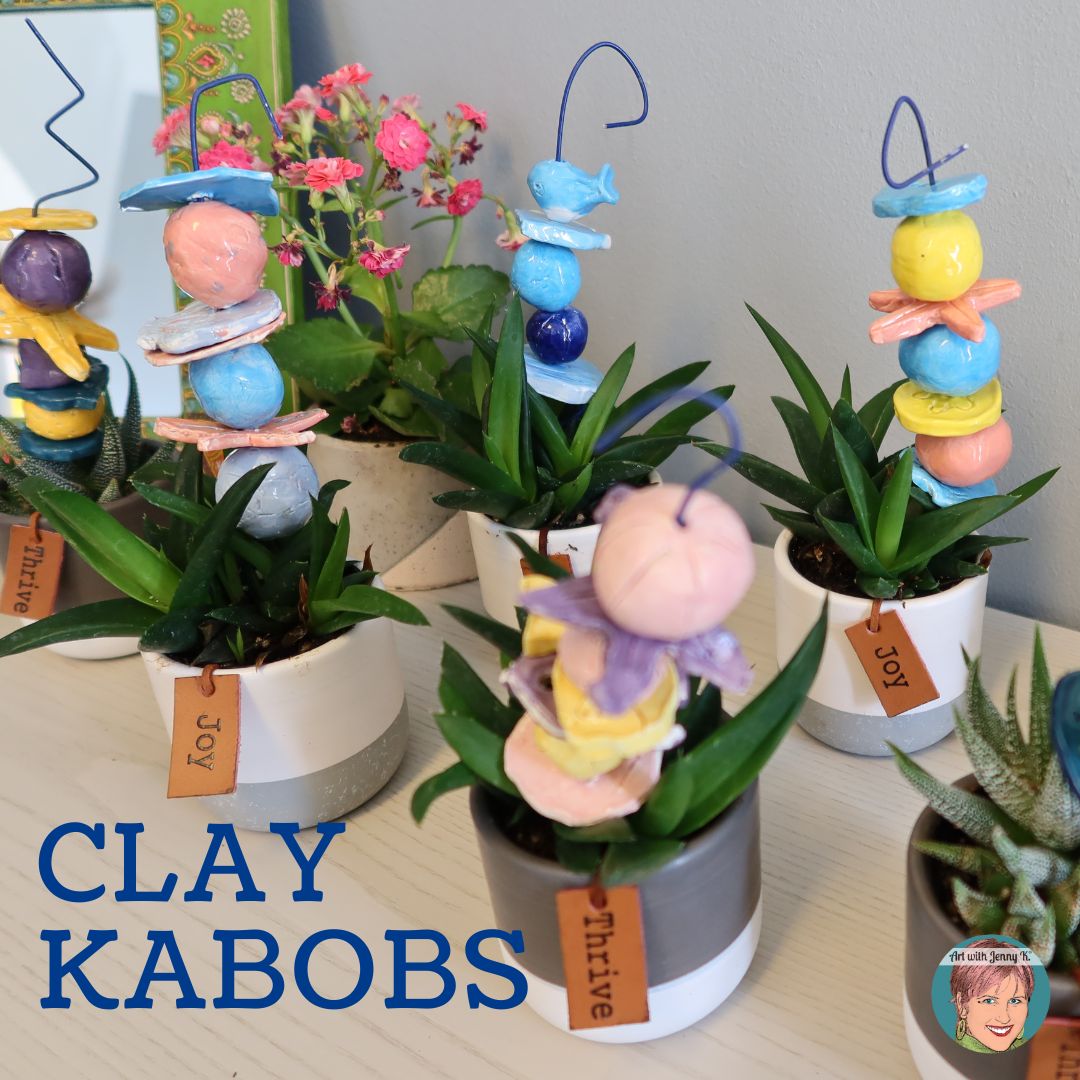
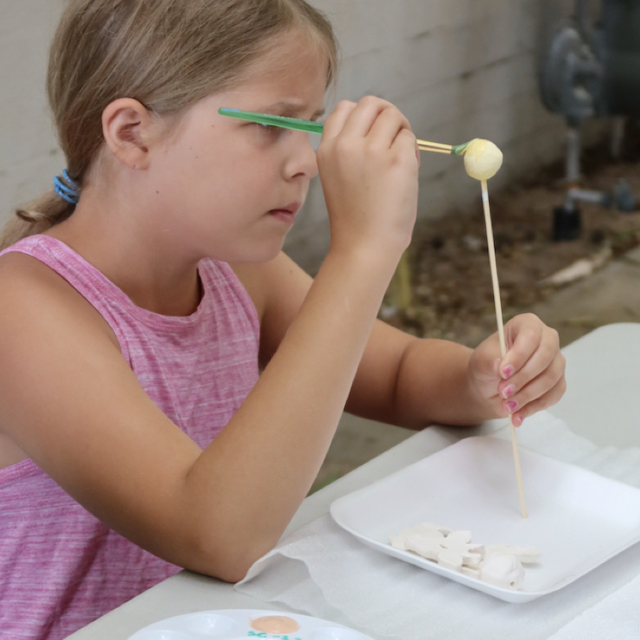
To assemble the clay kabobs, you’ll need a stick to put them on. Something firm enough to support the clay pieces, but soft enough that you can bend the wire and cut off the extra. My husband went to the hardware store and got me the little flags you put in the ground to mark buried utility lines. I cut off the little flags, laid them out, and spray-painted them red and blue.
Once you have all the pieces, you can then assemble your clay kabobs. I had my students work out their design and then I went around with my wire cutters and bent the top into a design that would keep the pieces from coming off. I also bent the bottom so the pieces didn’t slip off the end.
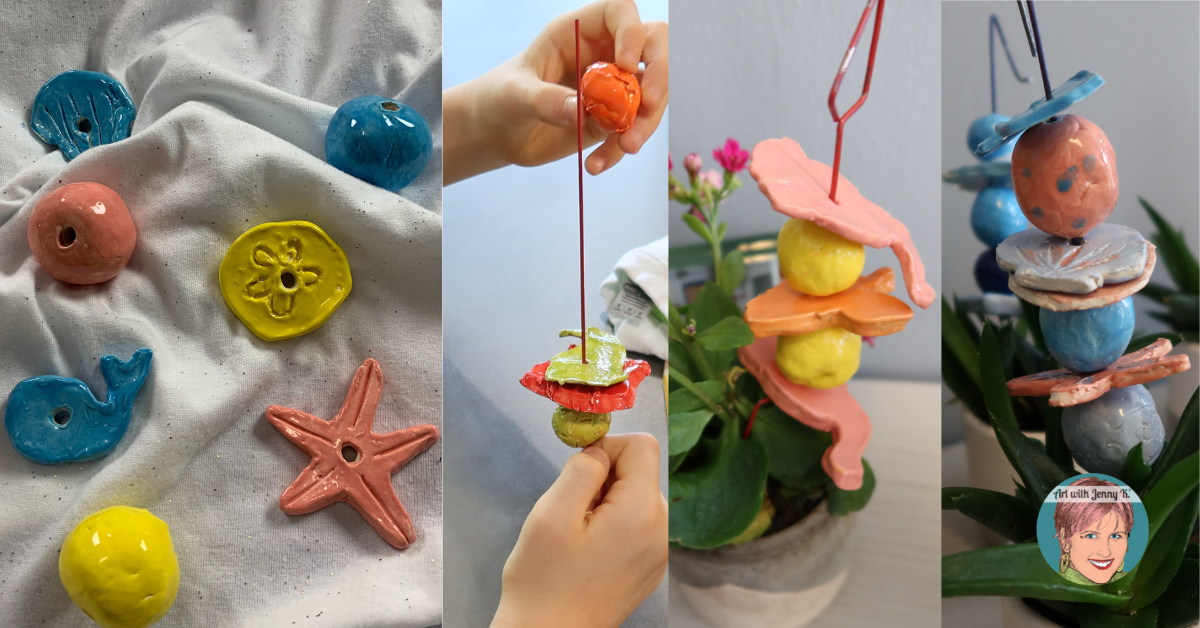
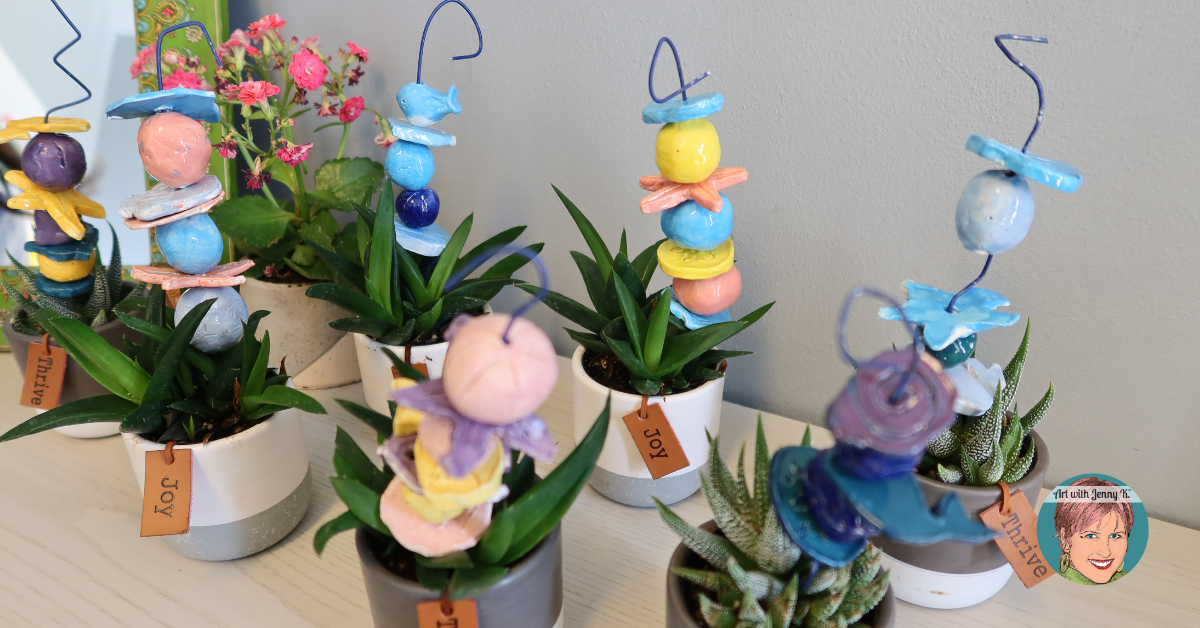
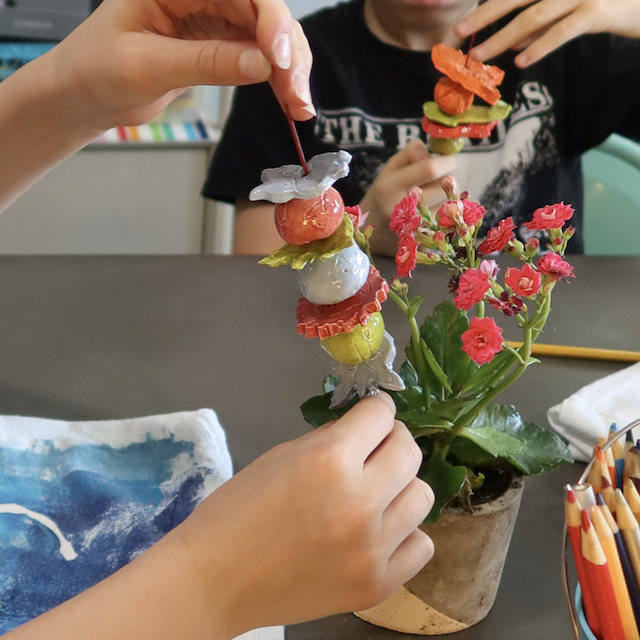
I did this project for a summer camp, my classes were smaller, and I could buy each child a small plant for their clay kabobs. Once the clay pieces were stacked, then each child put them in their plant. These made the best gifts for students to give to their parents at the end of the week. If you can’t get them a plant, that’s okay—they can put them in a plant at home.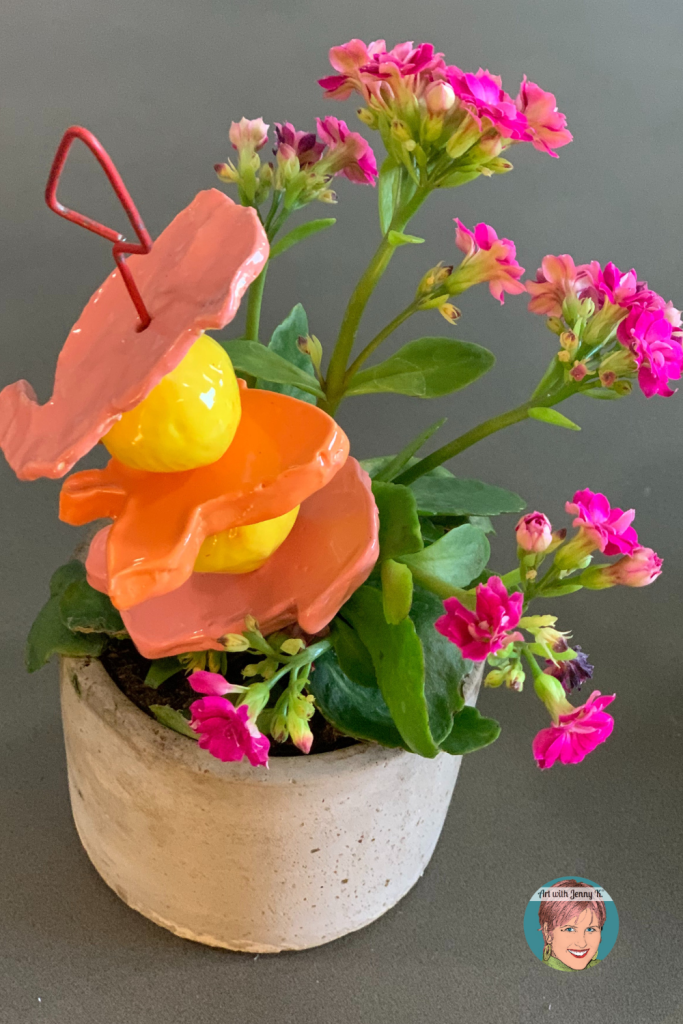


Purchase on Amazon!
Purchase on Amazon!