How to draw a pig (with some bling)! Oh boy, this lesson will give your students something to squeal about (happy squeals). Kids love to draw animals — especially these cute little piggies. My students loved this lesson, and I’m confident yours will too. I’ve created and designed a lesson that teaches children how to draw a pig step-by-step, encouraging them to be creative and add some fun “bling” like glasses, bow ties, pearls, and more. I had one student who added a hat to their pig and another who added wings. One of my students added a little purple and orange for her background and said her pig was “rolling around in the mud” (more at the end of this post about painting pigs if that interests you).
My lessons are always designed with classroom teachers, art teachers, and parents/guardians in mind. In this post, I will break down how to do the steps. However, to make things as easy as possible for you, I’ve also included both my free handout (keep reading) and a YouTube Video of me demonstrating the steps below.
How to use this activity in your classroom?
There are so many ways you could use this lesson in your classroom. First and foremost, you can use it to allow students time to draw (tons of benefits to that). It’s great if you do a fine art Friday lesson. It’s great to leave for a sub.
If your students read Charlotte’s Web, you could pair the reading with this activity, or if your students are much younger, perhaps The Three Little Pigs.
Have your students write stories, explain the steps or share their experiences, and they can practice writing as well.
So many easy, fun, and educational ways you can use this lesson.
How to Draw a Pig: Step-by-Step
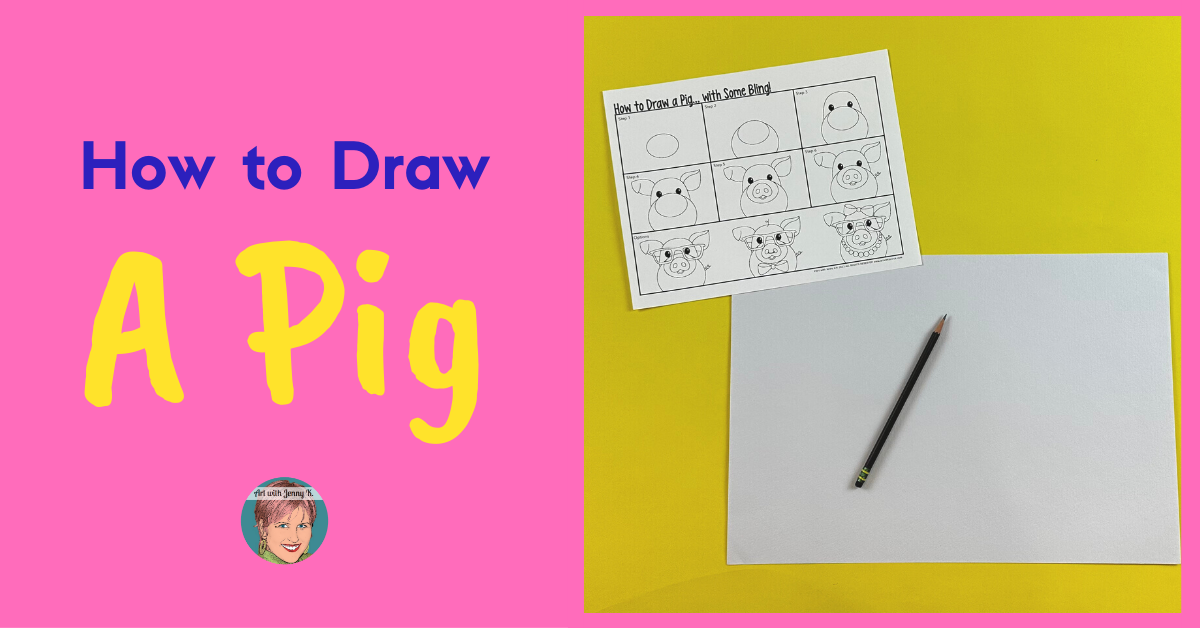
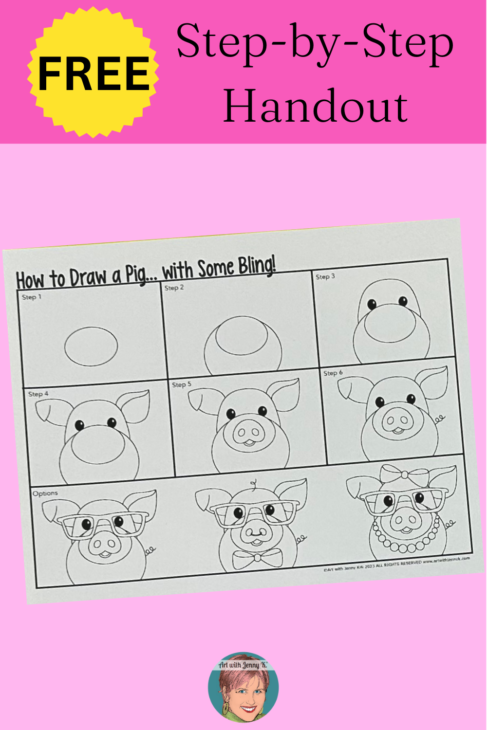
I have created a handout you can show your children digitally or print for them physically. In this handout, I break down how to draw a pig in six steps.
Rather than make a 25-step handout (okay, maybe I exaggerate), I paired things I knew the children could easily do together. For example, the head and eyes are in the same step, and the two different ears are in one step. Think of the six steps as six groupings.
You can download a free version of my handout from my TPT store HERE.
Choices! You can give the handout to your students and let them work independently, or you can guide them together as a class. This will greatly depend on the age of your students and how you are using this lesson.
When I guide my students through directed drawing, I have a technique to keep them engaged and on track. I “sing” the steps to my students and have them repeat the steps back to me (singing) as they draw the same step.
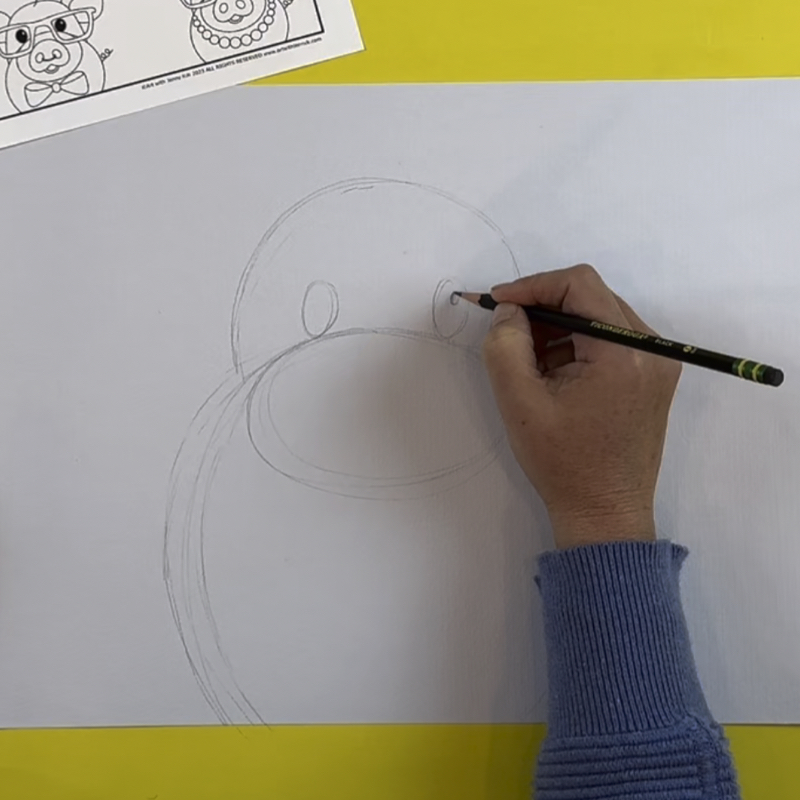
Step 1: Draw the Snout
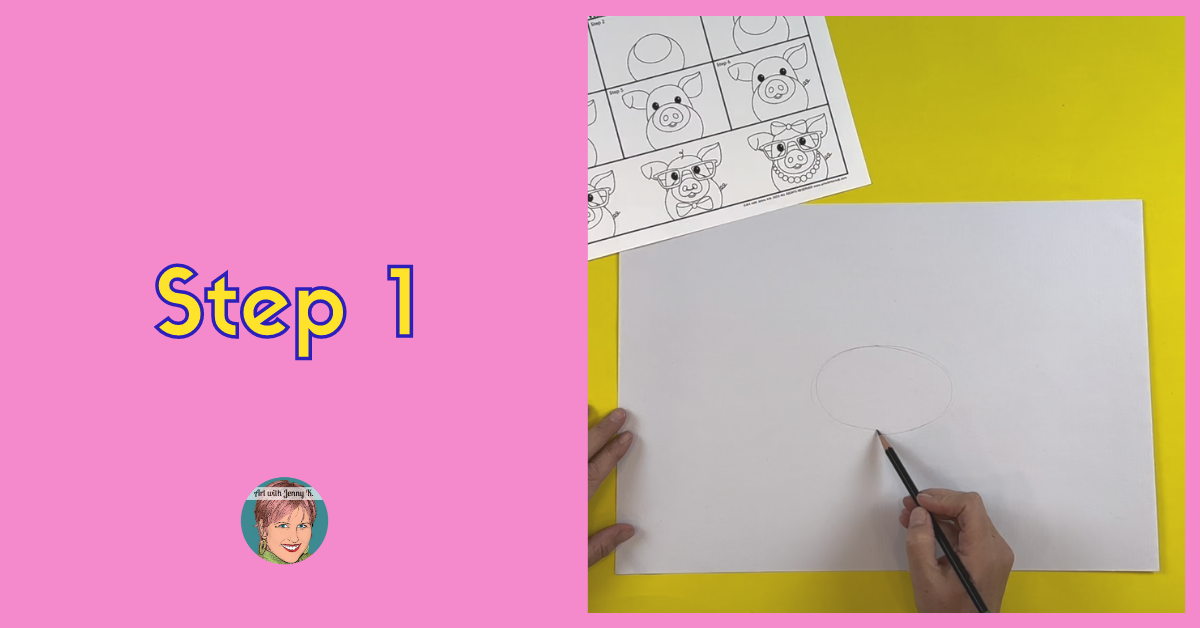
Draw an oval in the middle of your paper. Leave enough room above this oval shape for the pig’s head and ears and enough room below for the rest of the body.
Step 2: Draw the Body
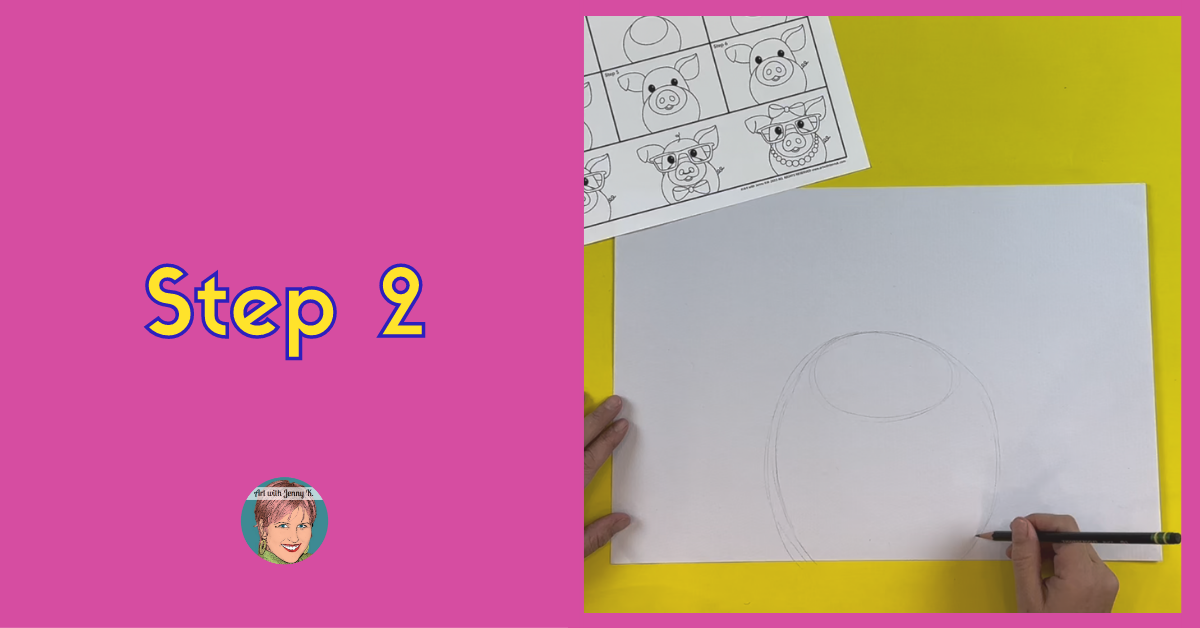
Draw the round body shape around your first oval and extend it to the bottom of the page.
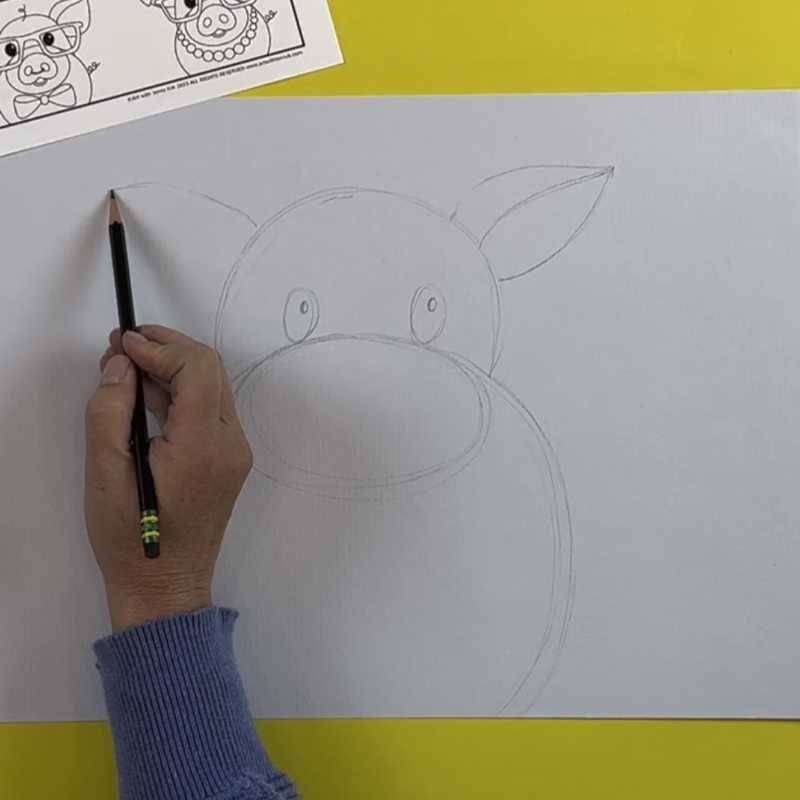
Step 3: Draw the Head
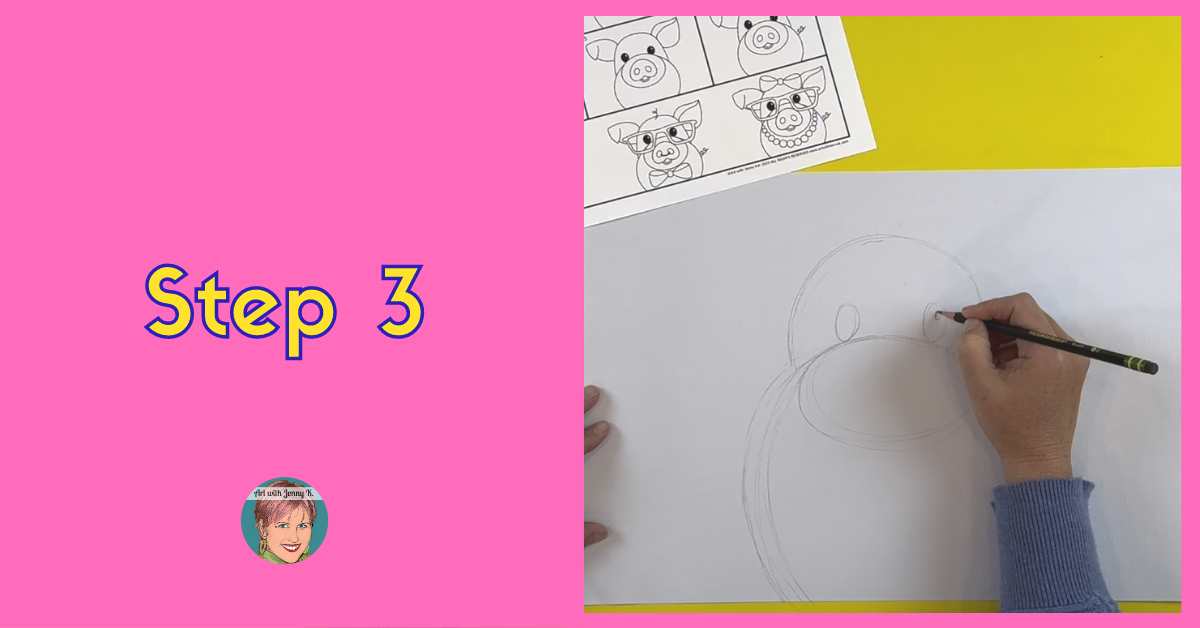
This step combines both the head shape and the eyes. Don’t forget to draw the smaller circles inside the eyes. You can fill in the eyes dark as they are in the handout, or if you plan to color in your pig, leave the rest of the eye for your paints or markers (or whatever medium you choose).
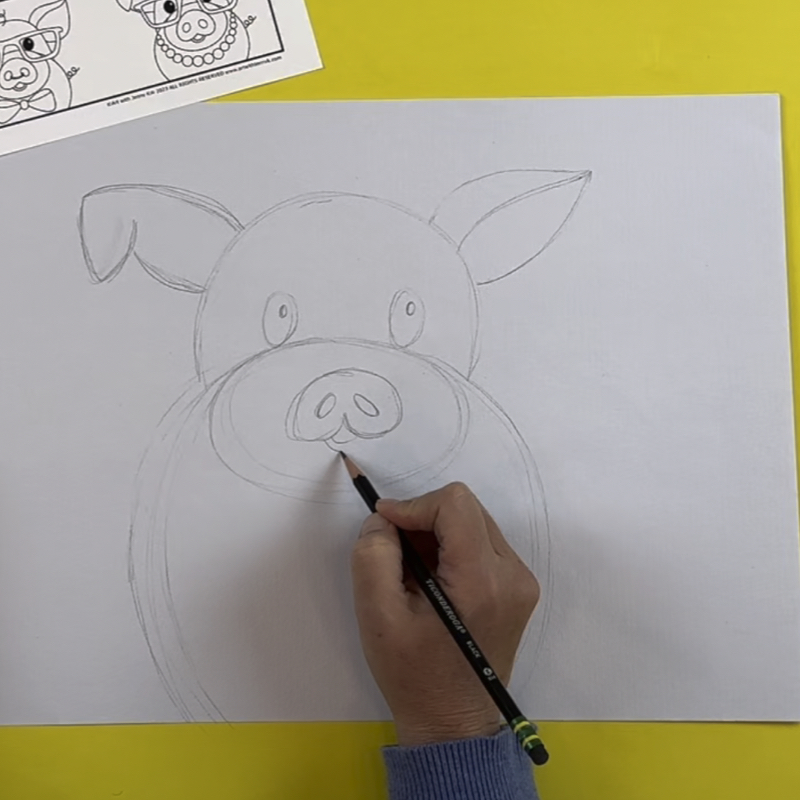
Step 4: Draw the Ears
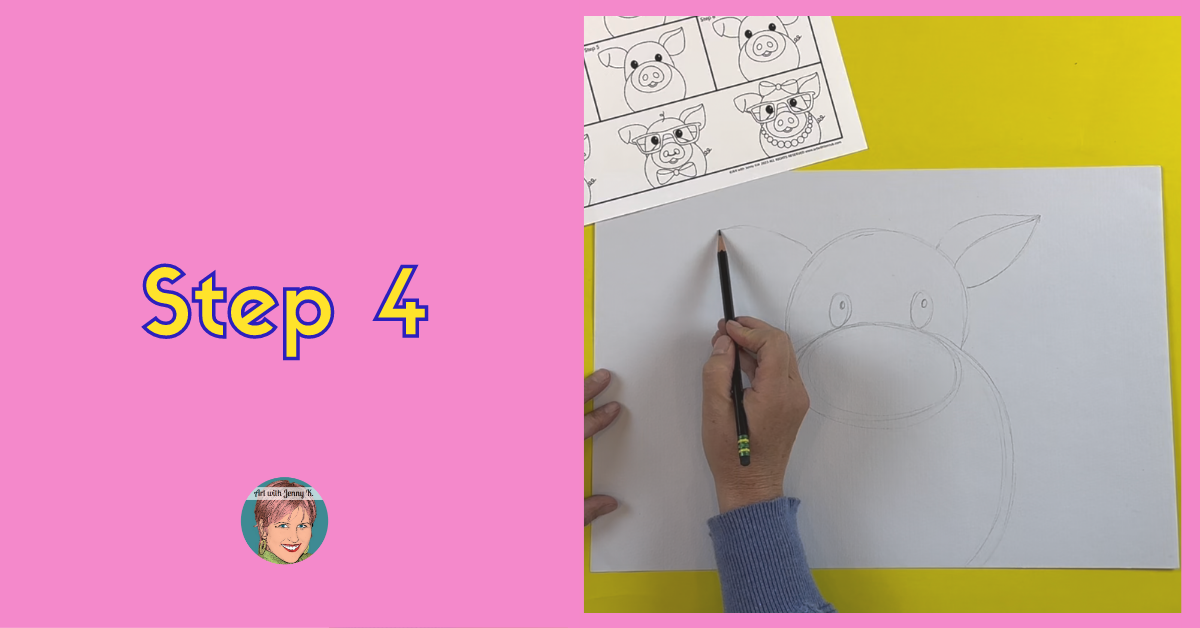
Next, draw the ears. I find it helpful to mark with a small dot on the page where I want the ear to end before starting to draw my shape from the head. The ear shape is kind of like a triangle (kind of).
Step 5: Add Details to the Snout
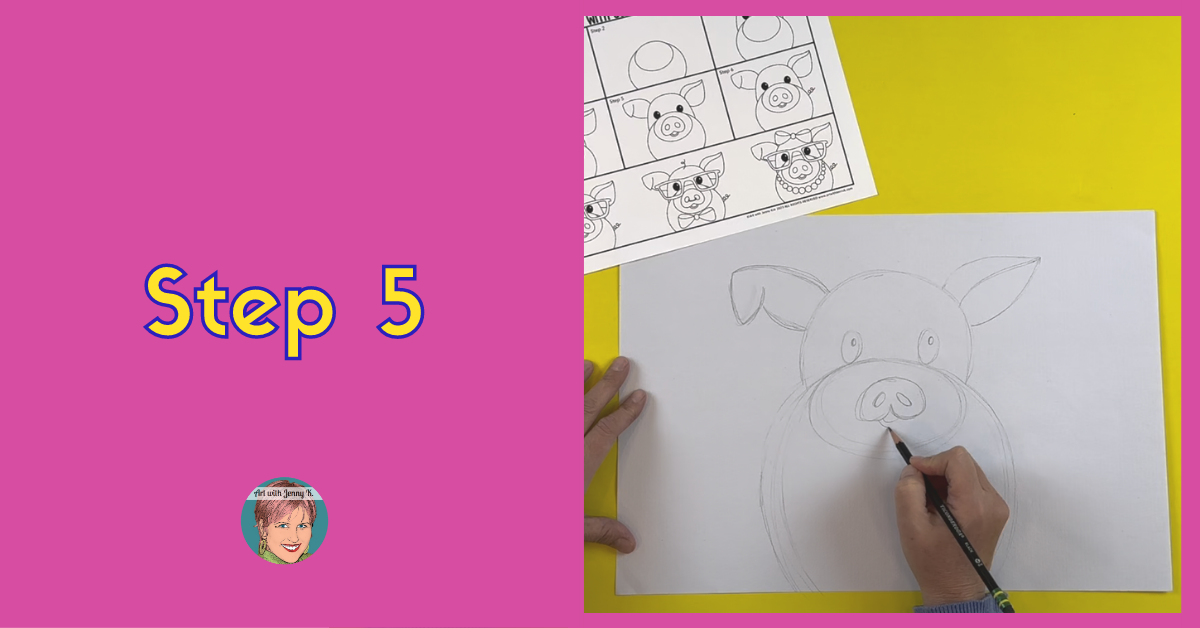
For step number five, I start by drawing the curve at the bottom and then connecting it at the top. I think of this little shape like a “w” or an upside-down heart. In fact, the entire snout shape is like a heart but just not pointed and upside down. To finish the details of the snout, add the oval-shaped nostrils and finally two curves for the little lip.
Step 6: Add the Curly Tail!
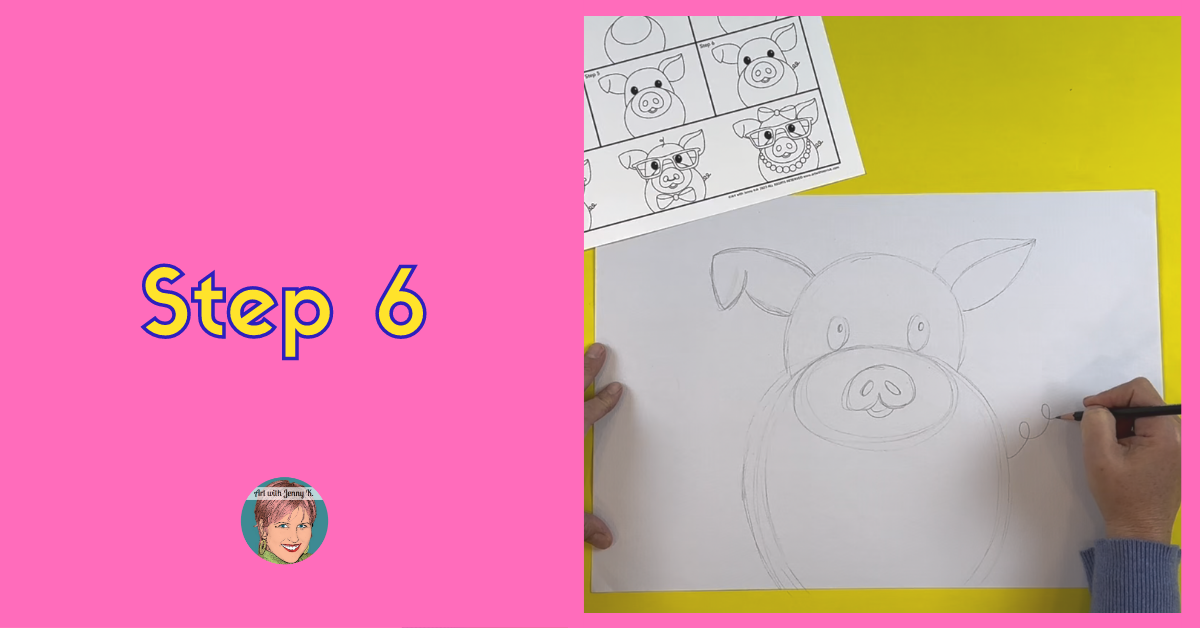
What would our little piggies be without distinctive features like a snout, pointed ears, and, most of all — a curly tail? For step number six, draw the curly tail, but remember, if you are going to paint, you might have to paint over it and then add it back in (depending on your medium). I recommend drawing it anyway so you can have the satisfaction of drawing your pig completely.
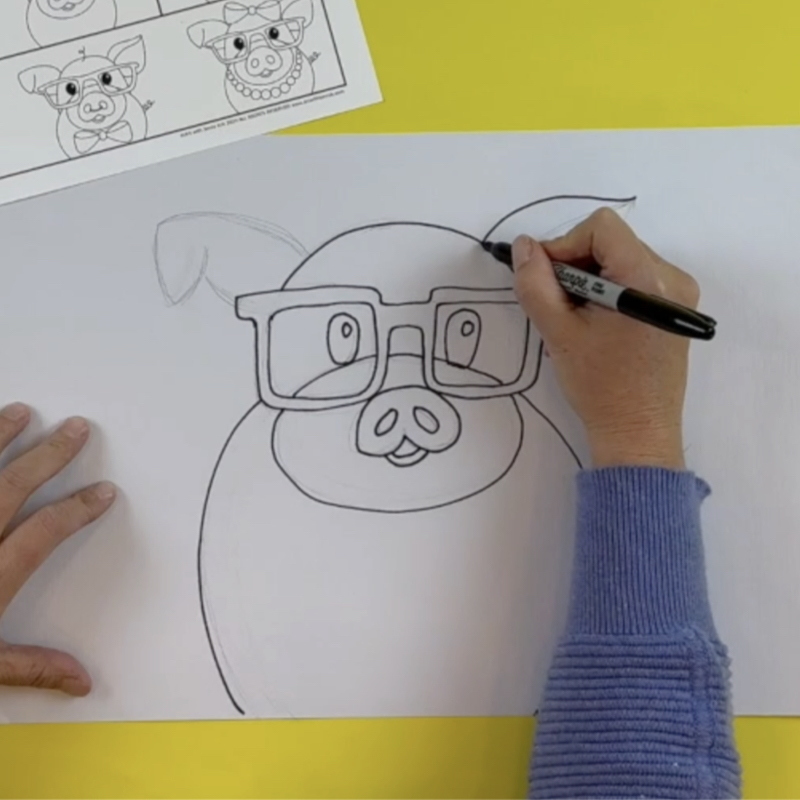
Don’t forget to add the bling!
Once your students have finished the first six steps of my handout, they will all have very similar-looking pigs. Now you can encourage them the add their own “bling” to their pigs. I have included examples like glasses, pearls, bow ties, and a hair bow. I even added a nose ring for fun. This is just to inspire your children and give them ideas.
The idea here is not that your students draw all the “bling-y” things at once (although they could if they wanted to), but rather they draw what they want.
…and speaking of inspiration. You just never know where it’s going to come from. If you follow me on Instagram and/or Facebook, you might have seen the post I shared while designing this lesson.
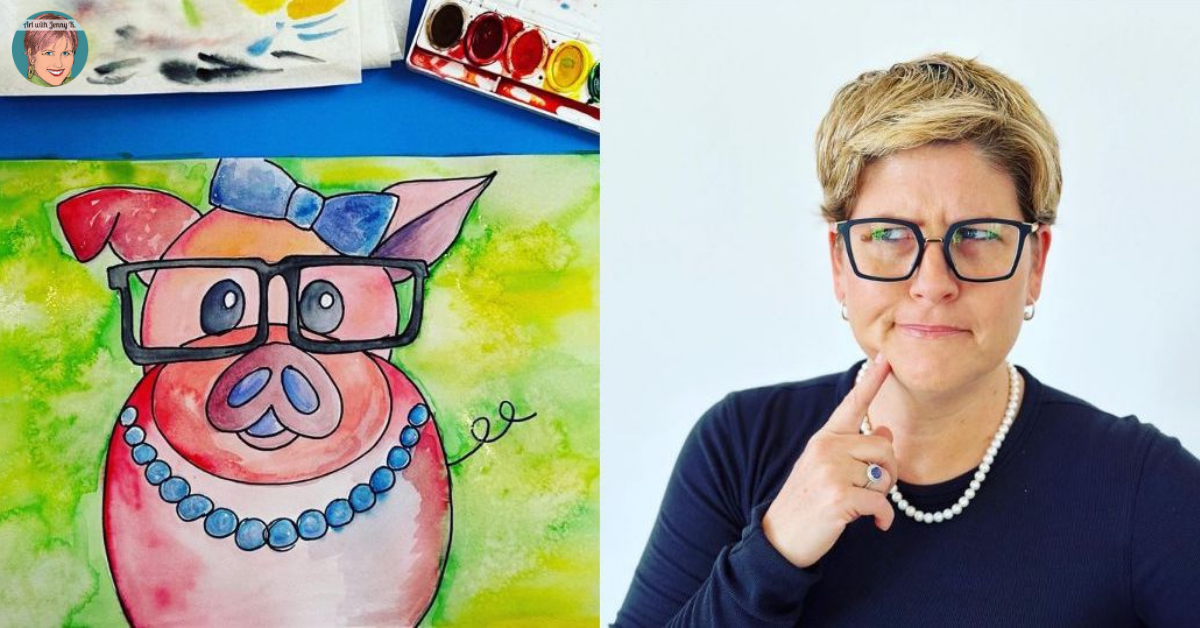
As I was painting the black glasses onto my pig, I thought. “Wait a minute. Did I just create a self-portrait?”
Well, if I did — I didn’t do it on purpose. But you gotta take inspiration where it comes from, so it’s all good by me!
Optional: Outline
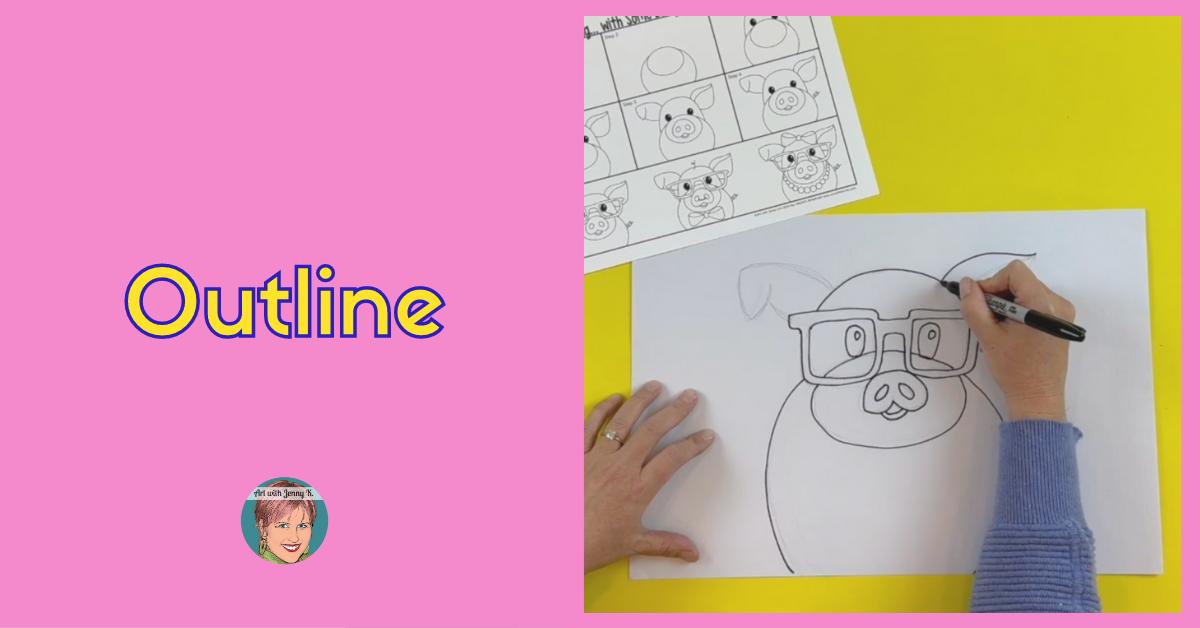
While my students start drawing their pigs in pencil, I always encourage them to outline over the pencil with a permanent marker when they’re done. Drawing an outline helps the pig stand out boldly and visibly. This is an optional step and doesn’t make sense for every child or classroom, do what works for you and your students.
Take it to the Next Level and Add Paint!

If you feel good about how to draw a pig with your students, then you might want to take it to the next level and try painting pigs. Don’t worry; I have an entire blog post dedicated to painting your pigs using either watercolor on paper or acrylic paint on canvas.
If you’d like to try painting pigs with your kids, you’ll find all the instructions on my blog HERE.