I enjoyed the creative challenge the LEGO birthday theme provided me, so I decided to take the time to write about these activities in case this information would be helpful to any others interested in throwing their own LEGO birthday. I certainly would have liked to have found this sort of thing when I was planning for this LEGO birthday party!
If you have ever purchased LEGOS (and who hasn’t, right?), you’ll know they aren’t cheap—they are totally worth it, but they can be a bit costly. So, any links that go to Amazon are affiliate links (I might make enough to buy one LEGO brick if you purchase from my affiliate link—but hey, every little brick helps!). You can see my disclosure HERE.
I explain the preparation for each LEGO activity below and give you the links to the resources I used. Of course, feel free to use whatever resources you have already and/or to support your local stores to purchase anything you need to create the perfect LEGO birthday party for your child or student.
Setting Up
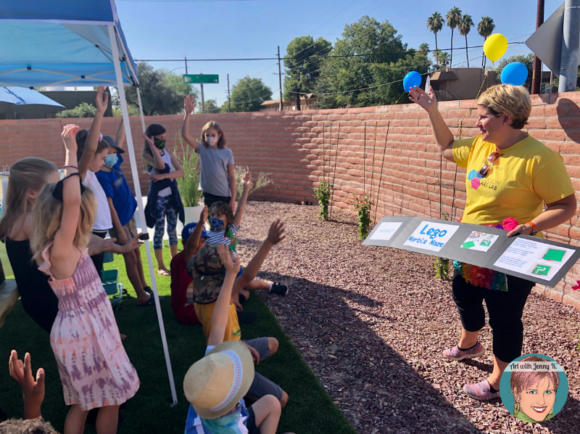
Before the children arrived, I set up my Art Lab space with different activity centers. One activity per table.
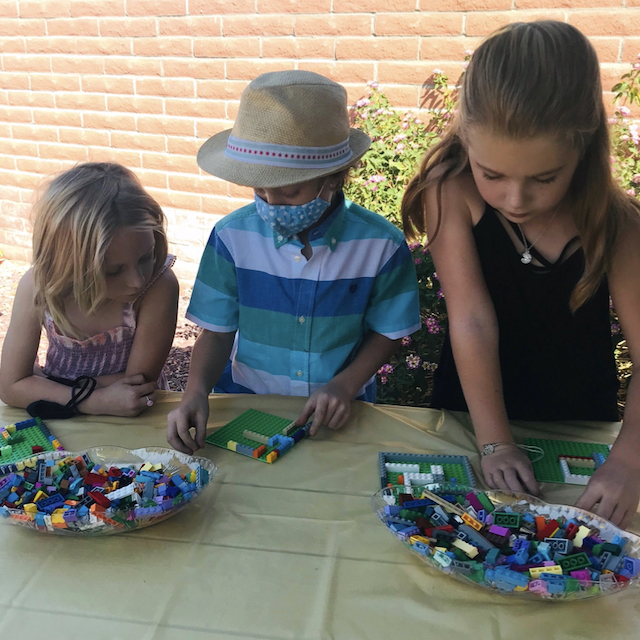
Normally, I might have just had the kids freely rotate between the stations whenever they wanted to. However, for this party (during 2020), I assigned 3 kids to a group and had the groups rotate together from one station to another. You can do this however works best for you.
Getting Started
I started the party by asking the children a very simple question, “How many of you have used LEGOs before?” Well, of course… they all had!
Then, I explained that we’d be using LEGOs in a little bit different way than they probably ever had before. We’d be making mazes, learning about printmaking, and creating Mondrian mini-masterpieces.
This was a birthday party, so of course, I wanted to keep it fun, but I thought if I could introduce the children to some art concepts along the way, like primary colors, printmaking, and the artist Piet Mondrian, that wouldn’t be so bad—right?!
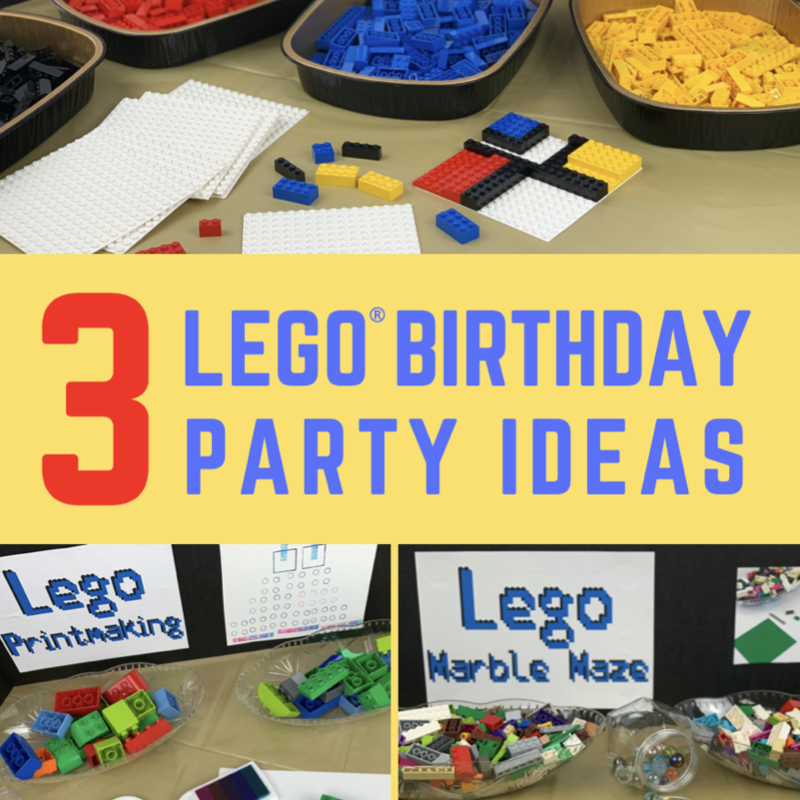
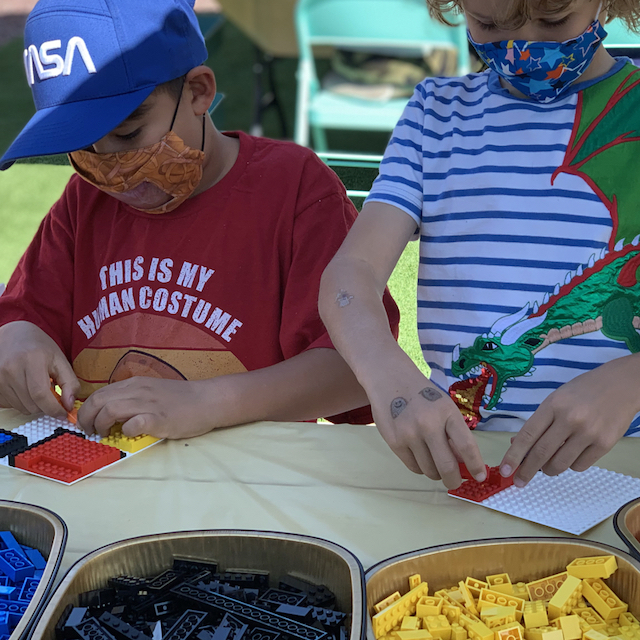
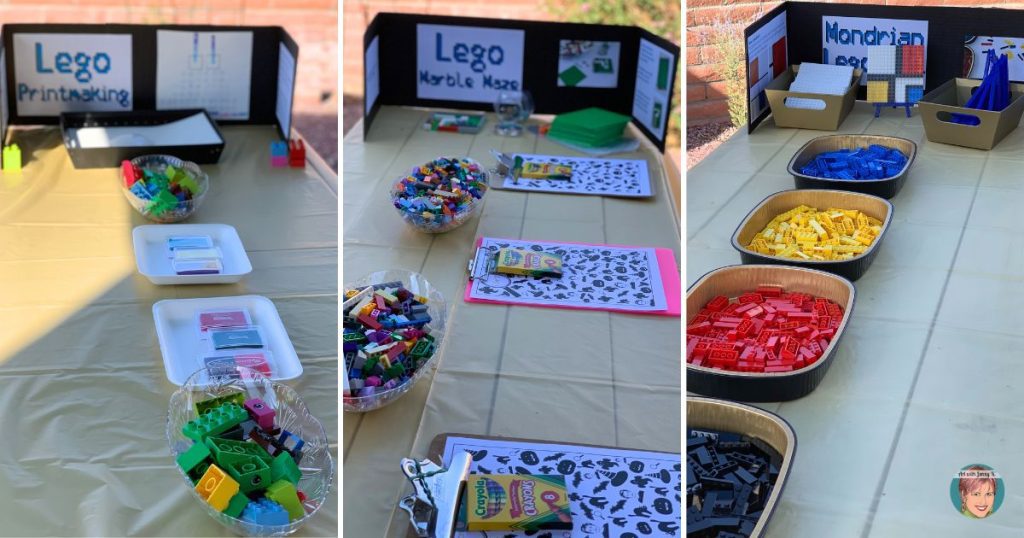
Idea #1: Marble Mazes
I knew the kids would like making these LEGO mazes, but I didn’t expect just how much they would love it. It was a fan favorite for sure, and I think that’s because not only did they love designing and creating the maze, but then they could play with their finished product!
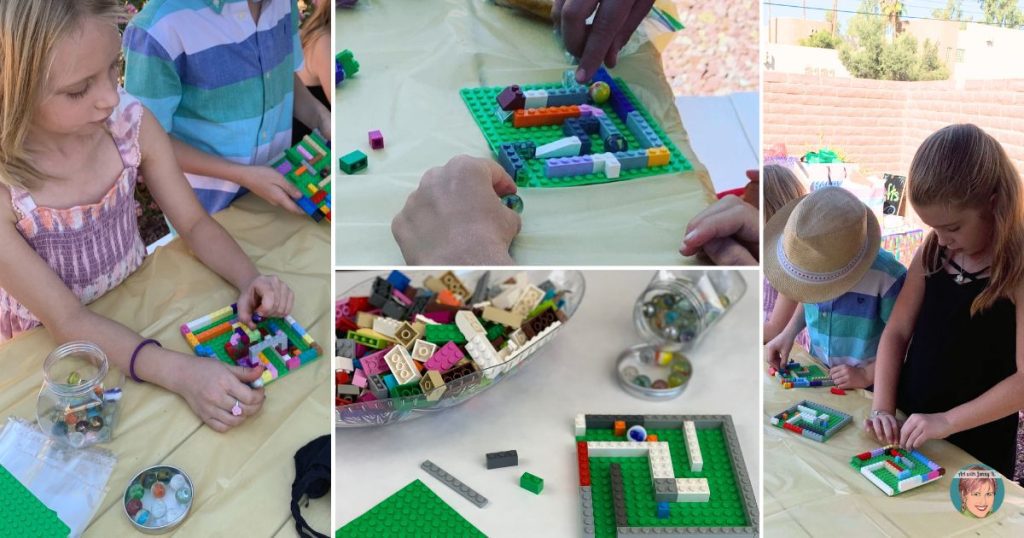
The objective of this LEGO birthday activity is to use LEGOs to create a maze that a marble can fit through. It’s ideal if you can use single brick LEGOS for this. But you can also use double bricks if you need to.
To prepare for this activity, I presorted all the 1-stud wide LEGO pieces that I had and supplemented them by purchasing a box of classic LEGOs. You can also use a classic set and pull out the red, yellow, blue, and black pieces for the Mondrian activity (explained later).
I went to a dollar store and bought some plastic containers to put the pieces in and a little plastic jar for the marbles. You only need one marble per maze/child. It’s good to have a few extras on hand. They tend to drop and roll off into Neverland or under something heavy.
You will also need the LEGO baseplate to attach the pieces. I purchased the larger ones (32 x 32 studs) and cut them into 4 pieces (each 16 x 16 studs). The final LEGO marble maze size, doing it this way, is approximately 5″ x 5.” This was the perfect size for the children to hold and play with their maze.
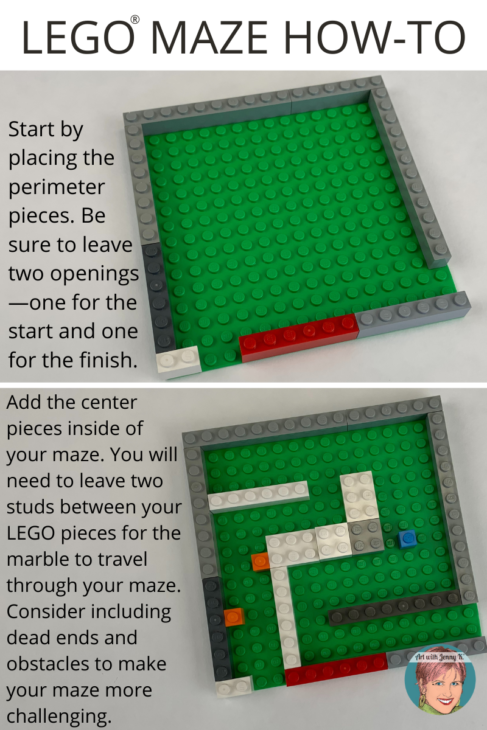
Start by creating the outside of your maze. I’m a teacher, so it’s hard to turn that off when I’m with kids. So I found this is a great time to use the word “perimeter” with the children.
Remember to leave TWO openings to the maze—a starting place and an ending.
Set the perimeter, leaving two openings. Then, you can start designing the inside of the marble maze. It’s important to leave two LEGO “studs” between your brick pieces for the marble to travel through your maze.
Once the maze is complete, the children can enjoy playing with it and playing with each other’s mazes. I saw so many creative things from the children at our birthday party. One child even created a special little “holder” to keep the marble when you weren’t playing the game—kids are brilliant!
Lastly, I supplied each child with a small plastic bag to put their final maze in.
You know, so they wouldn’t lose their marble (…because we know what happens when we lose our marbles).
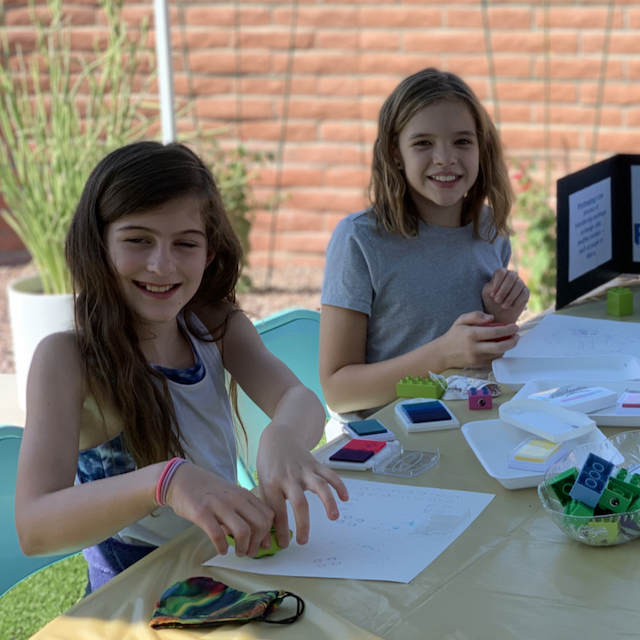
Idea #2: Printmaking
For this LEGO birthday activity, I kept things pretty simple. I used the larger DUPLO LEGO CLASSICS for this activity. You could also use the smaller LEGOs if you wanted to. I got various ink pads—in different colors and then just used simple white drawing paper.
I instructed the children to use the LEGOs and ink pads to create pictures, patterns, or designs on their paper. You could also ask them to create a flower, a birthday cake, a person, a monster, or a robot.
I wanted this to be open-ended to allow the children to think more about the process than the outcome. So do what works for you!
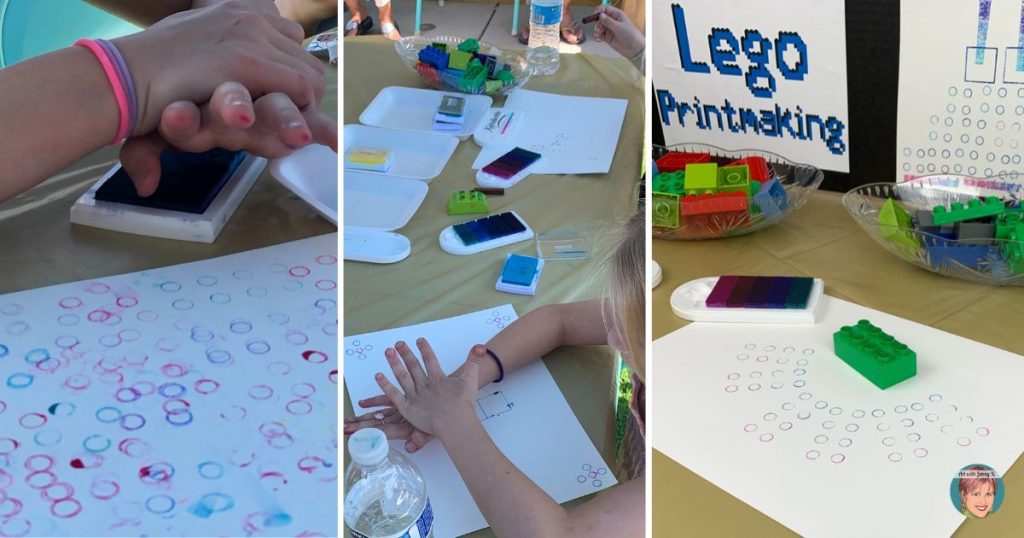
Printmaking is the process of transferring an image or design onto another surface — such as paper or fabric.
STEPS:
-
-
- 1: Get a piece of white paper.
- 2: Select a LEGO brick.
- 3: Press the LEGO brick into the ink and then transfer that onto your paper.
- 4: Repeat this process to create a picture of something or create fun designs or patterns! Use different sizes and shapes of LEGO pieces for your artwork.
-
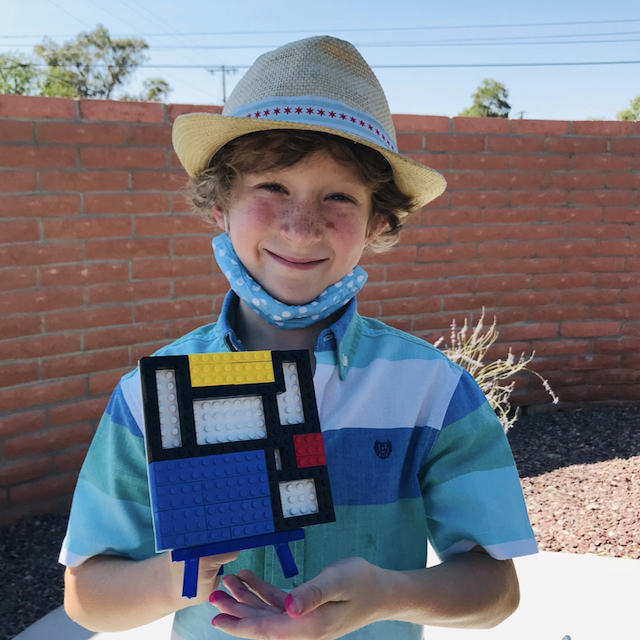
#3: Mondrian mini-masterpieces
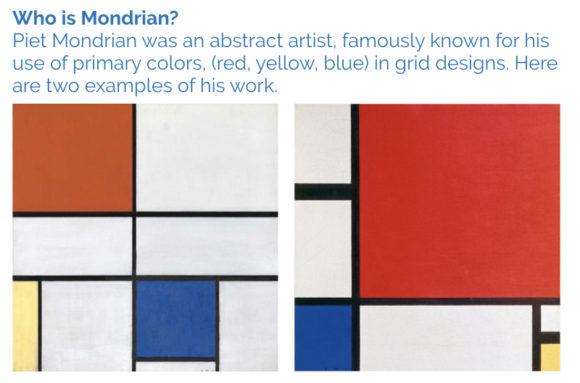
Piet Mondrian was an abstract artist famously known for using primary colors (red, yellow, blue) in grid designs. Here are two examples of his work.
Often students have seen references to famous artists like Mondrian and don’t even know it. For this activity, I wanted them to think a little differently about how an “artwork” could be made— using LEGOs!
There is an artist named Nathan Sawaya who is a master of re-creating famous artworks using LEGOs. He is even called the “brick artist.” I was fortunate enough to see one of his shows in Portland years ago, and it has stuck with me ever since! Although I didn’t have a lot of time to go into the details of Mondrian or even the more contemporary connection of Sawaya during the birthday party, I still wanted the children to get the experience of re-creating a famous piece of art with LEGOs. Hopefully, this is something I could expand on one day in one of my art classes–stay tuned! If you are doing only this activity (at a birthday party, in an art class, or on a different occasion), then I would encourage you to teach your children more about Mondrian and make that connection to Nathan Sawaya as well. One of the best ways to connect art projects to art history is with books. Here are a couple of good ones, one about Mondrian and one about Sawaya, if you want to go that route.
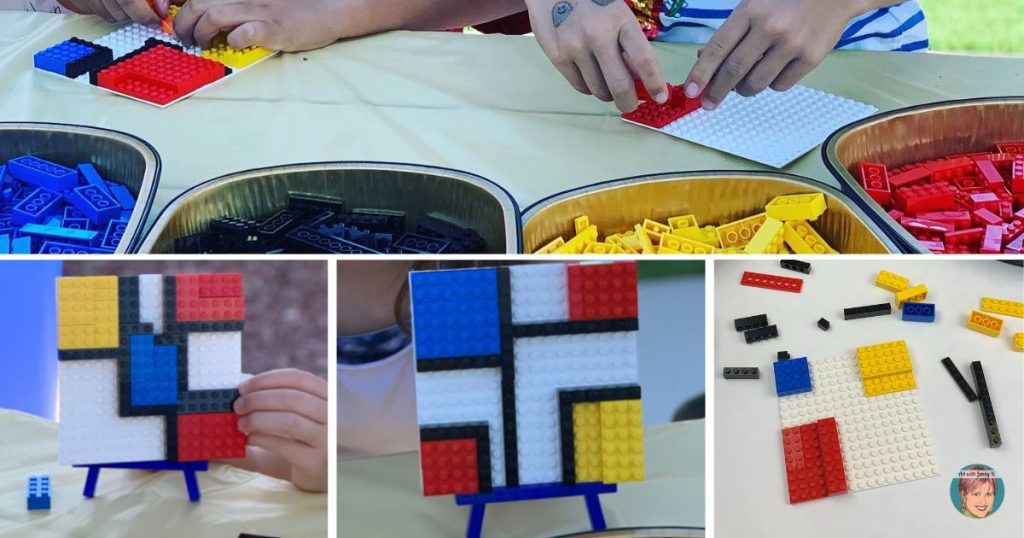
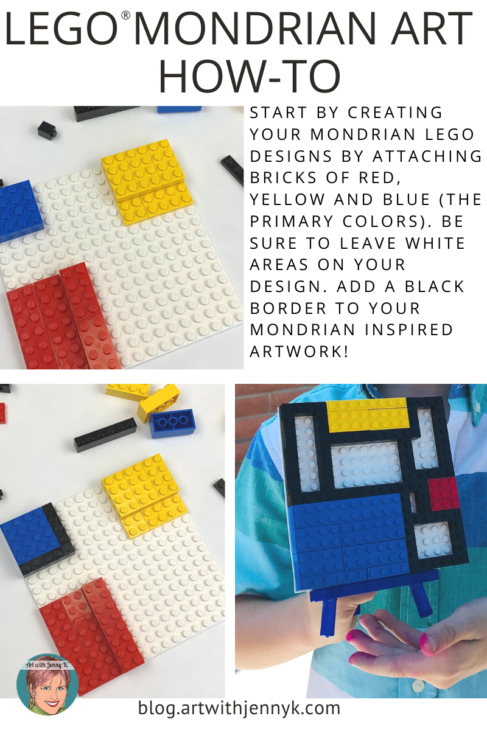
I pre-sorted out simple LEGO bricks into red, yellow, blue, and black for this LEGO birthday party activity. For the baseplate, I used white so that the children could leave some areas white. In fact, this was the one thing I said the most that day to the kids at this station. “Don’t forget to leave some white areas in your art as Mondrian did!”
I didn’t have the children re-create a particular Mondrian painting, “brick for brick.” Instead, they could create any Mondrian-esque design they wanted.
More bricks? Since the classic sets of LEGOs come in various colors, I did order some sets of just red LEGOS, blue LEGOS, yellow LEGOS, and black LEGOS. I was worried I wouldn’t have enough. So I wanted to be sure I had plenty of the primary colors. The steps for this Mondrian LEGO birthday party ideas are pretty simple. Start by creating geometric shapes (squares or rectangles work best) by attaching red, yellow, and blue (the primary colors) to a white LEGO baseplate. Leave white areas on your design. Add a black border (1-stud wide bricks work best) to your Mondrian-inspired artwork! If you have a small mini easel, you can display your final work as well.
When the birthday party was over, each child had a white bag full of all their artwork from the party. They got to take home their marble mazes. I’m sure they played with them the entire way home. Their Mondrian mini-masterpieces (that I hope they set up on a shelf when they got home), and their printmaking artwork.
My uncle used to say to me, “Inch by inch, anything is a cinch.” So, I’ll end this post by saying that “brick by brick, this LEGO birthday party will be a hit!”
If you decide to use any of these ideas and share them on social media, please tag me! You can find me on Instagram, Facebook, Twitter and Pinterest.
Thanks for reading!
Jenny K.