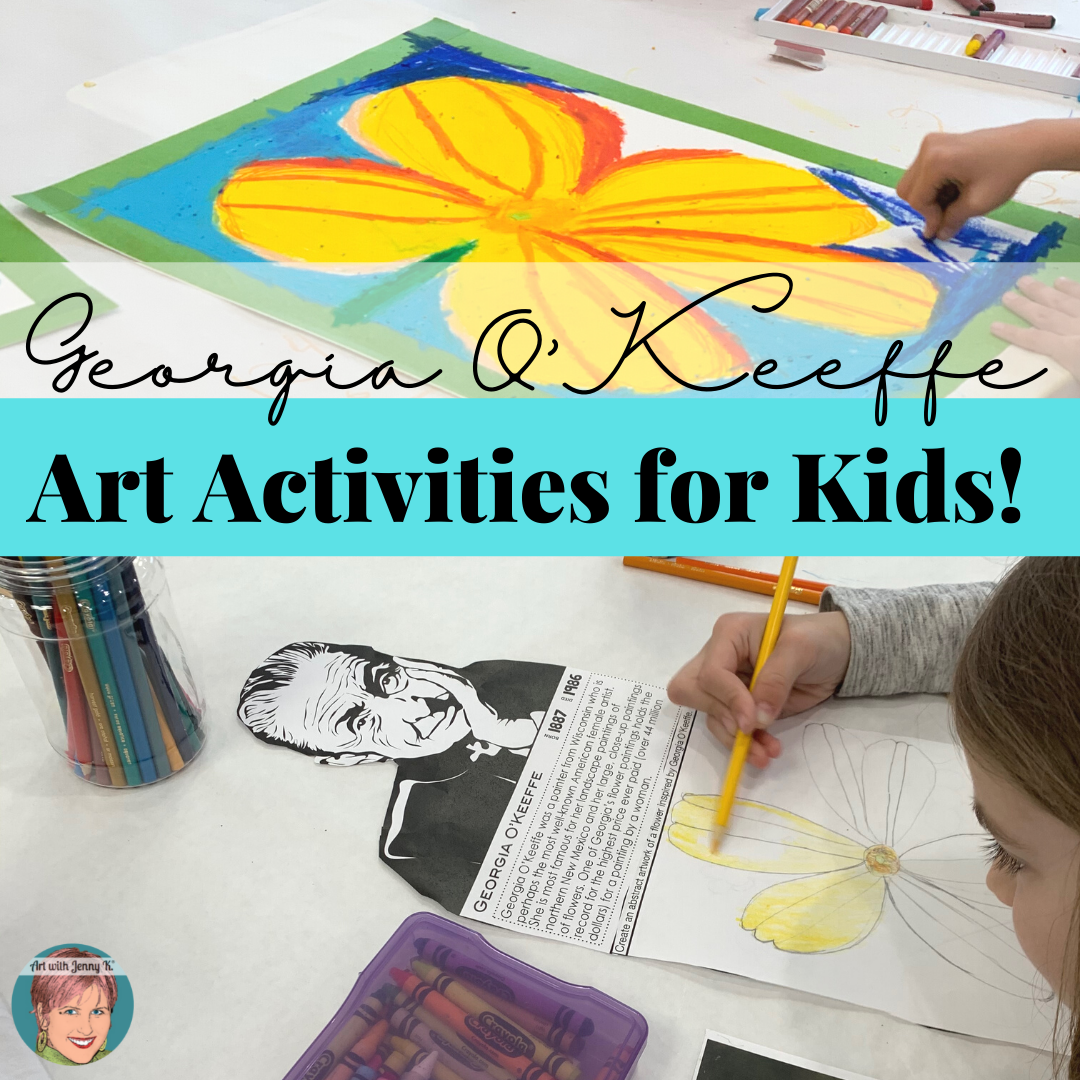
Activity#1: Large Format Flowers

I do not doubt that when you think of Georgia O’Keeffe, you think of large flowers. That is why this Georgia O’Keeffe art activity focuses on the idea of large-format flowers. Your students will get to draw and color a sizeable O’Keeffe-inspired flower.
I’ve also compiled these instructions into a downloadable PDF that you can get HERE.
Kids LOVE when they get to work large. So, if you can provide them with large paper, please try to. If you can’t get your hands on large watercolor paper, or thick drawing paper, you can use butcher paper and cut it into large pieces.
Almost always, it seems, kids are sitting at their desks working with small, fine motor skills, using 8 1/2″ x 11″ paper.
When you do this project, your students will use their entire bodies to draw LARGE! This project will use their gross motor skills and let them move around in class (structured). You might even see some of them push their chairs aside and stand so they can get into their artwork.

Supplies:
-
-
- Pictures of flowers
- Watercolor paper or thick paper 18″ x 24″
- Pastels (chalk or oil)
- Painters tape
-
Flower Pictures
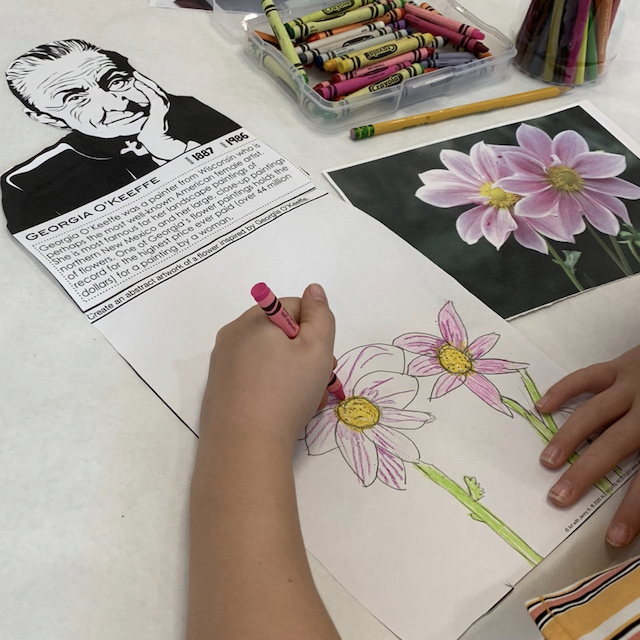
To start this Georgia O’Keeffe art activity with your students, provide them with pictures of flowers to look at and to use to draw their flowers. If your students use technology in your classroom, they could find their own images of flowers. They could use books or any cut-out pictures that you might have for them. Years ago, I printed off pictures of flowers, laminated them, and then use them repeatedly when I do this project.

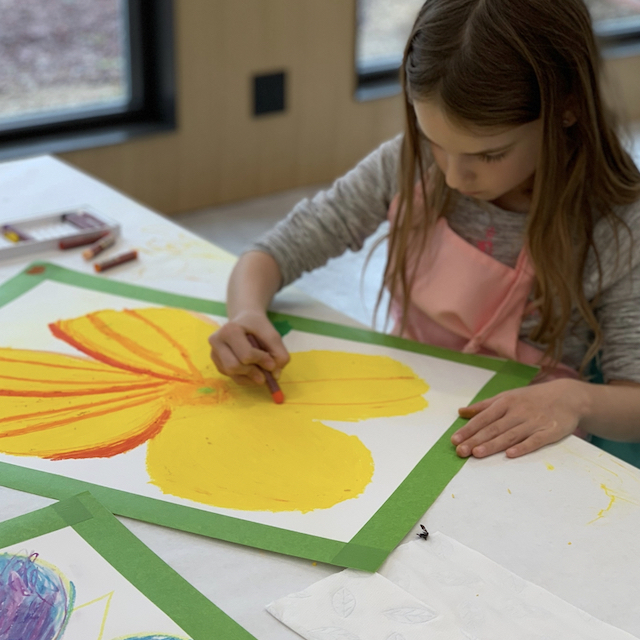
Tape Border
This step is optional—but if you can do it, I highly recommend that you try it. Unless you are working with really young children, your students can help with this step. Or, you can prep this step ahead of class. You will LOVE the outcome.
Using painter’s tape, put a border around the edge of the paper. Be sure to use painter’s tape, not masking tape. You want this to come off at the end of the project and leave a nice clean white border. Using masking tape will tear the paper with it and mess up the final artwork. Painters tape (the blue or green kind) stays put while working but comes off when you need it to—without tearing the paper.

Draw Flower
No pencils allowed! I know your students are going to hate you—but do it anyway—and blame me for it. 😉 If you give them a pencil and eraser, they will draw, erase, draw, erase, draw, and erase again.
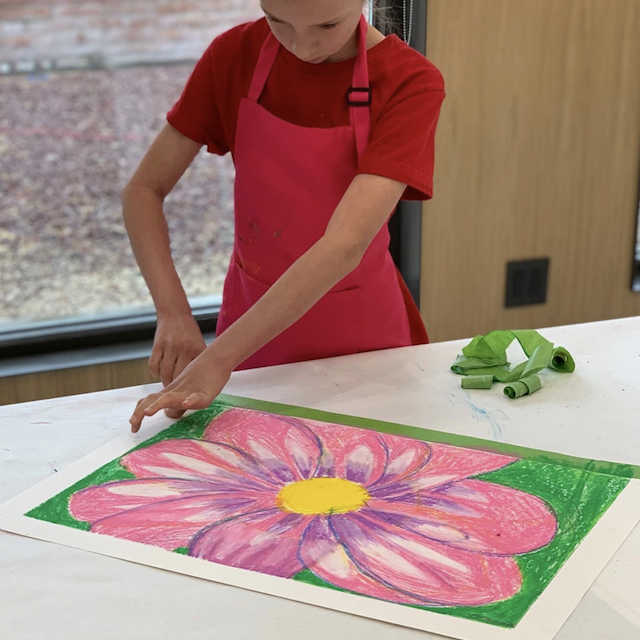
Instead, ask them to use a yellow, light pink, or other light color chalk or oil pastel to draw their flower. Using a light color will force your students to draw large (knowing they can’t erase), and they can learn to draw a sketch and keep working on the image until they get what they want. This part of the project is just a sketch. It will get covered entirely over.

Remind them how Georgia O’Keeffe zoomed in on flowers to abstract them. Have your students think about one flower—zoomed-in—not a vase of flowers from far away.
Give them some time to sketch and work on their flower design before introducing any color to their flower.
Color Flower
I did this project with my students using oil pastels. Yes, they can be messy. However, I have always found that kids rise to the challenge of using them because it feels special to use a “big kid” art material. Provide paper towels so your students can keep their fingers clean while they are working.
The fun of oil pastels is all wrapped up in one word—blending!
Please encourage your students to use many colors and blend them to get light and dark areas as Georgia did. She was always blending her colors, so colors changed gradually.

Color Background
Since you taped the border, you’ll want to ensure your students have a bright, colorful background. After your students color their flowers—remembering to blend the colors—then have them color the background. Guide them to think about a color that would contrast the primary color in their flower. For example, if their flower was primarily yellow, perhaps a bright blue would make a striking background.
Have your students color up to the tape so they’ll have a nice crisp border when they remove the tape in the next step.

Remove Tape
This step of the flower project MIGHT be one of the most joyful parts of this project. As my nine-year-old likes to say, “It’s so satisfying.”

First, have your students clean up the area where they have been working. Have them put away their pastels and clean up any “crumbs” the pastels left behind (by picking them up, not wiping them onto the floor). Then, have your students wash their hands so they won’t have any pastel fingerprints to leave behind.
Once your students clean up, have them remove their tape borders—one strip at a time. They will LOVE this step.
Display
When your final Georgia O’Keeffe art activity—large-format flowers—is complete, then you can hang the art on a bulletin board to display for your school community. Since they are pastels, I don’t recommend hanging them in a hallway where children can run their fingers through them and smear them.
If you have a display area at your school that is a glass case or is up high, you can display them there. Also, since they are large, you might not be able to show them all at once. Instead, you could feature a few each day/week.
When you send these home, consider putting a piece of tissue paper over the final artwork, so they get home safely.

Free downloadable PDF Lesson Plan HERE.
Activity #2: Meet the Master Artist

To get my kids prepared to do the previous activity—large-format, pastel, Georgia O’Keeffe flowers—I sometimes start them off with my Meet the Master Artist Georgia O’Keeffe project. This introduces them to Georgia O’Keeffe and gets their creative juices flowing. That isn’t necessary—it’s only optional if you want to do it this way.

The nice thing about my “Meet the Master Artist” project is that it can be used with a project like the large-format flowers. Or it can be used all on its own as a complete Georgia O’Keeffe art activity.
My Meet the Master Artist activity allows my students to plan for their larger format flowers. They were able to work on color, design, and overall composition. I chose to do it this way because it was a fun and easy way to introduce art history.

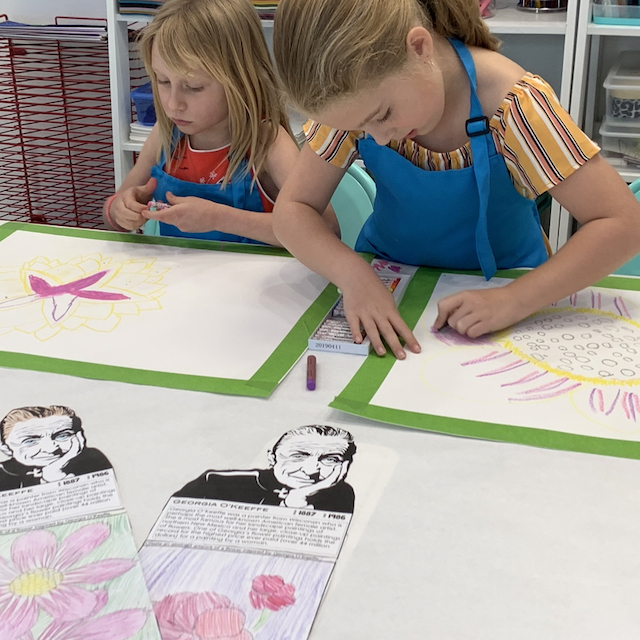
For this activity, students get two pages that get cut out and glued together. The top page has a portrait of Georgia O’Keeffe that I drew and a biography that I wrote. The top page gets glued to the second page with room for children to work on their flower activity.
This project has a lot of variations included. I offer options from a coloring page on page two to a blank biography page on the first page. This wide range of options allows you to differentiate among your students and use this activity with many different grade levels. It’s a great art history lesson that I’ve made easy for you!
Meet the Master Artist: Georgia O’Keeffe activity HERE.
Full “Meet the Master Artist” Series HERE.
Activity #3: Famous Faces® of Art History

If one artist isn’t enough—try seven! Over the years, both art teachers and classroom teachers have liked using my Famous Faces® of Art History collaboration poster with their students. This poster is great for inspiring your students and/or teaching them about famous art masters like Salvador Dali, Pablo Picasso, Frida Kahlo, and Georgia O’Keeffe. My collaboration poster is a time-saving activity that packs a punch when complete. Kids can’t believe what they have just helped to create.
This poster has been so popular that teachers have asked me, over the years, to create Famous Faces® posters for many other times of the year and for other important groups of people. You can see all my Famous Faces® collaboration posters HERE.
You can find my Famous Faces of Art History Collaboration Poster HERE.
Activity #4: Unscramble the Famous Faces® of Art History
My collaboration posters are a lot of fun, but the kids don’t get to take something home in the end—because the final result is hanging in their classroom or along their hallway! This is okay, of course. My collaboration posters are a great lesson about doing something for the greater good and making something beautiful for your school community. However, having individual pages is also very helpful.
Teachers often like to pair my Famous Faces® of Art History collaboration poster (mentioned above) with my Unscramble the Famous Faces® of Art History because they are individual activities that children can take home with them.
Bonus—they work great as early finisher activities and substitute lesson plans.

You can find my Unscramble the Famous Faces® of Art History resource HERE.
Email Sign up!
I love to spoil teachers, parents, and administrators who sign up for my emails by sending exclusive freebies, tips, and tricks, as well as special announcements of sales. Not to mention, after you join, you’ll get invited to my “Subscribers Library” of freebies like my Artist Freebie.
It’s easy. Simply sign up here and start using it right away!

Thanks for reading,
Jenny K.