Over the years, I have taught many different Arizona art projects to my students. I have tried to capture the beauty and uniqueness of where we live. 2012 was the Arizona Centennial, and I did various projects for the art show that year (some mentioned in this post). Then years later (2020), I had a summer art camp that was entirely Arizona-themed. Many of the art projects in this post were fine-tuned during that camp, and I feel comfortable sharing them with you. Hopefully, I have worked out the bugs and figured out the best way to approach these lessons so you can jump in and do the fun stuff—make Arizona-themed art projects!
Don’t live in Arizona? If you don’t live in Arizona but are looking for ways to integrate art and social studies, don’t go anywhere. You can easily adapt these lessons to the state where you live and teach. I will explain more about ways to adapt each project below.
If you are looking for great ways to infuse art into your social studies lessons the ideas in this post will be helpful to you—be it in Arizona or any other state!
Disclosure: Any links that go to Amazon are affiliate links. That means I get a small (very small) amount in return for taking you there. To see my full disclosure click HERE. Thank you for your support in this way.
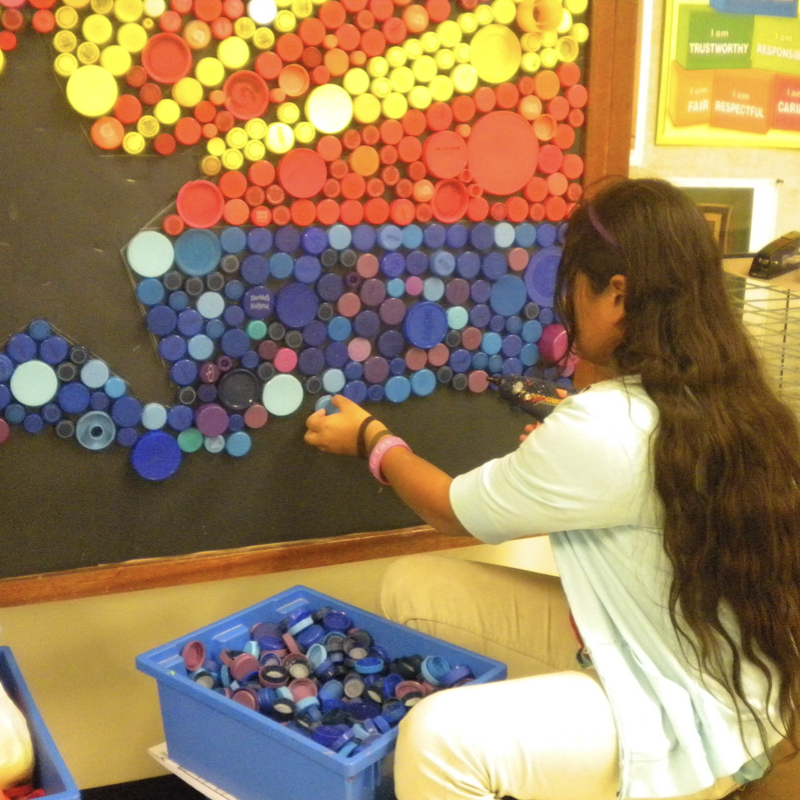
Bottle Top Arizona Flag

My students and I made this bottle-top Arizona flag for the Arizona centennial in 2012. It was on display at our school district’s annual art show. To this day (currently 2022), I still keep bottle caps, I try to tell myself to recycle them, but I can’t help but keep them—especially when I find a rare or beautiful color. I’m always thinking, “Oh, this could be great for a bottle-top mural.”
To do this project, I asked the school community to save bottle tops for me in different colors. They pulled through and gave my students and me all the tops we needed.
We washed and organized the tops by color. My students helped me organize the tops—great job for kindergarten and first grade as sorting is an objective for them.
To prepare the surface of our flag, I covered the bulletin board in black butcher paper, and with a white colored pencil, I drew on the design of the Arizona flag. I put the black paper on the bulletin board with a lot of staples because once the tops are glued on, it becomes heavy, and if not secured, the paper could come off with the bottle caps. Of course, you can adjust what you put the tops on if you plan to keep the mural. I didn’t plan to keep the mural long-term (although after the show, it did stay on display in the office for a long time).
Using a hot glue gun (yes, this part is only for older students—mine were in 5th grade), my students helped glue the caps to the paper. Since Arizona is known for copper, we glued pennies in the center (not pictured above). I have written more about this project in detail HERE if you’d like to do your state flag in this way.
If you don’t live in Arizona, this is the kind of project you could easily modify to your state flag. You could also create a bottle-top flag of your state bird, flower, etc. If you make a bottle-top flag, please tag me on social media or email me. I would LOVE to see what you and your students create.
Arizona Chalk Flag with Black Glue

Chalk, black paper, white colored pencil, and black glue…what? Yes, those are the materials you’ll need for this really fun project. The idea is to mimic batik. Batik is where you use wax on fabric, paint, and then the wax is removed, and you are left with the fabric showing through your design. Using black glue on black paper mimics the final look of batik. Also, it’s a lot of fun, and the kids get a huge kick out of it.
To get started, the kids traced a star template in the middle of their paper using a white colored pencil so it would show up on the black paper. Then they drew the lines for the rays on the Arizona flag design. Next, they colored each section using chalk. You don’t need anything fancy here—just regular chalk will do. Have your students use a tissue and rub the chalk on their artwork to smooth it out a bit.
Tip: When the chalk gets too messy, have your students lightly tap their artwork right into a trash can so they can get the excess chalk off to help minimize (but not reduce ;)) the chalk dust.
Finally, when the flag design is drawn and colored in with chalk, have your students go over their lines (originally in white) with black glue. Depending on how much glue they used, moving them around could be a big mess (if they dropped them or the glue started to run when they moved the paper). VERY carefully have them put them on the drying wrack, or if you can, let them leave them to dry on their tables.
After a night of drying, the glue will harden, and the final work will be lovely!
How do I make black glue?!?
Oh wait…you are probably wondering, How do I make “black” glue? You simply add a little black acrylic paint to regular glue—that’s it! I purchased small bottles dedicated to this purpose, but you don’t have to do it this way. You could make up a larger batch of black glue and paint and then put it in regular glue bottles, or you could do it like I did and put them in smaller bottles.
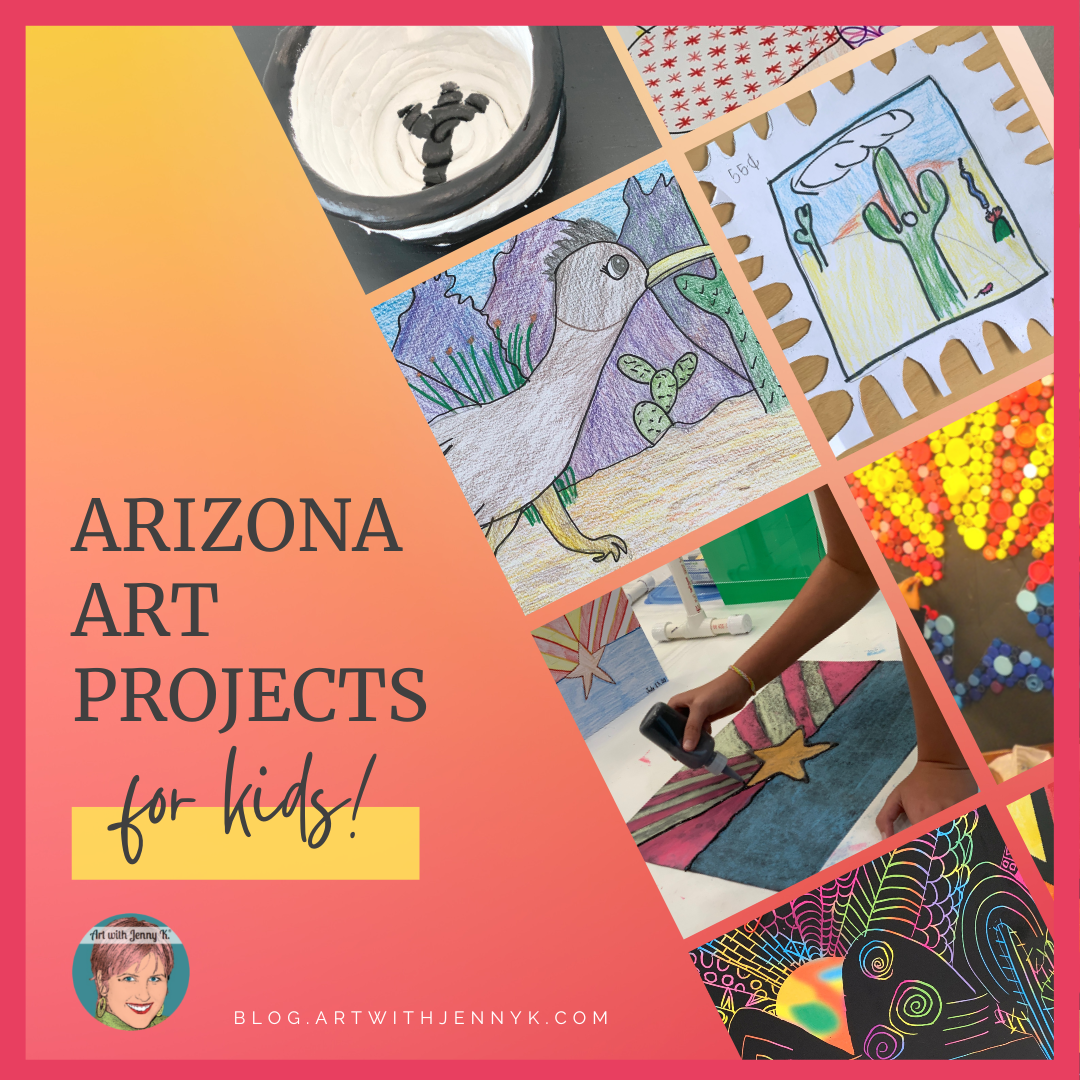
Desert Scratch Art Landscapes
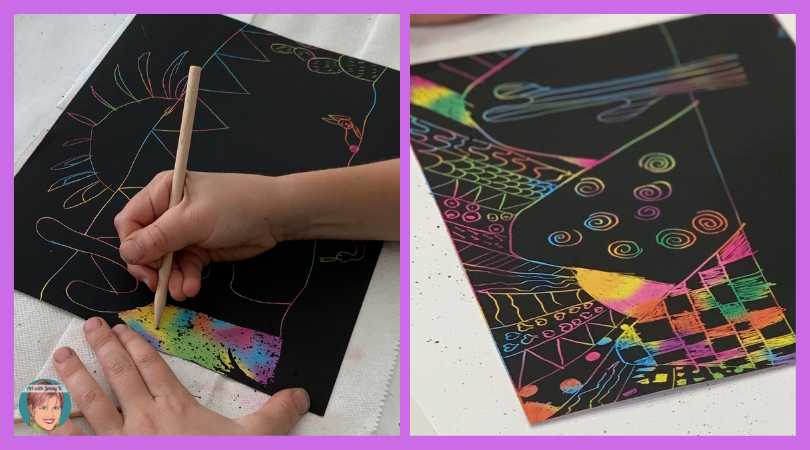
If you have done scratch art with your students, you know how much they love it. The magic of scratching off the black to reveal the bright colors behind it is always a joy. I had my students create a landscape design on scratch art for this Arizona art lesson. We talked about mountains, cacti, sunsets, etc. Students then started drawing their landscapes and scratching patterns and designs into the various spaces to reveal more of the colorful background.
Materials: To do this project, you will need scratch art paper, a wooden stylus, and your imagination!
Tip: You can’t “erase” a mark you make with scratch art. For this reason, children tend to focus on what they are doing. However, knowing that you can’t fix something if you mess up can be stressful. For this reason, I suggest that you have your students embrace the “happy accidents.” It’s okay if they make a mark they didn’t mean to make—simply encourage them to make something new out of that mark. If they embrace this mindset, they will look forward to mistakes when they happen and not the other way around. Often an “oops” can turn into something unique. [BTW, do you know the book Beautiful Oops? If not, check it out HERE—it’s fantastic and one of my students’ favorite books].
This project can be messy when the black starts to scratch off. For this reason, I recommend having a piece of paper or paper towel under the scratch art to catch the “crumbs.” I purchased scratch art paper for my students, but you can make it yourself. I have not tried doing this myself, but I’ve seen it done many times. Do what works best for you!
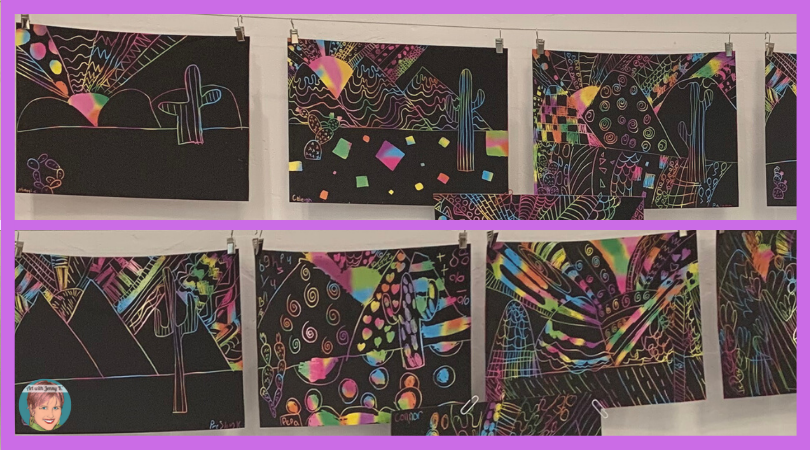
One of the things I love about this project, besides how colorful the final pieces turned out, is that there is no drying time needed. When students finish, the artwork can be hung up right away and displayed for all to enjoy!
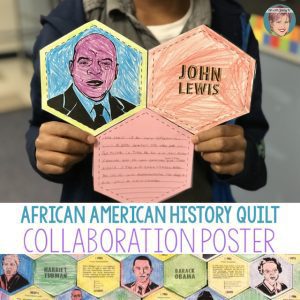
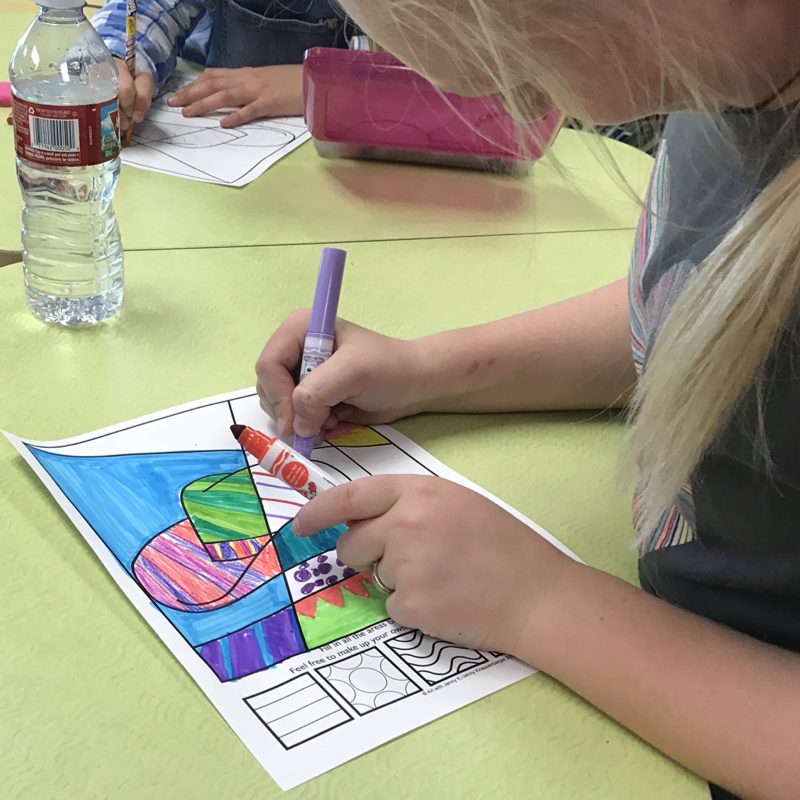
Arizona Flag Collaborative Poster
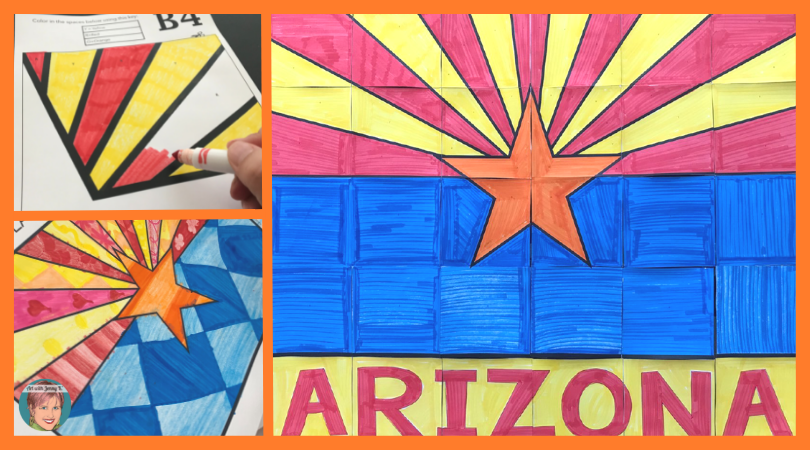
Much like my bottle-top Arizona flag that is collaborative, my Arizona collaboration flag poster is even easier for you and your students and assures that each student gets to participate. My posters are easy—simply print the pages and hand them out to your students. Each student will color a page of the final poster. This could be done using solid colors or patterns/designs/doodles. For example, your students could write about the state of Arizona on their pieces—facts they have learned, why they like (or don’t like) the state, etc.
Once the pieces are colored (and written on), have your students cut out the pieces and assemble them together. Students will go up to the final poster and say, “I did this piece!” as they eagerly and excitedly point at their contribution to the final artwork.
With all the creative ways you could use this poster, it’s the perfect Arizona art project for you to use when you want to integrate social studies and art in your classroom. Keep it simple and have your students color with crayons, colored pencils, or markers. Or have your students paint on their pieces—the sky is the limit.
Arizona State Flag Collaboration Poster HERE
If you are not from Arizona but still want to integrate art and social studies, you will find that I have MANY state flag collaboration posters HERE. If your state isn’t in the list yet exist, please check back. I am always working hard and adding more of them to my store.
Design a Stamp
I wrote this sentence…
A stamp is something familiar that kids can easily relate to and connect with. Then I thought, “Wait, is that true?” In a world of online bill paying, do they even know what stamps are?
I’m guessing they do because I know how hard teachers work to help children understand the world. Perhaps you are reading about this lesson for just that reason—to teach students that our mail requires postage and that we can make our postage beautiful with art. The perfect marriage of form and function is illustrated beautifully on our mail. Art can be made just for the sake of art—or course. However, art can also be made to help beautify something as common and functional as a stamp. Stamps are mini-artworks.
It’s not uncommon to be standing at the post office wanting to buy stamps and having difficulty choosing between all the beautiful designs. As though you were looking at a mini art show and trying to select which artwork you would (and could) buy.
Stamps have been collected for years. They are beautiful mini works of art! People who collect stamps often save them in beautiful display books or even frame them.
If you are looking for easy (and fun) ways to integrate art into your social studies lessons—this is it! For this project, your students will be artists and illustrators of their state stamp designs. While your students won’t be using these on real mail, they will get the wonderful experience of designing something that represents Arizona (or any state where you live).
Arizona State Stamp How-To:
Your students will need paper, a pencil, and something to color with. It doesn’t matter what size paper you use. However, it should be square. Also, you can go very simple with this project and use crayons, colored pencils, and/or markers. Or you could let your students paint their postage stamp ideas. Please modify this lesson to fit the needs of your students!
First, your students should brainstorm what they want to include on their stamps. If an idea doesn’t come to mind immediately, provide scratch paper and prompt your students with questions like these…
-
-
- What makes Arizona (or whatever state you live in) unique?
- What symbols represent Arizona?
- Do you want to represent nature in your stamp design? Maybe the state bird or state flower?
- Perhaps your stamp design points out a part of history from our state? Can you illustrate a moment in our state’s history that interests you?
- Is there an issue you feel passionate about? If so, make a statement using your stamp and say what you want to say using art!
- Can you design your stamp without using images and instead use words in a creative way?
-
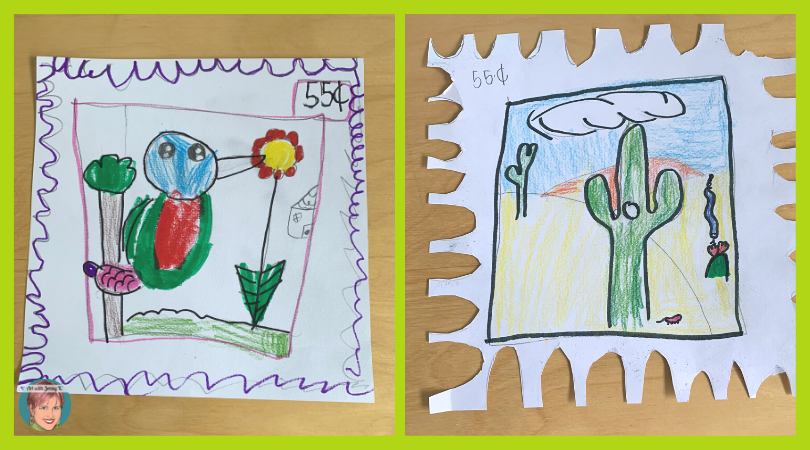
Once students have brainstormed their ideas, they can start drawing on the final square piece of paper. Have them draw lightly with a pencil first so they can make changes if they want to.
After the drawings are complete, your students can cut around the perimeter to create a scalloped edge—this will help it look more like a stamp. If they don’t want to cut the scallop edge design, they can draw the design on their artwork (you can see both demonstrated above).
Make sure students include the price of stamps; this is an interesting thing to look back on. Much like, “I remember when gas was such and such a gallon,” we can all remember when stamps were “such and such” a stamp. Parents often keep the artwork their children make in school. When children are older, and they pull out the artwork their parents have saved, they will chuckle at the price of stamps “back then” and be amazed at how “cheap” they were.
More Ideas:
-
-
- Have your students all design a stamp about a different state. Hopefully, you don’t teach 50 students (at once), but if you do, assign a state per student and see if you can get a collection of all 50 states (how amazing would that be?!).
- Have your students work on a series and create more than one design. Then let classmates vote on their favorites.
-
Watercolor Hummingbirds with Salt!
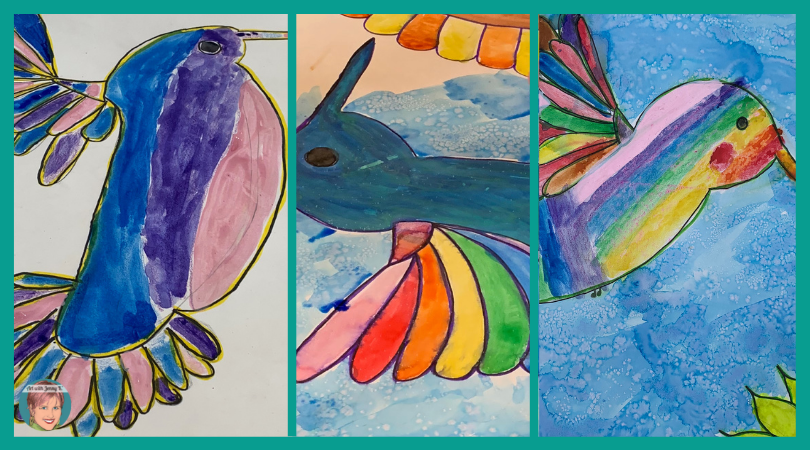
During my Arizona-themed art week, the kids and I made a lot of art. At the end of the week, I asked them what their favorite project was. I thought they’d say clay or a variety of other things. I was shocked when they all wrote in their journals that our watercolor hummingbirds (with salt) were their favorite.
This is a great lesson and easy to pull off. I have written about it in full detail HERE. If you are interested in this lesson, I recommend you go to my post and check out all the details.
BTW, you could do this same technique with any bird!
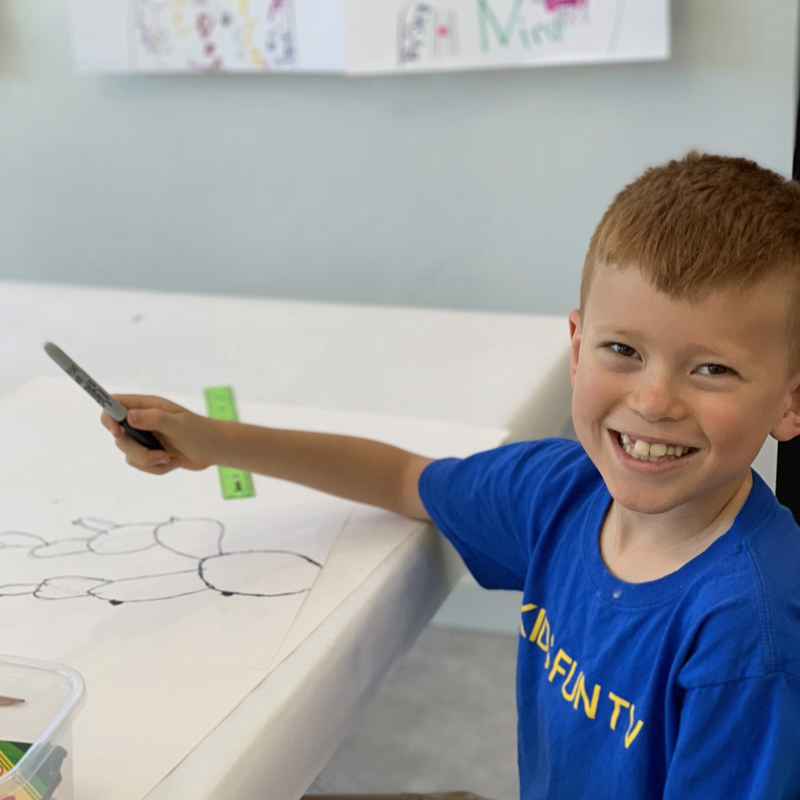
Roadrunner Drawings
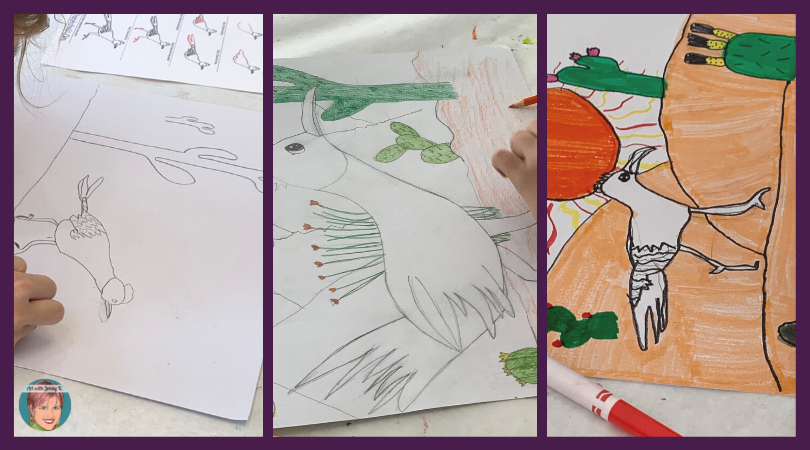
Speaking of other kinds of birds. What would a list of Arizona art projects be without something pertaining to a roadrunner? They are iconic in Arizona and really interesting birds. Kids love them.
The objective of this lesson was to have children draw a roadrunner in the foreground and an Arizona landscape in the background. I showed my students pictures of roadrunners and had them draw from those. I let them use colored pencils or markers on 12″ x 18″ white paper.
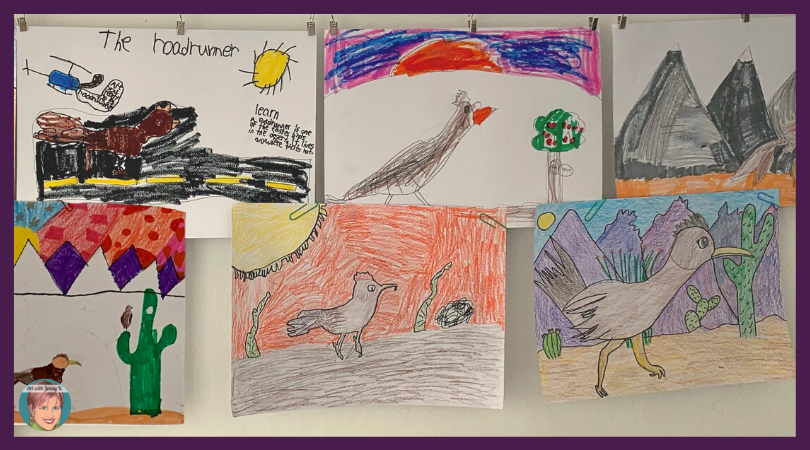
Here are the steps for this Arizona art project:
- First, draw the roadrunner on your paper. Draw it big, so it looks like it’s in the foreground.
- Draw the background, middle ground, and details you want in your final artwork.
- Then, outline and color
It’s as easy as that!
Doodle Cactus
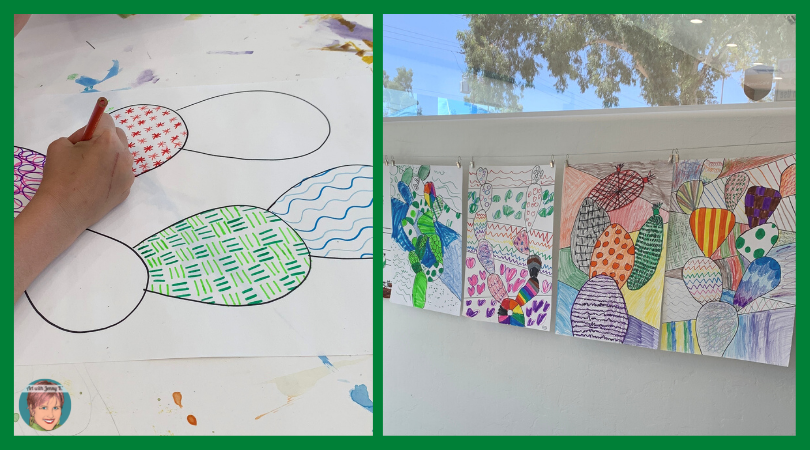
This Arizona art project, doodle cactus, is another post that I have written about in detail HERE. To keep this post somewhat reasonable in length, I recommend you go there for the details of this project.
If you know my work, you know how much I love to use patterns and colors in my art. An Art with Jenny K. lesson isn’t complete unless we have used untraditional colors, included patterns, and/or stretched things just slightly past what you expect.
Speaking of stretching things just slightly. If you are a fan of surrealistic art, I have a surrealistic cactus art project that is fun. You can see it HERE. I also have Pop Art desert coloring pages you can use with your students. They are great to introduce a lesson for early finishers or as art projects all on their own! You can find my desert coloring pages HERE.
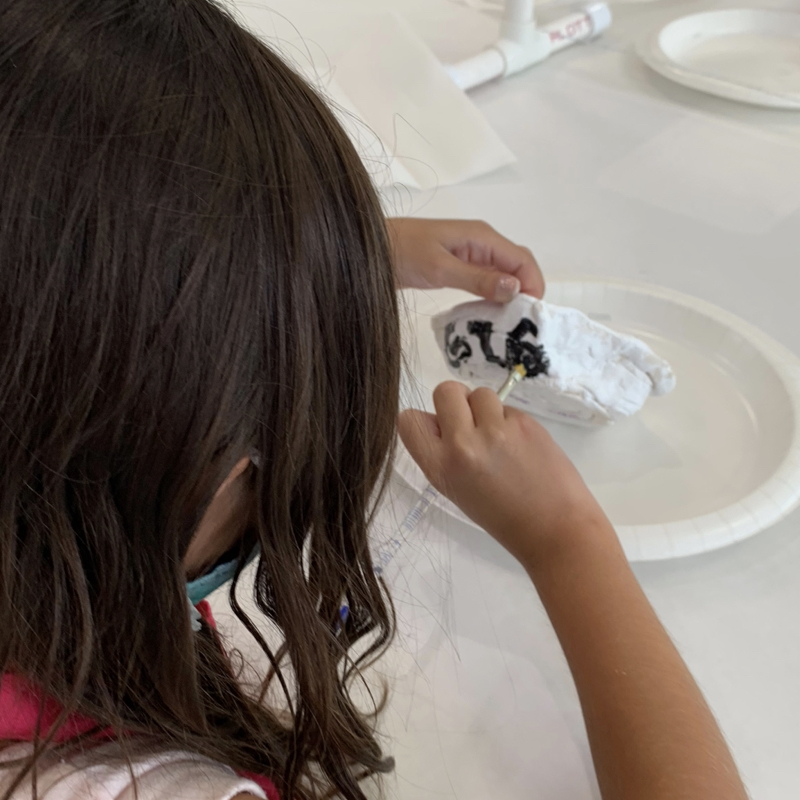
Air-dry Clay Coil Pots
Clay in the classroom. I know how much kids love clay—a lot! However, as a classroom teacher, you probably didn’t get a pottery class as I did in art school. But, that’s okay, you have me to help!
First, you can do air-dry clay if you don’t have a kiln and kiln-dried clay. I used Crayola’s air-dry clay, white acrylic paint, and black acrylic paint for this lesson. That’s it!
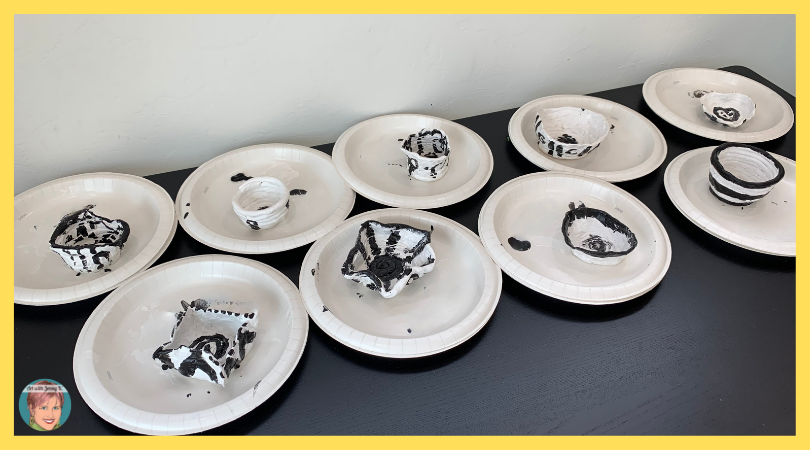
Coil pots are one of the easiest types of pots to make. When you think of the Southwest, you probably think of pottery. It’s been around for as long as we can remember. Making things in clay with an entire class is hard enough. So, for this reason, I kept the decorating simple. I chose to use the black-on-white pottery design that is so iconic in the Southwest. You can read about this pottery style from the American Southwest Virtual Museum HERE.
How to:
-
-
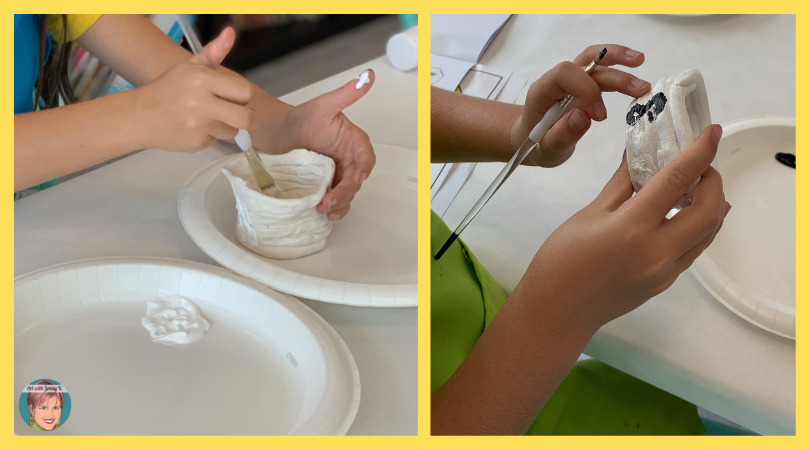
- Start by rolling out the coils. These look like snakes.
- Roll the first one flat on the table to create the base.
- Then, roll another coil and stack it on top of the base coil. Drip your finger in water and wet the clay where it will touch the bottom layer of clay. Repeat this process as you build your pot up.
- The clay will start to dry out. Keep rubbing water on it with your finger while you are working with it.
- (Optional) Using your fingers or any simple tool, smooth the edges of the pot, so the coils don’t show. This is optional because it can look neat to see the coils, especially when children are just learning.
- Let the clay dry overnight.
- Paint with acrylic paint. It’s essential that you use acrylic paint because it has a plastic finish and will stick to the clay. Tempra paint will flake off. If you aren’t going to use acrylic, test the paint you have to be sure it will work.
-
I would love to see your students’ work if you decide to create this project with them. Feel free to tag me (@artwithjennyk or #artwithjennyk) on social media so I can see what they make! You’ll find me on Twitter, Facebook, and Instagram!
Thank you for reading and for all you do!
Jenny K.
Art with Jenny K. LLC is a participant in the Amazon Services LLC Associates Program, an affiliate advertising program designed to provide a means for sites to earn advertising fees by advertising and linking to amazon.com.